

What siz bike for 4 year old
For most 4-year-olds, start by comparing a 12-inch, 14-inch or 16-inch bike. Measure the child first: height and actual fit matter more than age.
Choose the starting size from measured height
Have the child stand straight without shoes and measure from the floor to the top of the head. Use that height to identify the first wheel sizes to try; overlapping ranges mean a test fit is necessary, not that every listed size will work equally well.
| Wheel size | XBikes starting height | XBikes starting age |
|---|---|---|
| 12 Inch | 34–40 in / 86–102 cm | 3–4 |
| 14 Inch | 37–45 in / 94–114 cm | 3–6 |
| 16 Inch | 40–48 in / 102–122 cm | 4–7 |
A child measuring 34–36 inches should begin with a 12-inch bike. At 37–39 inches, compare 12-inch and 14-inch models. At exactly 40 inches, all three ranges overlap, so control and confidence decide the fit. From 41–45 inches, begin with 14-inch and 16-inch options; from 46–48 inches, begin with 16-inch.
These are starting points only. Do not move up simply because the child has turned four or because a larger bike could last longer.
Measure inseam before the test ride
Height narrows the choice, but inseam helps reveal whether the frame is manageable. With the child barefoot, place a book gently between the legs as though it were a bicycle saddle. Keep it level, then measure from the floor to the top edge of the book.
Compare that measurement with the bicycle maker’s fit information and check stand-over in person. Because no frame dimensions are supplied here, wheel diameter alone cannot confirm clearance. The child should be able to straddle the bike comfortably without the frame making the position awkward. Follow the exact product manual for adjustment limits, assembly and compatibility, or ask a qualified bicycle mechanic.
Check control, reach and confidence
Have the child try the bicycle, ideally in a calm, level area with close adult supervision. The American Academy of Pediatrics advises against buying an oversized bicycle just for growth and recommends checking stand-over, control and brake reach.
- Starting and stopping: The child should get into position and stop without the bicycle feeling overwhelming.
- Steering: Hands should remain securely on the grips while the child turns the handlebar comfortably.
- Brake reach: The child must be able to reach and operate the fitted braking controls as described in the bike’s manual.
- Posture: Reaching the handlebar should not require an extreme stretch or prevent controlled steering.
- Confidence: If the child freezes, cannot steer predictably or struggles to stop, try the smaller overlapping size.
A larger wheel is not an upgrade when it reduces control. Likewise, do not choose the smaller option automatically if the child is cramped or outside its starting height range.
How the supplied training-wheel bikes compare
The two supplied catalog options help because each is a training-wheel bike offered under 12 Inch, 14 Inch and 16 Inch SKU labels—the three sizes most likely to need comparison for a 4-year-old. They show the relevant size choices, but their catalog titles and wheel labels do not replace an individual fit check.
 Blue XJD Girls Bike with Training Wheels – 12/14/16 Inch
A training-wheel bike with 12 Inch, 14 Inch and 16 Inch SKU labels. Its three sizes are relevant comparison options for a measured 4-year-old, subject to stand-over, reach, braking control and confidence checks.
 XJD Boys 12/14/16" Training Wheel Bike – Blue
A blue training-wheel bike carrying 12 Inch, 14 Inch and 16 Inch SKU labels. Select a size from measured height, then confirm the child can straddle, steer and operate the fitted braking controls comfortably.
Blue XJD Girls Bike with Training Wheels – 12/14/16 Inch is categorized as a Training Wheel Bike and has 12 Inch, 14 Inch and 16 Inch SKU labels. Compare only the size matching the child’s measured-height range, then confirm stand-over, reach, braking control and confidence.
XJD Boys 12/14/16" Training Wheel Bike – Blue is also categorized as a Training Wheel Bike with 12 Inch, 14 Inch and 16 Inch SKU labels. Apply the same measurement and in-person checks rather than choosing from the wording in the title.
These products are relevant when a training-wheel configuration suits the child’s current confidence and one of their listed wheel sizes fits. They are not relevant merely because the child is four. If the child needs a different wheel size, a different riding configuration, or cannot control the fitted brakes and steering, treat these as comparison points rather than suitable choices.
Complete the fit and safety check
Once a size passes the standing check, let the child demonstrate steering, braking, starting and stopping. Recheck after any permitted seat or handlebar adjustment, following the exact manual. For uncertain assembly, adjustment or mechanical condition, use a qualified bicycle mechanic rather than guessing at procedures or torque.
Add a properly fitted bicycle helmet. The U.S. Consumer Product Safety Commission advises that it should sit level and that its straps should be used according to the helmet manufacturer’s instructions. A helmet cannot correct a bicycle that is too large or difficult to control.
The decision for a 4-year-old
Measure height and inseam today, shortlist 12, 14 or 16 inches from the table, and have the child try the shortlisted sizes. Choose the smallest option that provides comfortable stand-over without cramped posture and allows confident steering, reachable braking, starting and stopping; if none passes every check, do not buy that bike for growth.
Bikes for your next adventure
-
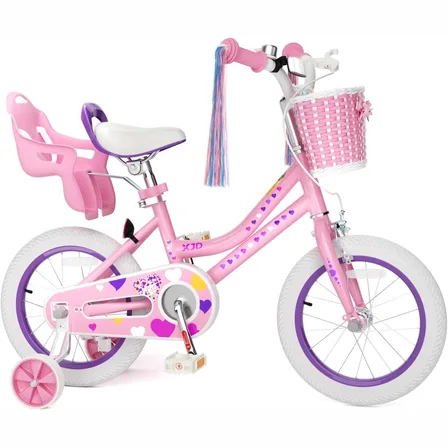
Pink Girls' 12/14/16" Bike by XJD – Basket & Doll Seat
The XJD Pink Girls' Bike with Basket & Doll Seat is made for riders 71–122 cm ta…$75.99
$99.99 -
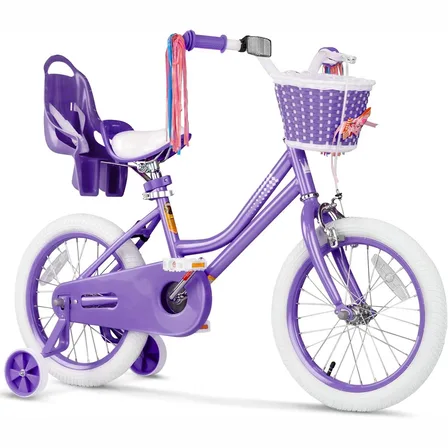
XJD Girls Bike for Kids Ages 3-8, 12/14/16 Inch with Training Wheels – Purple
The XJD Girls Bike in Purple is a training-wheel bicycle for kids ages 3 to 8, f…$149
$169 -
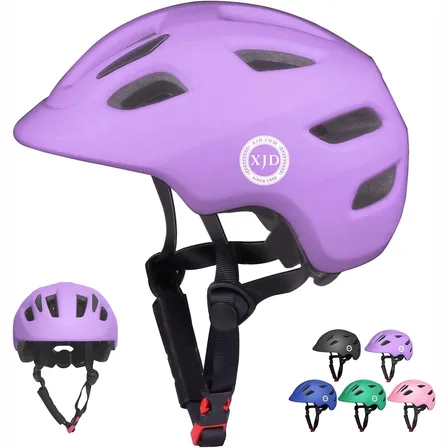
Light Purple XJD Toddler Bike Helmet, Adjustable, Size XS (46–51 cm)
This Light Purple XJD toddler bike helmet is made for the smallest riders — the …$20.39