

What size bike do i get my 4 year old
For a 4-year-old, start by comparing measured height with 12-, 14-, and 16-inch bikes: 12 Inch fits the smallest range, 14 Inch overlaps both, and 16 Inch starts at 40 inches. Choose only after checking inseam, stand-over, reach, brake control, and confidence on the actual bike.
Which wheel size should you try first?
Age gives you a shortlist, not a final size. Under the XBikes starting points, all three sizes can be relevant around age four, but their rider-height ranges differ:
| Wheel size | XBikes age starting point | Rider height |
|---|---|---|
| 12 Inch | Ages 3–4 | 34–40 in / 86–102 cm |
| 14 Inch | Ages 3–6 | 37–45 in / 94–114 cm |
| 16 Inch | Ages 4–7 | 40–48 in / 102–122 cm |
If your child is 36 inches tall, begin with 12 Inch. At 38 or 39 inches, compare 12 Inch and 14 Inch in person. At 40 inches, all three height ranges meet, so control and confidence must decide. From 41 to 45 inches, compare 14 Inch and 16 Inch. From 46 to 48 inches, begin with 16 Inch.
Do not automatically select the larger option within an overlap. A bike that feels manageable now is more useful than an oversized bike bought for future growth.
Measure height and inseam before shopping
Measure your child without shoes, standing upright against a wall. Mark the top of the head and measure from the floor. Use that result with the table rather than relying on clothing size or a recent age milestone.
For inseam, have the child stand with feet slightly apart. Place a firm, thin book between the legs and raise it gently to mimic where a saddle would meet the body. Measure vertically from the floor to the top edge of the book. Keep this measurement available when checking the bicycle’s stand-over and saddle adjustment information.
Wheel size alone does not reveal frame shape or actual stand-over. If the exact bicycle’s fit dimensions are not provided, consult its product manual, ask the seller for the relevant measurement, or have a qualified bicycle mechanic help with the fit.
Do these five fit checks on the actual bike
- Stand-over: With the child standing over the bicycle, confirm that the frame does not prevent a stable, comfortable stance.
- Starting and stopping: The rider should be able to get into position, begin moving, and stop without the bike overwhelming them.
- Reach: Seated in a normal riding position, the child should reach the handlebar without an extreme stretch or cramped posture.
- Brake control: Check that small hands can reach and operate the bicycle’s actual brake controls reliably. Do not assume this from wheel size.
- Confidence: Watch for relaxed steering and purposeful control. Persistent fear, wobbling caused by the bike feeling too large, or difficulty stopping means you should compare a smaller option.
These checks matter more than choosing by age alone. Have the child try the bicycle, and do not buy an oversized model merely to leave growing room.
How the supplied XBikes option helps you compare
The XJD Girls' Bike with Training Wheels, 12/14/16/20 Inch – Purple is relevant because its available SKU labels include 12 Inch, 14 Inch, and 16 Inch—the three starting sizes most likely to require comparison for a four-year-old. Its 20 Inch SKU is not a typical four-year-old starting point: the XBikes standard places 20 Inch at ages 7–12 and 48–60 in / 122–152 cm. Select among the SKUs by measured fit; the shared product title does not make their sizes interchangeable.
These catalog options let you compare the relevant labeled wheel sizes while keeping the product choice tied to your child’s height and hands-on fit check.

The supplied facts identify the size labels and training-wheel category, but they do not provide frame dimensions, brake type, assembly details, load limits, or adjustment procedures. Follow the exact product manual for those points, or use a qualified bicycle mechanic when fit or assembly remains uncertain.
What to do after choosing the size
Repeat the reach, stand-over, stopping, and brake-control checks after any permitted saddle or handlebar adjustment. Use only adjustments described in the exact bicycle manual; do not improvise limits or torque settings.
Add a properly fitting bicycle helmet. It should sit level, and its straps should be used according to the helmet manufacturer’s instructions. Recheck helmet fit whenever it is adjusted or replaced.
Your next move is simple: measure your four-year-old’s height and inseam, shortlist 12, 14, or 16 Inch from the table, then choose the smallest-feeling option that passes every real-bike control check without being cramped.
Bikes for your next adventure
-
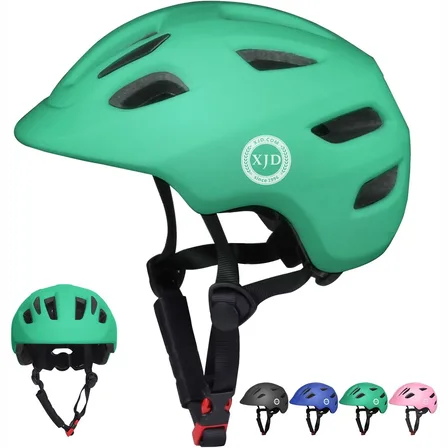
Green XJD Toddler Bike Helmet with Adjustable Fit, XS (46–51 cm)
The XJD toddler bike helmet in Green is built for the youngest riders — the size…$20.39
$23.99 -

Kids Bike Helmet by XJD for Boys & Girls – Black, Blue, Green, Pink, Purple
The XJD Kids Bike Helmet covers a wide 2-to-8-year age range thanks to two head-…$59.99
-

Kids Bike Helmet by XJD for Girls – Pink
The XJD Kids Bike Helmet in Pink is a lightweight multi-sport helmet for girls r…$59.99
$99