

Why my 4 year old wont ride bike
A 4-year-old often will not ride because the bike feels too large, the controls are hard to reach, balance is unfamiliar, or pressure has made practice frightening. Measure your child and check the bike before treating reluctance as misbehavior.
First, find out what “won’t ride” means
Ask one calm question: “What feels hard or scary?” The answer may identify a physical fit problem, fear after a fall, discomfort with balancing, difficulty starting, or simply no interest today. Watch what happens without pushing: can your child get on, stand over the frame, hold the handlebar comfortably and stop the bicycle using its installed controls?
If your child refuses before mounting, move practice away from traffic, crowds and spectators. If refusal begins only after mounting, inspect fit and control before adding encouragement. A child who cannot confidently reach the ground or operate the brakes has a practical reason to stop.
Measure height, inseam and reach
Measure standing height without shoes. For inseam, have your child stand straight with feet slightly apart, then measure from the floor to the crotch. Compare those measurements with the actual bicycle—not just an age printed on packaging.
- Stand-over: Your child should be able to straddle the bike without being trapped against the frame.
- Seat position: For early practice, confirm that getting on, putting feet down and getting off feel controlled.
- Reach: The handlebar should not require an uncomfortable stretch or locked elbows.
- Brake control: Check that your child can reach and operate the bicycle’s installed braking controls while maintaining a secure grip.
The American Academy of Pediatrics advises having the child try the bicycle and not buying an oversized model merely for growth. If you cannot establish suitable stand-over, reach or brake control, use another size or ask a qualified bicycle mechanic to assess the fit.
Compare the likely wheel-size starting points
Age is only an initial guide. For a 4-year-old, measured height can place the rider in overlapping XBikes starting ranges:
| Wheel size | XBikes age starting point | Rider-height starting point |
|---|---|---|
| 12 Inch | Ages 3–4 | 34–40 in / 86–102 cm |
| 14 Inch | Ages 3–6 | 37–45 in / 94–114 cm |
| 16 Inch | Ages 4–7 | 40–48 in / 102–122 cm |
Overlap does not make these sizes interchangeable. Start with measured height, then let inseam, stand-over, reach, brake use and present confidence decide. A 16 Inch bike can match the age starting point while still being too large for a particular 4-year-old; a smaller option can be the more appropriate comparison when it gives better control.
When the supplied bikes are relevant
The Flower Pink XJD Girls Bike with Doll Seat & Basket and the Purple XJD Girls' Bike with Doll Seat & Basket are both cataloged as Training Wheel Bikes, with 12 Inch, 14 Inch and 16 Inch SKU labels. That makes them useful comparison options when you are considering a training-wheel bike within those three size ranges. Their different catalog titles distinguish the pink and purple choices; the supplied facts do not establish further performance differences.
 Flower Pink XJD Girls Bike with Doll Seat & Basket
A Training Wheel Bike offered with 12 Inch, 14 Inch and 16 Inch SKU labels. Compare the Flower Pink option against the rider’s measured height, inseam, reach, brake control and confidence.
 Purple XJD Girls' Bike with Doll Seat & Basket
A Purple Training Wheel Bike available under 12 Inch, 14 Inch and 16 Inch SKU labels. It is relevant for size comparison, but its catalog title does not establish individual fit.
Neither title proves fit for your child. Compare the correctly labeled size with the measurements above, then conduct an individual fit check. Do not choose 16 Inch solely to leave growing room, and do not assume training wheels resolve an uncomfortable reach, poor stand-over or inaccessible brakes.
For assembly, adjustment, maintenance, load limits, compatibility and torque, follow the manual for the exact product or use a qualified bicycle mechanic. Those details are not established by the supplied catalog information.
Make the next attempt smaller and calmer
- Correct any fit or control problem before the next session.
- Choose a flat, open area away from vehicles and obvious hazards.
- Let your child walk the bike and practise getting on and off before expecting pedaling.
- Set one brief goal, such as sitting comfortably or moving a few feet, and stop while the experience is still calm.
- Offer another day if your child says no; repeated pressure can turn uncertainty into resistance.
If balance is the sticking point, practise pushing along with feet available for support, provided the bicycle can be configured that way according to its exact manual. Do not improvise component removal or adjustment when the manufacturer’s procedure is unknown.
Do not skip the helmet check
Use a bicycle helmet every time. The U.S. Consumer Product Safety Commission advises that it fit properly, sit level on the head and have its straps used according to the helmet manufacturer’s instructions. Replace guesswork with the instructions for that exact helmet.
If pain, unusual weakness, persistent dizziness or a physical limitation appears to be preventing riding, pause and seek appropriate medical advice. Otherwise, today’s decision is straightforward: measure height and inseam, test stand-over, reach and braking, compare 12, 14 and 16 Inch starting points where applicable, and postpone riding until your 4-year-old can control the chosen bike without fear.
Bikes for your next adventure
-
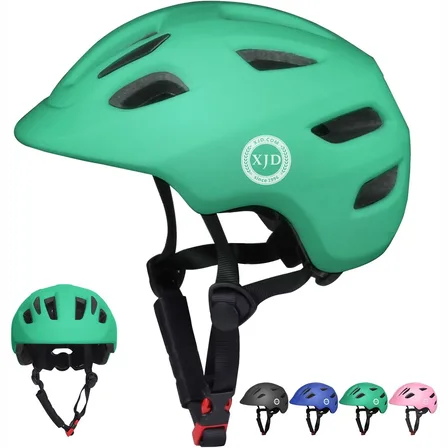
Green XJD Toddler Bike Helmet with Adjustable Fit, XS (46–51 cm)
The XJD toddler bike helmet in Green is built for the youngest riders — the size…$20.39
$23.99 -

Kids Bike Helmet by XJD for Boys & Girls – Black, Blue, Green, Pink, Purple
The XJD Kids Bike Helmet covers a wide 2-to-8-year age range thanks to two head-…$59.99
-

Kids Bike Helmet by XJD for Girls – Pink
The XJD Kids Bike Helmet in Pink is a lightweight multi-sport helmet for girls r…$59.99
$99