

How buy bike for child
To buy a bike for a child, measure the child’s height and inseam, shortlist the matching wheel size, then check stand-over clearance, reach, brake control and confidence on the actual bicycle. Do not buy an oversized bike for future growth.
Measure the child before choosing a size
Start with the child standing straight in socks or normal riding shoes. Record total height. Then measure inseam from the floor to the crotch; a book held level between the legs can help identify that point. Use the measurements to narrow the wheel-size range, not to guarantee a fit.
Age is only a starting point because children of the same age can have different proportions and abilities. The American Academy of Pediatrics advises having the child try the bicycle and avoiding an oversized bike bought for growth. The child’s current control matters more than how long the bike might last.
Use wheel size to create a shortlist
| Wheel size | Starting age | Rider height |
|---|---|---|
| 12 Inch | 3–4 | 34–40 in / 86–102 cm |
| 14 Inch | 3–6 | 37–45 in / 94–114 cm |
| 16 Inch | 4–7 | 40–48 in / 102–122 cm |
| 18 Inch | 5–9 | 43–52 in / 109–132 cm |
| 20 Inch | 7–12 | 48–60 in / 122–152 cm |
| 24 Inch | 10–14 | 54–64 in / 137–163 cm |
| 26 Inch | Youth and adults | Over 60 in / 153 cm |
Where ranges overlap, compare both plausible sizes in person. Choose according to measured height, inseam, reach, brake operation and confidence rather than automatically selecting the larger wheel.
Perform the fit and control check
Ask the child to straddle the bicycle. There should be usable clearance between the child and the frame when standing over it. Next, seat the child and check that starting, stopping and putting a foot down feel controlled rather than stretched or hurried.
Have the child hold the grips and turn the handlebar in both directions. The child should not need to lock the elbows, lean excessively or shift position simply to steer. Ask them to operate each brake control fitted to the bicycle. They must be able to reach and use it reliably with their hands in a normal riding position.
A bike is too large for now if the child cannot stand over it appropriately, reach its controls, steer comfortably or stop with confidence. A smaller size may also be unsuitable if the riding position is cramped or interferes with steering and pedalling. If fit remains uncertain, use a qualified bicycle mechanic.
Decide whether training wheels are relevant
Training wheels may be relevant when the child is still developing pedalling confidence and is not ready to balance independently. They are not a reason to overlook fit: the rider still needs suitable stand-over clearance, reach and brake control. A child who already starts, balances, turns and stops confidently may not need a training-wheel model.
The supplied catalog options help because all three are training-wheel bicycles and offer overlapping 12, 14 and 16 Inch choices; one also offers 20 Inch. That lets a parent compare only the sizes supported by the child’s measurements and current confidence.
 Light Pink XJD Girls' Bicycle with Basket & Training Wheels
A training-wheel bicycle offered in 12, 14, 16 and 20 Inch labels. It is relevant when one of those sizes fits the child; its title also specifies a basket.
 Blue XJD Girls Bike with Training Wheels – 12/14/16 Inch
A blue training-wheel bicycle offered in 12, 14 and 16 Inch labels. Consider it only after measurements and an individual stand-over, reach, brake-control and confidence check.
 XJD Boys 12/14/16" Training Wheel Bike – Blue
A blue training-wheel bicycle offered in 12, 14 and 16 Inch labels. The title’s wording does not determine fit; select by the child’s measurements and actual control.
Compare the supplied XBikes options
Light Pink XJD Girls' Bicycle with Basket & Training Wheels is listed in 12, 14, 16 and 20 Inch variants. Among the supplied products, it is the only option extending to 20 Inch and the only title that specifies a basket.
Blue XJD Girls Bike with Training Wheels – 12/14/16 Inch is available in 12, 14 and 16 Inch labels. XJD Boys 12/14/16" Training Wheel Bike – Blue offers the same three supplied size labels. Their exact titles differ, but those titles do not establish fit; use the measurements and individual try-out instead.
These products are not relevant when the child needs an 18, 24 or 26 Inch starting point, because none of those sizes appears in the supplied SKU labels. They may also be inappropriate when the child does not need training wheels. Availability, component specifications and compatibility cannot be inferred from the titles or size labels.
Complete the purchase check
- Measure height and inseam, then identify the plausible wheel sizes.
- Have the child try each shortlisted bicycle and compare stand-over clearance, reach, steering, brake operation and confidence.
- Reject any bicycle the child is expected to grow into before they can control it properly.
- Choose a properly fitting bicycle helmet. The U.S. Consumer Product Safety Commission says it should fit properly, sit level and have its straps used according to the helmet manufacturer’s instructions.
- Follow the exact bicycle manual for assembly, maintenance, load limits, compatibility and torque. If instructions are missing or uncertain, use a qualified bicycle mechanic.
Buy only after the child can demonstrate a comfortable fit and dependable control on the chosen size; if none of the supplied training-wheel sizes passes that check, choose a different size or bicycle type.
Bikes for your next adventure
-

Kids Bike Helmet by XJD for Boys & Girls – Black, Blue, Green, Pink, Purple
The XJD Kids Bike Helmet covers a wide 2-to-8-year age range thanks to two head-…$59.99
-
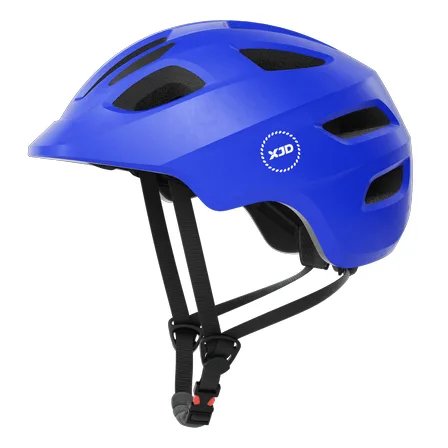
Blue XJD Kids Bike Helmet for Boys & Girls
The Blue XJD Kids Bike Helmet is a lightweight, adjustable multi-sport helmet fo…$59.99
$99 -
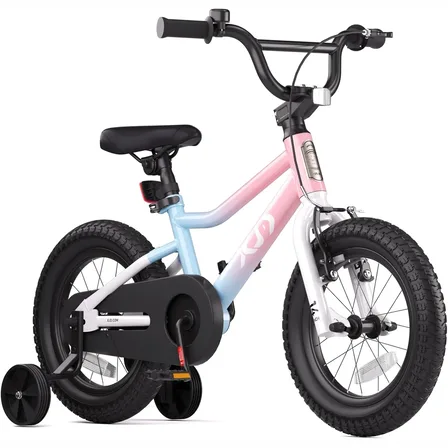
XJD Girls BMX Bike 12/14/16 Inch with Training Wheels – Pink Blue
The XJD Girls BMX Bike in Pink/Blue is built as a first pedal bike for kids roug…$99.99
$119.99