

How do child bike seats attach
Child bike seats usually attach to the bicycle’s frame, a compatible rear rack, or the front steering area. Identify the seat’s mounting system first, then verify bicycle compatibility, clearances, load limits and installation instructions in the exact seat and bicycle manuals.
The three common attachment locations
Frame-mounted rear seats use a bracket fixed to a suitable part of the bicycle frame, commonly around the seat-tube area. Support arms connect the seat to that bracket. The frame must have the shape, dimensions and clear space required by the seat manufacturer.
Rack-mounted rear seats clamp or lock onto a rear carrier. A rack merely being present does not establish compatibility: the seat manufacturer must permit rack mounting, and the rack must meet the specified dimensions, interface and load requirements.
Front-mounted seats connect near the head tube or steering area using a model-specific bracket. They require enough room for steering, cables and the adult rider’s knees. A front basket or other accessory can occupy the same mounting space.
Some systems involve an axle or another specialized mounting point. Use only the hardware supplied or explicitly approved for that seat; do not improvise adapters.
What to measure and inspect
Before ordering or installing a seat, record the bicycle’s make, model, frame size and any rack model. Then compare these physical details with the child-seat manual:
- The mounting tube’s diameter, shape and usable straight length.
- Whether cables, bottle mounts, suspension parts or frame joints cross the bracket area.
- For rack mounting, the rack’s platform dimensions, attachment interface and stated load limit.
- Clearance above the rear wheel and around the tire, brakes and moving parts.
- Space for full handlebar rotation and normal pedaling.
- Whether the frame material and bicycle type are permitted by both manufacturers.
Also compare the child’s current size with every height, weight or developmental limit in the seat manual. These values are product-specific, so they cannot be inferred from bicycle wheel size.
How to decide whether the combination works
Read both manuals before fitting any bracket. Compatibility requires agreement from both sides: the child-seat instructions must allow the bicycle and mounting location, while the bicycle or rack documentation must allow the added seat and load.
Set the seat in the intended position without guessing at final adjustment. Confirm that it cannot contact the wheel, interfere with braking or cables, restrict steering, or obstruct the adult rider’s control of the bicycle. Follow the supplied sequence, hardware and torque instructions exactly. Because no universal torque or fitting procedure applies, ask a qualified bicycle mechanic to install or inspect the system whenever the documentation is missing, unclear or contradictory.
What the supplied kids’ bikes can—and cannot—tell you
The catalog options below help distinguish a child’s own bicycle from an adult bicycle carrying a child seat. They provide wheel-size and equipment comparison points, but none is identified in the supplied facts as a child passenger seat or as a bicycle approved to carry one.
 XJD Boys & Girls BMX Bike with Training Wheels, 12/14/16" – Blue
A Kids’ BMX Bike offered in 12 Inch, 14 Inch and 16 Inch labels; useful as a child-rider size comparison, but the supplied facts do not establish passenger-seat compatibility.
 XJD Pink Beach Cruiser for Girls – Rear Rack & V-Brake
Offered in 20 Inch, 24 Inch and 26 Inch labels with a rear rack named in the title. The rack alone does not establish child-seat compatibility or its permitted load.
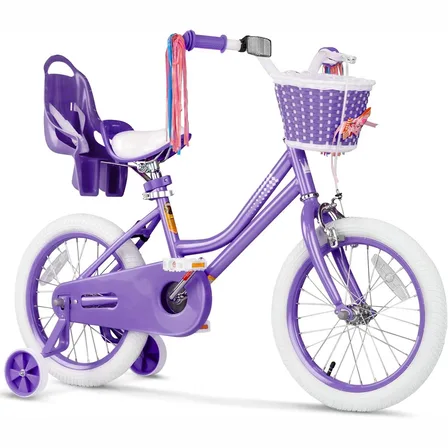
 Girls' Training Wheel Bike by XJD with Basket – Purple
A Training Wheel Bike offered in 14 Inch, 16 Inch and 20 Inch labels. It illustrates a child’s own bicycle rather than a verified host bicycle or passenger seat.
XJD Boys & Girls BMX Bike with Training Wheels, 12/14/16" – Blue is a Kids’ BMX Bike offered in 12 Inch, 14 Inch and 16 Inch labels. Girls' Training Wheel Bike by XJD with Basket – Purple is offered in 14 Inch, 16 Inch and 20 Inch labels. These are children’s bicycles, not evidence of passenger-seat compatibility.
XJD Pink Beach Cruiser for Girls – Rear Rack & V-Brake is offered in 20 Inch, 24 Inch and 26 Inch labels and includes a rear rack according to its exact title. That rack does not automatically accept a child seat. Its manual and the proposed seat manual must confirm the interface and permitted load; otherwise, consult a qualified bicycle mechanic.
Wheel size is for rider fit, not seat attachment
If the goal is choosing a bicycle for a child to ride independently, measure the child rather than relying on age alone. XBikes uses these starting points:
| Wheel label | Starting age | Rider height |
|---|---|---|
| 12 Inch | 3–4 | 34–40 in / 86–102 cm |
| 14 Inch | 3–6 | 37–45 in / 94–114 cm |
| 16 Inch | 4–7 | 40–48 in / 102–122 cm |
| 18 Inch | 5–9 | 43–52 in / 109–132 cm |
| 20 Inch | 7–12 | 48–60 in / 122–152 cm |
| 24 Inch | 10–14 | 54–64 in / 137–163 cm |
| 26 Inch | Youth and adults | Over 60 in / 153 cm |
These figures do not determine whether a passenger seat attaches. For a child’s own bike, prioritize measured height, inseam, reach, brake control and current confidence. Have the child try the bicycle, check stand-over and brake reach, and do not choose an oversized bicycle merely for growth.
Final checks before carrying a child
- Confirm the exact seat model and its mounting type.
- Match every frame, rack, clearance and load requirement against the bicycle.
- Install and adjust only as both manufacturers direct.
- Have a qualified bicycle mechanic resolve uncertainty and inspect the finished installation.
- Fit the child with a properly fitting bicycle helmet, positioned level with its straps adjusted according to the helmet manufacturer’s instructions.
Proceed only when the manuals explicitly support the bicycle-seat combination and every clearance and control check passes; otherwise, choose a different approved mounting system or bicycle.
Bikes for your next adventure
-

Light Pink XJD Girls' Bicycle with Basket & Training Wheels
The Light Pink XJD Girls' Bicycle with Basket & Training Wheels is a retro-style…$109.99
$129.99 -

Blue XJD Girls Bike with Training Wheels – 12/14/16 Inch
If you're shopping for a first pedal bike for a daughter roughly 3 to 8 years ol…$149
$169 -
XJD Girls Bike for Kids Ages 3-8, 12/14/16 Inch with Training Wheels – Purple
The XJD Girls Bike in Purple is a training-wheel bicycle for kids ages 3 to 8, f…$149
$169