

How to assemble 16inch bike
To assemble a 16-inch bike, first confirm the box, parts and exact product manual match; then follow that manual in order, secure each supplied component to its specified torque, check controls and fit, and keep the child off the bike until every check passes.
Prepare before attaching anything
Work in a clear, well-lit area where small hardware cannot roll away. Open the packaging carefully, remove protective material and place the bicycle and loose parts where they will not be scratched or stepped on.
Find the manual for the exact model and variant. Compare its parts list with everything supplied, and inspect the frame, fork, wheels, controls and hardware for visible damage or missing pieces. Do not guess where an unfamiliar spacer, washer or fastener belongs. If the manual is absent, incomplete or inconsistent with the bicycle, pause and contact the seller or use a qualified bicycle mechanic.
Assemble the 16-inch bike in the manual’s sequence
- Identify orientation. Confirm the front and rear of the bicycle, the direction of any wheel or component markings, and the left and right parts before installation.
- Install the supplied components. Attach only the parts named in the exact manual, in its stated order. Common boxed bicycles may require work on items such as the handlebar, front wheel, seat, pedals or training wheels, but what is already installed varies by model.
- Use the specified fasteners and torque. Start threads by hand and use the correct tool. Follow every torque value and tightening pattern in the manual; there is no universal torque for all 16-inch bikes.
- Set alignment. Follow the manual to align the handlebar, wheel and saddle. Nothing should be visibly twisted, loose or able to rotate unexpectedly.
- Complete model-specific adjustments. Brake, chain, wheel, bearing and training-wheel procedures differ. Follow the manual exactly or have a qualified bicycle mechanic complete them.
Never force a part that does not fit cleanly. Resistance, mismatched threads, unexplained play or rubbing can indicate incorrect orientation, incompatible hardware or damage.
Run a stationary safety check
Before the child rides, recheck every connection you handled. Confirm both wheels are retained as the manual specifies, the handlebar and saddle cannot twist, pedals turn normally, and moving parts do not bind or contact unintended surfaces.
Operate each brake control and verify the braking system responds as described in the product manual. Check tire inflation against the marking and manual rather than assuming a pressure. If training wheels are fitted, verify their orientation, attachment and adjustment using the model instructions.
Any looseness, damaged part, uncertain routing, brake problem or unexplained noise is a stop condition. Do not improvise a repair; consult the exact manual or a qualified bicycle mechanic.
Measure the rider and confirm 16-inch fit
Measure the child’s standing height without shoes and check inseam using a firm book held level at the crotch. The XBikes starting point for a 16-inch bike is ages 4–7 and a rider height of 40–48 inches (102–122 cm), but height and age are only screening tools.
| Wheel size | Age starting point | Rider-height starting point |
|---|---|---|
| 14 Inch | 3–6 | 37–45 in / 94–114 cm |
| 16 Inch | 4–7 | 40–48 in / 102–122 cm |
| 18 Inch | 5–9 | 43–52 in / 109–132 cm |
Have the child try the completed bicycle with adult support. Check stand-over clearance, comfortable reach to the handlebar, reliable access to and control of the brakes, and the ability to start, stop and steer without stretching or becoming unstable. Current confidence matters too. Do not choose an oversized bicycle merely to allow room for growth.
How the supplied 16-inch catalog options are relevant
All three supplied XJD listings include a catalog SKU labeled “16 Inch,” so they are directly relevant when comparing models for this assembly question. They also include 12-inch and 14-inch variants, making it essential to verify that the carton, manual and parts belong to the selected 16-inch SKU before assembly.
 XJD Pink Girls' Bike – Kids 12/14/16 Inch Training Wheel Bicycle
Available with a 16 Inch SKU label and categorized as a Training Wheel Bike. Confirm the selected carton and manual are for that exact size before following model-specific assembly instructions.
 XJD Girls Bike for Kids Ages 3-8, 12/14/16 Inch with Training Wheels – Purple
This Training Wheel Bike listing includes a 16 Inch SKU label alongside 12 Inch and 14 Inch. Its “Ages 3-8” title wording is a catalog label, not individual fit evidence.
 Girls 12/14/16 Inch Kids Bike by XJD with Training Wheels – Peach
A relevant assembly comparison because this Training Wheel Bike is offered with a 16 Inch SKU label. Use the exact 16-inch variant’s manual for assembly, adjustment and torque details.
XJD Pink Girls' Bike – Kids 12/14/16 Inch Training Wheel Bicycle, XJD Girls Bike for Kids Ages 3-8, 12/14/16 Inch with Training Wheels – Purple and Girls 12/14/16 Inch Kids Bike by XJD with Training Wheels – Peach are all categorized as Training Wheel Bikes and list 12 Inch, 14 Inch and 16 Inch SKU labels.
The “Ages 3-8” wording in the purple model’s exact catalog title is a label, not proof of fit. For every option, use the XBikes 16-inch starting point and then check the individual child’s height, inseam, reach, brake control and confidence. The supplied catalog facts do not establish shared assembly steps, torque settings or component compatibility, so use the manual packaged for the exact chosen SKU.
Finish with a controlled first check
Fit a bicycle helmet so it sits level and use its straps according to the helmet manufacturer’s instructions. In a flat, traffic-free area, have an adult steady the child while confirming reach, braking and steering at very low speed. If the bike does not fit or any assembled part shifts, stop riding and correct the issue through the exact manual or a qualified mechanic before the 16-inch bike is used again.
Bikes for your next adventure
-
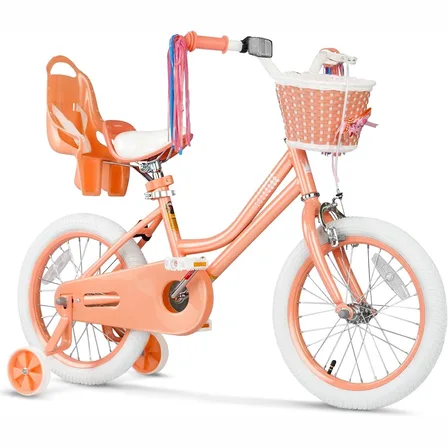
Girls 12/14/16 Inch Kids Bike by XJD with Training Wheels – Peach
The XJD Girls Bike in Peach is a training-wheel bike built for girls roughly 3 t…$149
$169 -

XJD Boys 12/14/16" Training Wheel Bike – Blue
The XJD Boys Bike in Blue is a training wheel bike for riders 71–122 cm tall—rou…$169
$199 -
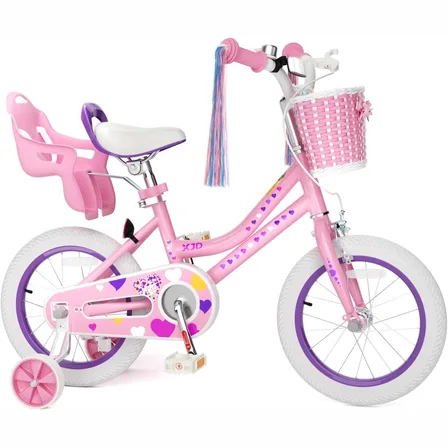
Pink Girls' 12/14/16" Bike by XJD – Basket & Doll Seat
The XJD Pink Girls' Bike with Basket & Doll Seat is made for riders 71–122 cm ta…$75.99
$99.99