

How to choose a bike for my child
Choose your child’s bike by measuring height and inseam, then checking stand-over clearance, reach, brake control and confidence on the actual bike. Use age only as a starting point, and never size up merely for future growth.
Measure your child before comparing bikes
Measure your child without shoes, standing straight against a wall. Record total height from floor to the top of the head. For inseam, have the child stand with feet slightly apart and measure from the floor to the crotch. The inseam helps you judge whether the child can stand over the bicycle comfortably; height helps narrow the likely wheel size.
Write down both measurements and bring them when shopping. Children of the same age can have different proportions, so neither age nor total height can confirm fit by itself.
Use wheel size to narrow the choices
Start with the measured rider height in this XBikes chart. Where height ranges overlap, compare both sizes on the child rather than automatically choosing the larger one.
| Wheel size | Starting age | Rider height |
|---|---|---|
| 12 Inch | 3–4 | 34–40 in / 86–102 cm |
| 14 Inch | 3–6 | 37–45 in / 94–114 cm |
| 16 Inch | 4–7 | 40–48 in / 102–122 cm |
| 18 Inch | 5–9 | 43–52 in / 109–132 cm |
| 20 Inch | 7–12 | 48–60 in / 122–152 cm |
| 24 Inch | 10–14 | 54–64 in / 137–163 cm |
| 26 Inch | Youth and adults | Over 60 in / 153 cm |
These ranges are screening tools, not promises of fit. Prioritize measured height, inseam, reach, brake control and present confidence over the age column.
Check the fit on the actual bicycle
Have your child try the bicycle in a controlled area. The American Academy of Pediatrics recommends trying the bike rather than buying an oversized model for growth. Check these points before deciding:
- Stand-over: The child should be able to straddle the bike without the frame preventing a stable stance.
- Starting and stopping: The child should be able to get into position, begin moving and stop without losing control.
- Reach: Hands should reach the controls without an uncomfortable stretch or forced posture.
- Brake control: The child must be able to reach and operate the bicycle’s brakes reliably.
- Steering: Ask the child to make gentle turns and show that the bicycle responds without overwhelming them.
If the child cannot complete those checks comfortably, reject that fit even when the chart or age range appears suitable. A bike that is too large now is not made appropriate by the expectation that the rider will grow.
Match the bicycle to current confidence
Wheel size answers only part of the question. Consider what the child can do today: balance independently, start without help, steer predictably and stop on request. A less confident rider may need a different setup from a child of identical height who already controls a bicycle independently.
Training-wheel models are relevant when that format matches the child’s current learning needs and the parent’s plan. They are not automatically the right choice for every beginner, and their presence does not override the fit checks above.
When the supplied catalog option is relevant
The Light Pink XJD Girls' Bicycle with Basket & Training Wheels is listed in Training Wheel Bikes and offers 12 Inch, 14 Inch, 16 Inch and 20 Inch SKU labels. Those four sizes help compare several chart starting points within one supplied model; the basket and training wheels also make its intended configuration clear. It is relevant only if one of those sizes and that configuration suit the individual rider after an in-person fit check. It is not relevant when the child needs an 18 Inch, 24 Inch or 26 Inch starting point, or cannot comfortably control the bicycle.

Do not infer weight, materials, brake type, load limits, assembly details or compatibility from the title or size labels. For assembly, adjustments, maintenance and torque requirements, follow the exact product manual or ask a qualified bicycle mechanic.
Make the final decision safely
- Measure height and inseam.
- Use the chart to shortlist one or two wheel sizes.
- Have the child try each candidate and compare stand-over, reach, braking, steering and stopping.
- Choose for present control, not future growth.
- Add a properly fitting bicycle helmet before riding.
The U.S. Consumer Product Safety Commission advises that the helmet should fit properly, sit level and have its straps used according to the manufacturer’s instructions. Your next step is therefore concrete: take the measurements, shortlist the matching wheel sizes, and buy only after your child demonstrates comfortable control of the exact bicycle.
Bikes for your next adventure
-
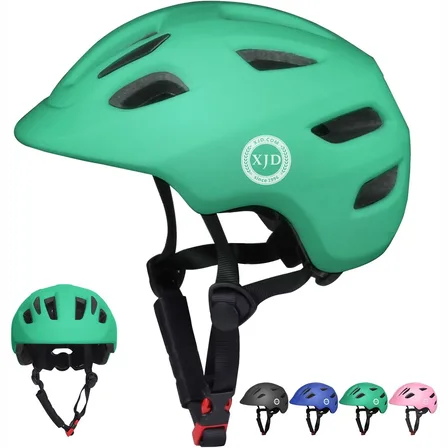
Green XJD Toddler Bike Helmet with Adjustable Fit, XS (46–51 cm)
The XJD toddler bike helmet in Green is built for the youngest riders — the size…$20.39
$23.99 -

Kids Bike Helmet by XJD for Boys & Girls – Black, Blue, Green, Pink, Purple
The XJD Kids Bike Helmet covers a wide 2-to-8-year age range thanks to two head-…$59.99
-

Kids Bike Helmet by XJD for Girls – Pink
The XJD Kids Bike Helmet in Pink is a lightweight multi-sport helmet for girls r…$59.99
$99