

How to help a child learn to ride a bike
Help a child learn to ride by choosing a bike they can control now, fitting a level helmet, and practising balance, braking, steering and pedalling in short, calm sessions.
Measure the rider before choosing a bike
Measure the child’s standing height and inseam in the shoes they will wear for riding. Use age only as a starting point: two children of the same age may need different sizes or levels of support.
Have the child try the bicycle. They should be able to stand over it comfortably, reach the handlebar without stretching, steer while looking ahead and operate the brakes confidently. Do not buy an oversized bicycle for the child to grow into. If reach, stand-over clearance or brake control is uncertain, compare another size or ask a qualified bicycle mechanic to check the fit.
| Wheel size | Age starting point | Rider height starting point |
|---|---|---|
| 12 Inch | 3–4 | 34–40 in / 86–102 cm |
| 14 Inch | 3–6 | 37–45 in / 94–114 cm |
| 16 Inch | 4–7 | 40–48 in / 102–122 cm |
| 18 Inch | 5–9 | 43–52 in / 109–132 cm |
| 20 Inch | 7–12 | 48–60 in / 122–152 cm |
| 24 Inch | 10–14 | 54–64 in / 137–163 cm |
| 26 Inch | Youth and adults | Over 60 in / 153 cm |
These ranges overlap deliberately. Prioritize measured height, inseam, reach, brake control and present confidence over age alone.
Prepare the bike, helmet and practice area
Follow the exact product manual for assembly, adjustments, maintenance, compatibility, load limits and torque. If anything is missing, loose, damaged or unclear, use a qualified bicycle mechanic before the child rides.
A bicycle helmet should fit properly, sit level and have its straps adjusted according to the helmet manufacturer’s instructions. Choose a flat, open area away from traffic, steep slopes and obstacles. Closed-toe shoes and comfortable clothing help the child move freely.
Teach one skill at a time
- Balance: Let the child sit on the bike and practise moving forward, looking ahead and stopping their feet safely. Adjustments or component removal should follow the bicycle manual or be handled by a mechanic.
- Steering: Ask the child to make wide, gentle turns while keeping their eyes on the route rather than the front wheel.
- Braking: Practise reaching and applying the brakes while stationary, then stopping from a slow roll. The child must be able to use the fitted controls reliably.
- Pedalling: Once gliding and stopping are comfortable, practise starting with one pedal ready to push, then looking forward and maintaining a smooth cadence.
Walk beside the child and offer light support only when needed. Avoid pulling the handlebar, which can interrupt steering. Several brief attempts usually preserve concentration better than one exhausting session.
Decide whether training wheels are useful
Training wheels can support early steering and pedalling practice, but they do not replace learning to balance on two wheels. They may be relevant when a child is not yet confident holding the bike upright or needs time to coordinate pedalling and braking. A balance-first approach may be more useful when the child can already glide and wants to develop independent balance.
Reassess after each session. If the child depends heavily on the supports, continue with simple control exercises. If they steer, pedal and stop calmly, consult the bicycle manual or a qualified mechanic about the correct next adjustment or removal process.
Compare the supplied 12, 14 and 16 Inch options
The two catalog options below are relevant because both provide 12 Inch, 14 Inch and 16 Inch labels, letting families compare three overlapping starting sizes; their titles and catalog categories also distinguish BMX and training-wheel presentations.
 Black XJD Kids' BMX Bicycle with Training Wheels
Available in 12 Inch, 14 Inch and 16 Inch labels. Its title identifies training wheels, making it relevant for comparing a supported learning option after an individual fit check.
 Pink Girls' 12/14/16" Bike by XJD – Basket & Doll Seat
A Training Wheel Bikes catalog option in 12 Inch, 14 Inch and 16 Inch labels. The title also identifies a basket and doll seat; fit still depends on the individual rider.
Black XJD Kids' BMX Bicycle with Training Wheels is listed under Kids' BMX Bikes and is offered with 12 Inch, 14 Inch and 16 Inch SKU labels. Its title identifies training wheels, so it may suit a learner using that support while practising basic controls.
Pink Girls' 12/14/16" Bike by XJD – Basket & Doll Seat is listed under Training Wheel Bikes, with the same three available size labels. Its title identifies a basket and doll seat, but those catalog details do not establish fit or learning readiness.
Compare the correct size label first, then the child’s actual stand-over position, reach, brake operation and confidence. Do not select either bicycle solely because its name or category sounds suitable.
Know when the child is ready to ride independently
Move toward unsupported riding when the child can start with minimal help, look ahead, steer a planned path, stop on request and recover from a small wobble without panic. Pause if the child cannot reach the controls, repeatedly loses control or becomes tired or frightened.
Your next step is simple: record height and inseam, shortlist the matching wheel-size starting points, arrange an individual fit check, and begin with balance and braking before expecting independent pedalling.
Bikes for your next adventure
-

Black XJD Kids Bike for Boys – 12, 14 & 16 Inch Sizes
For a son between roughly 3 and 8 years old, the XJD Kids Bike in Black covers t…$169
$199 -

Blue XJD Girls Bike with Training Wheels – 12/14/16 Inch
If you're shopping for a first pedal bike for a daughter roughly 3 to 8 years ol…$149
$169 -
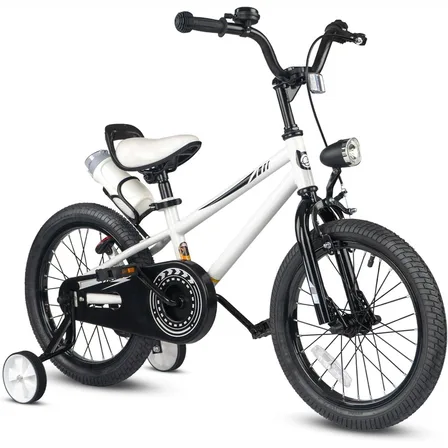
XJD Kids' Training Wheel Bike for Boys & Girls, 12/14/16 Inch – White
The XJD kids' training wheel bike in White is made for riders ages 3–8 (roughly …$169
$199