

How to help child learn to ride bike
Help a child learn to ride by choosing a correctly fitted bike, practising balance before pedalling, and building skills in short, calm sessions.
Measure the rider before choosing the bike
Measure the child’s height and inseam while they are wearing the shoes they will ride in. Height gives you a wheel-size starting point; inseam helps you judge whether the child can stand over the bicycle comfortably. Age is only a rough guide.
| Wheel size | Starting age | Rider height |
|---|---|---|
| 12 Inch | 3–4 | 34–40 in / 86–102 cm |
| 14 Inch | 3–6 | 37–45 in / 94–114 cm |
| 16 Inch | 4–7 | 40–48 in / 102–122 cm |
| 18 Inch | 5–9 | 43–52 in / 109–132 cm |
| 20 Inch | 7–12 | 48–60 in / 122–152 cm |
| 24 Inch | 10–14 | 54–64 in / 137–163 cm |
| 26 Inch | Youth and adults | Over 60 in / 153 cm |
Overlapping ranges are normal. When two sizes look possible, have the child try each one rather than buying the larger bike for future growth. Check that they can stand over it, reach the handlebar without stretching, steer confidently, and operate the brakes with control. Measured height, inseam, reach, brake control and current confidence take priority over age.
Set up a safe, low-pressure practice area
Choose a flat, open space away from traffic, slopes and obstacles. The child should wear closed-toe shoes and comfortable clothing that cannot catch in moving parts. A bicycle helmet should fit properly, sit level, and have its straps adjusted according to the helmet manufacturer’s instructions.
Before each session, check that the bike appears secure and works as intended. For assembly, adjustments, maintenance, compatibility or torque, follow the exact product manual or ask a qualified bicycle mechanic. Do not improvise a mechanical procedure when the instructions are unclear.
Teach balance before combining every skill
Begin with the child seated and holding the handlebar while you steady the bike gently. Let them walk the bike forward and practise stopping. When they are comfortable, encourage longer glides so they feel how steering and balance work together.
- Practise looking ahead instead of down at the front wheel.
- Ask the child to push off, glide briefly and stop under control.
- Add gentle steering around widely spaced markers.
- Introduce pedalling only after gliding feels predictable.
- Practise starting, riding straight, turning and stopping as separate skills before linking them.
Support the child at the torso if needed, without pulling the handlebar. Reduce that support gradually. A few controlled attempts are more useful than continuing after the child becomes tired, frightened or frustrated.
Decide whether training wheels fit the next step
Training wheels can help a child practise pedalling, steering and stopping while receiving lateral support. They do not teach two-wheel balance by themselves, so continue balance-focused practice and treat their removal as a gradual transition. A child already gliding confidently may be ready to practise without them; a child still worried about pedalling or stopping may benefit from temporary support.
The supplied catalog options are relevant when the fit check points to a 12, 14 or 16 Inch training-wheel bike. The Blue XJD Girls Bike with Training Wheels – 12/14/16 Inch and XJD Boys 12/14/16" Training Wheel Bike – Blue are both cataloged as training-wheel bikes with 12 Inch, 14 Inch and 16 Inch size labels, making them direct size-label comparison options within that range.
 Blue XJD Girls Bike with Training Wheels – 12/14/16 Inch
A training-wheel bike offered in 12 Inch, 14 Inch and 16 Inch labels. It is relevant only when the child’s measurements, reach, brake control and confidence confirm one of those sizes.
 XJD Boys 12/14/16" Training Wheel Bike – Blue
A blue training-wheel bike with 12 Inch, 14 Inch and 16 Inch labels. Compare its applicable size label only after measuring the rider and completing an individual stand-over, reach and control check.
The supplied facts do not establish differences in brakes, weight, materials, geometry or other equipment, so do not infer those distinctions from the titles. If the child’s fit check indicates 18, 20, 24 or 26 Inch wheels, neither supplied product is the requested size; these products are not substitutes.
Use progress, not speed, to plan the next session
End a session after one small success: a controlled glide, an independent start or a smooth stop. At the next session, repeat that skill before adding another. If the child repeatedly tips, struggles to reach the controls, cannot stop predictably or looks stretched, pause and reassess fit rather than blaming confidence.
Your next action is simple: measure height and inseam, compare the height with the table, then have the child try the likely size and demonstrate stand-over clearance, comfortable reach, brake control and confidence before beginning balance practice.
Bikes for your next adventure
-

Black XJD Kids Bike for Boys – 12, 14 & 16 Inch Sizes
For a son between roughly 3 and 8 years old, the XJD Kids Bike in Black covers t…$169
$199 -

Blue XJD Girls Bike with Training Wheels – 12/14/16 Inch
If you're shopping for a first pedal bike for a daughter roughly 3 to 8 years ol…$149
$169 -
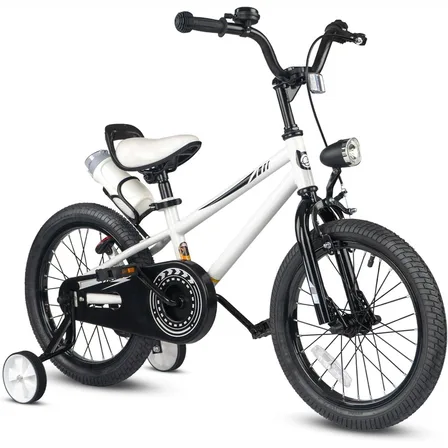
XJD Kids' Training Wheel Bike for Boys & Girls, 12/14/16 Inch – White
The XJD kids' training wheel bike in White is made for riders ages 3–8 (roughly …$169
$199