

How to Replace a 14-Inch Bike Tire Safely
Learning how to replace a 14-inch bike tire starts with identifying the exact tire standard. The words 14 inch are not enough to guarantee compatibility because nominal names, widths and bead-seat diameters can differ. Before taking the wheel off, photograph the sidewall, brake arrangement, washers and axle position and find the bicycle's service instructions.
Buy from the complete size code
Copy every number and symbol from both sides of the tire, including the ISO or ETRTO marking when available. Match the bead-seat diameter exactly, then stay within the bicycle and rim maker's approved width. Also select a compatible tube range and the correct valve type and length.

Prepare a clean work area
Turn the bicycle off if it has any electrical accessory, remove loose items and support it using the method allowed by the manual. Keep children away from the work area. Lay removed nuts, washers and retention parts in order so their position is not guessed during reassembly.

Remove the wheel according to its system
Brake release, chain position and axle retention vary. A rear coaster-brake arm, training-wheel bracket or chain tension setup can add steps. Do not loosen parts that are not covered by the instructions, and do not force the tire past a brake or guard.
Inspect before installing
Check the rim for damage, sharp edges and displaced rim tape. Find and remove the cause of the puncture without running bare fingers blindly inside the tire. Add only enough air to give the tube shape, place it without twisting, and avoid pinching it beneath the bead.
Seat, inflate and verify
Work the bead evenly around the rim and inspect both sides before gradual inflation. Stay within the exact sidewall and manual guidance. Reinstall the wheel and all retention parts correctly, restore the brake, check chain or coaster-brake hardware, spin the wheel and perform an adult brake test before the child rides.
How current product examples clarify the choice
The blue 12/14/16-inch bikes make useful live references because a buyer can confirm that a 14-inch option exists while still checking the selected SKU and actual tire marking. Their training-wheel and brake hardware also illustrates why wheel removal steps are model-specific.
Practical checklist
- Match the full sidewall and rim standard.
- Photograph washer and bracket order.
- Inspect rim tape and find the puncture cause.
- Test wheel retention and brakes after reassembly.
Frequently asked questions
Can I reuse the old inner tube?
Only if inspection and the instructions support reuse; replace a damaged, stretched or repeatedly punctured tube.
What if the new tire is very hard to mount?
Stop and recheck the size. Excess force can damage the bead, tube or rim and does not prove compatibility.
Before making the final choice, revisit the exact route or driving area at the time it will normally be used. A setup that works during a quiet test may need more room, visibility or adult support when other people and everyday obstacles are present.
Bottom line
Use the answer to how to replace a 14-inch bike tire as a decision process, not a shortcut. Confirm the live product data and manual, match the rider to the controls and setting, and favor repeatable control over a larger size or higher performance label.
Bikes for your next adventure
-

Light Pink XJD Girls' Bicycle with Basket & Training Wheels
The Light Pink XJD Girls' Bicycle with Basket & Training Wheels is a retro-style…$109.99
$129.99 -

Blue XJD Girls Bike with Training Wheels – 12/14/16 Inch
If you're shopping for a first pedal bike for a daughter roughly 3 to 8 years ol…$149
$169 -
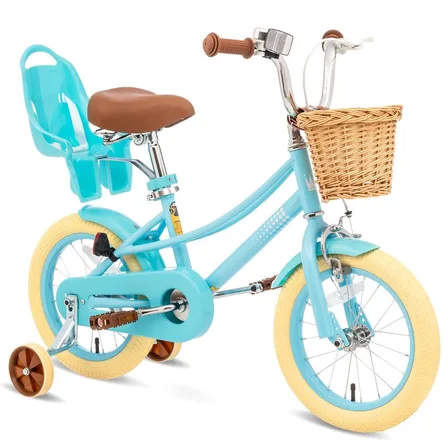
Girls' Training Wheel Bike by XJD, 12–20 Inch Wheels – Blue
This XJD girls' training wheel bike in Blue covers one of the widest fit ranges …$139
$159