

How to ride a bike for kids march 10
To help a child ride a bike, first confirm the bike fits, fit a helmet, practise balance and braking, then add pedalling in a clear, quiet area.
Measure the child before the March 10 ride
Measure the rider’s standing height without shoes and note their inseam. Use height to choose a starting wheel size, then have the child try that exact bicycle. March 10 does not change the fit decision: current measurements and ability matter more than a birthday, season or age printed in a product name.
During the try-on, check four things. The child needs suitable stand-over clearance, a comfortable reach to the handlebar, reliable access to the brakes and enough confidence to start and stop without being overwhelmed. Do not buy an oversized bicycle simply to allow room for growth.
| Wheel size | XBikes age starting point | Rider-height starting point |
|---|---|---|
| 12 Inch | Ages 3–4 | 34–40 in / 86–102 cm |
| 14 Inch | Ages 3–6 | 37–45 in / 94–114 cm |
| 16 Inch | Ages 4–7 | 40–48 in / 102–122 cm |
These ranges overlap, so they narrow the choices rather than determine the answer. When two sizes appear possible, compare both in person and choose according to stand-over, reach, brake control and the child’s present confidence.
Set up the first practice
Use a flat, open place away from traffic, parked vehicles, steep slopes and other avoidable obstacles. A supervising adult should remain close enough to intervene. Before every session, check that the bicycle is assembled and operating as its exact product manual directs. For uncertain assembly, maintenance, compatibility or adjustments, use a qualified bicycle mechanic rather than guessing.
Fit a bicycle helmet before the child gets on. It should fit properly, sit level and have its straps used according to the helmet manufacturer’s instructions. Shoes should stay securely on the feet, and clothing should not interfere with movement or the bicycle.
Teach the movements in a useful order
- Mount and stop: Have the child practise getting into position, looking ahead, reaching the brakes and coming to a controlled stop before adding speed.
- Balance: Let the rider move slowly while learning to keep the bike upright. Give light support only when needed; gripping and steering the bike for the child can hide whether they are balancing independently.
- Start: Ask the child to prepare a pedal, look toward open space and begin with a deliberate push. Repeat starts separately so a missed attempt feels routine.
- Pedal and steer: Use a short, straight path first. Once that is consistent, introduce broad turns while keeping the child’s eyes directed where they want to go.
- Stop on request: Call for gentle, planned stops at a visible point. Do not move to tighter turns or longer rides until the child can slow and stop with control.
Keep practice brief enough that fatigue does not replace learning. If the rider repeatedly struggles to reach controls, stand over the bicycle or manage its size, stop and reassess fit instead of treating the problem as a lack of courage.
Decide whether training wheels are relevant
Training wheels can be relevant when the immediate goal is practising pedalling and steering with added support. They do not remove the need to check fit, helmet position, brake reach or supervision. When the child is ready to work on independent balance, follow the bicycle’s manual for any training-wheel adjustment or removal, or ask a qualified bicycle mechanic.
The supplied catalog option helps with this decision because it is a training-wheel bicycle offered in the three wheel sizes shown above: XJD Girls Bike for Kids Ages 3-8, 12/14/16 Inch with Training Wheels – Purple. The “Ages 3-8” wording is part of its catalog title, not proof that it fits every child in that span. Compare the 12 Inch, 14 Inch and 16 Inch labels against measured height, then perform the individual fit checks.

Know when this product is not the answer
This catalog bicycle is relevant only if a 12 Inch, 14 Inch or 16 Inch starting point matches the rider and the child can control the exact bike. It is not a substitute when measurements indicate another wheel size, when reach or stand-over is unsuitable, or when the rider cannot operate the brakes confidently. The supplied facts do not establish its weight, material, brake type, load limit, certification or assembly procedure; consult the exact manual or a qualified mechanic for those questions.
Your March 10 decision
Before riding on March 10, record the child’s height and inseam, compare the applicable wheel-size ranges, and try the exact bicycle. Proceed only when stand-over, reach, braking and confidence all work together; otherwise choose a better-fitting size or postpone riding until the setup is corrected.
Bikes for your next adventure
-

XJD Boys 12/14/16" Training Wheel Bike – Blue
The XJD Boys Bike in Blue is a training wheel bike for riders 71–122 cm tall—rou…$169
$199 -
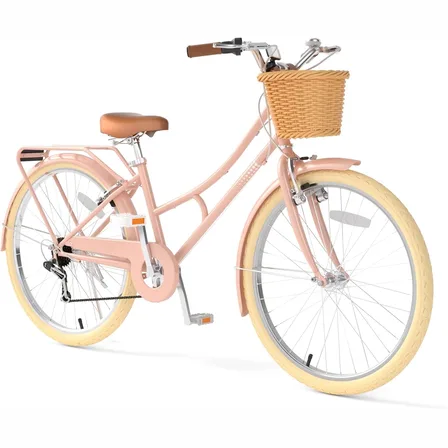
Pink XJD Beach Cruiser Bike, 24"/26", U-Brake
The XJD Pink Beach Cruiser Bike is a single-speed cruiser built for older kids a…$159.99
-

Light Pink XJD Girls' Bicycle with Basket & Training Wheels
The Light Pink XJD Girls' Bicycle with Basket & Training Wheels is a retro-style…$109.99
$129.99