

What bike should i get for my kid
Choose your kid’s bike by measured height and an in-person fit check, not age alone. Start with the XBikes wheel-size range below, then confirm stand-over clearance, easy reach, brake control and confident handling before buying.
Measure first, then choose a starting size
Measure your child’s height without shoes. An inseam measurement is also useful: have the child stand against a wall with feet slightly apart, then measure from the floor to the crotch. The height ranges below identify which wheel sizes to compare; they do not guarantee that a particular frame will fit.
| Wheel size | Age starting point | Rider height |
|---|---|---|
| 12 Inch | Ages 3–4 | 34–40 in / 86–102 cm |
| 14 Inch | Ages 3–6 | 37–45 in / 94–114 cm |
| 16 Inch | Ages 4–7 | 40–48 in / 102–122 cm |
| 18 Inch | Ages 5–9 | 43–52 in / 109–132 cm |
| 20 Inch | Ages 7–12 | 48–60 in / 122–152 cm |
| 24 Inch | Ages 10–14 | 54–64 in / 137–163 cm |
| 26 Inch | Youth and adults | Over 60 in / 153 cm |
Overlapping ranges are intentional. If your child’s height fits two rows, compare both sizes in person. Current confidence, inseam, body proportions and control should decide—not a desire to maximize growing room.
Check the bike with your child on it
The American Academy of Pediatrics advises having the child try the bicycle and avoiding an oversized bike bought merely for growth. During the fit check, look for these practical signs:
- Stand-over: With the child straddling the bicycle, there should be usable clearance rather than contact that makes stopping or dismounting awkward.
- Reach: The child should hold the handlebar without stretching, locking the elbows or leaning so far forward that steering becomes difficult.
- Brake control: If the bicycle has hand controls, the child must be able to reach and operate them while maintaining a secure grip.
- Starting and stopping: Ask the child to demonstrate controlled starts, turns and stops in a traffic-free area.
- Confidence: Watch for calm steering and deliberate movement. A bike that causes hesitation or loss of control needs reassessment, even when the chart suggests the size.
Do not infer required stand-over clearance, saddle settings or brake adjustments from a general article. Follow the exact product manual, or ask a qualified bicycle mechanic to set up and inspect the bicycle.
Decide whether training wheels match the rider
Training-wheel bikes are relevant when a child needs support while learning to pedal and steer. They are not automatically the right choice for every beginner, and wheel diameter alone does not reveal readiness. Consider what your child can do now: balance, steer, stop on instruction and recover from a wobble.
If training wheels are being considered, check the exact manual for their installation, adjustment and compatibility. Do not improvise attachment hardware or torque settings. A qualified bicycle mechanic can help when the instructions are unclear or the assembled bike does not sit or track as expected.
How the supplied catalog option fits the decision
The Purple XJD Girls' Bike with Doll Seat & Basket is cataloged as a Training Wheel Bike and is offered with 12 Inch, 14 Inch and 16 Inch SKU labels. Those three labels make it relevant for comparing the smaller wheel-size starting points after measuring the rider. Its title also identifies a doll seat and basket, but those features do not establish fit.
This catalog option helps answer the question when the measured child falls within the 12, 14 or 16 Inch starting ranges and a training-wheel bike suits their current confidence. The three listed sizes can be compared, but each still requires an individual fit check.

It is not the relevant supplied option for a child whose measurements and control point toward 18 Inch, 20 Inch, 24 Inch or 26 Inch wheels. Likewise, color and accessories should come after fit and control. No conclusion about brakes, construction, weight, load limits or other specifications can be drawn from the supplied catalog facts; consult the exact product listing and manual where those details matter.
Complete the safety and setup check
Use a properly fitting bicycle helmet on every ride. The U.S. Consumer Product Safety Commission advises that the helmet sit level and that its straps be used according to the helmet manufacturer’s instructions. Replace guesswork with the helmet’s own fitting directions.
Before riding, use the bicycle’s exact manual for assembly, maintenance, compatibility, load limits and torque requirements. If any part is loose, damaged, difficult to operate or uncertain, pause riding and have a qualified bicycle mechanic inspect it.
Make the final choice
- Measure height and inseam.
- Use the chart to shortlist one or two wheel sizes.
- Have your child try each candidate and compare stand-over, reach, brake operation, starts, turns and stops.
- Choose the size the child controls now; do not size up solely for future growth.
- Consider the Purple XJD Girls' Bike with Doll Seat & Basket only if a 12 Inch, 14 Inch or 16 Inch training-wheel option matches that completed fit check.
The bike your kid should get is the correctly fitted candidate they can control confidently today—confirmed by measurement, a real tryout and the exact product instructions.
Bikes for your next adventure
-
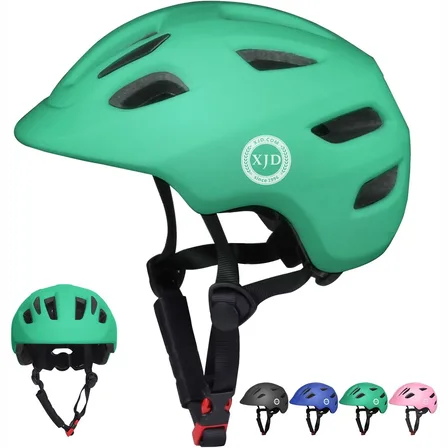
Green XJD Toddler Bike Helmet with Adjustable Fit, XS (46–51 cm)
The XJD toddler bike helmet in Green is built for the youngest riders — the size…$20.39
$23.99 -

Kids Bike Helmet by XJD for Boys & Girls – Black, Blue, Green, Pink, Purple
The XJD Kids Bike Helmet covers a wide 2-to-8-year age range thanks to two head-…$59.99
-

Kids Bike Helmet by XJD for Girls – Pink
The XJD Kids Bike Helmet in Pink is a lightweight multi-sport helmet for girls r…$59.99
$99