

What size bike for my child
Choose your child’s bike by measured height first, then confirm inseam clearance, comfortable reach, brake control and confidence on the actual bicycle.
Measure before choosing a wheel size
Measure your child without shoes, standing straight against a wall. Record total height from the floor to the top of the head. Then measure inseam from the floor to the crotch, using a book held level between the legs to represent the saddle area.
Height narrows the choices in the XBikes chart below. Inseam helps with the next step: checking whether the child can stand over the bicycle comfortably. Because frame shapes and adjustments vary, wheel diameter alone cannot prove that a bicycle fits.
Compare the measurement with the XBikes starting points
| Wheel size | Starting age | Rider height |
|---|---|---|
| 12 Inch | 3–4 | 34–40 in / 86–102 cm |
| 14 Inch | 3–6 | 37–45 in / 94–114 cm |
| 16 Inch | 4–7 | 40–48 in / 102–122 cm |
| 18 Inch | 5–9 | 43–52 in / 109–132 cm |
| 20 Inch | 7–12 | 48–60 in / 122–152 cm |
| 24 Inch | 10–14 | 54–64 in / 137–163 cm |
| 26 Inch | Youth and adults | Over 60 in / 153 cm |
Use age only as a secondary clue. Where height ranges overlap, compare both sizes in person rather than automatically choosing the larger one. Current confidence also matters: a hesitant beginner may control one appropriate-size bicycle more comfortably than another even when both appear in the same height range.
Check the bicycle with your child aboard
Have your child try the bicycle before making the final decision. Do not buy an oversized bike simply to allow room for growth. With the child standing over it, confirm there is comfortable clearance and no forced balancing or leaning just to remain upright.
Next, observe the riding position. Your child should be able to hold the handlebars without an uncomfortable stretch, turn them while staying balanced, and look ahead naturally. Ask the child to operate the brakes: the controls must be within reach, and the child must have enough hand control and confidence to use them as intended.
A suitable size should let the rider start, steer, stop and dismount without struggling against the bicycle. If reach, stand-over clearance or brake operation is doubtful, try another size or ask a qualified bicycle mechanic to assess the fit.
How the supplied training-wheel bikes compare
The catalog options are useful comparison points because together they cover 12, 14, 16 and 20 Inch wheel labels. The XJD Kids' Training Wheel Bike for Boys & Girls, 12/14/16 Inch – White is offered in 12, 14 and 16 Inch labels. The Girls' Training Wheel Bike by XJD, 12–20 Inch Wheels – Blue is offered in 12, 14, 16 and 20 Inch labels. Both are categorized as Training Wheel Bikes, so they are relevant only when that type of bicycle suits the rider.
 XJD Kids' Training Wheel Bike for Boys & Girls, 12/14/16 Inch – White
A Training Wheel Bike offered with 12, 14 and 16 Inch labels, making it relevant when the child’s measured height points to one of those sizes and an individual fit check confirms control.
 Girls' Training Wheel Bike by XJD, 12–20 Inch Wheels – Blue
A Training Wheel Bike offered with 12, 14, 16 and 20 Inch labels. Compare the appropriate label with the child’s measured height, then verify stand-over clearance, reach, brake control and confidence.
These titles and labels do not establish fit by themselves. Compare the child’s measured height with the table, then conduct the individual checks above. If your measurements point to 18, 24 or 26 Inch, neither supplied product has that exact wheel-size label; the displayed models are nearest-size comparison points, not substitutes for the size indicated by the fit process.
Resolve an overlap or growth-spurt decision
If your child falls within two height ranges, have them try both corresponding sizes. Compare the same practical signals on each bicycle:
- comfortable stand-over clearance;
- a natural, unstrained reach to the handlebars;
- reliable access to and operation of the brakes;
- controlled starting, steering, stopping and dismounting;
- the child’s present confidence rather than hoped-for future ability.
Choose the bicycle the child can control now. Recheck fit after a growth spurt or whenever posture, reach or stopping control changes noticeably.
Complete the safety and setup check
Add a properly fitting bicycle helmet. It should sit level and use its straps according to the helmet manufacturer’s instructions. A helmet that is merely labeled for an age group still needs an individual fit check.
For assembly, maintenance, load limits, compatibility and torque settings, follow the manual for the exact product. If the instructions are missing, unclear or beyond your experience, use a qualified bicycle mechanic rather than estimating a procedure or specification.
Your next step is simple: measure height and inseam, identify the matching wheel-size range, and let your child try that size—plus an overlapping size if applicable—before choosing the bike they can comfortably control today.
Bikes for your next adventure
-
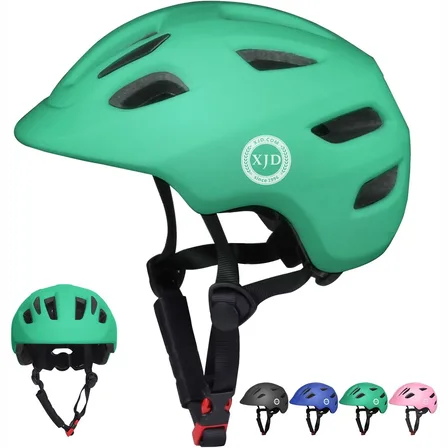
Green XJD Toddler Bike Helmet with Adjustable Fit, XS (46–51 cm)
The XJD toddler bike helmet in Green is built for the youngest riders — the size…$20.39
$23.99 -

Kids Bike Helmet by XJD for Boys & Girls – Black, Blue, Green, Pink, Purple
The XJD Kids Bike Helmet covers a wide 2-to-8-year age range thanks to two head-…$59.99
-

Kids Bike Helmet by XJD for Girls – Pink
The XJD Kids Bike Helmet in Pink is a lightweight multi-sport helmet for girls r…$59.99
$99