

Why can't my kid ride a bike
Your child may be unable to ride because the bike does not fit, the controls are hard to reach, or balance, braking and confidence have not developed together. Check fit first, then practise one skill at a time.
First, identify what “can’t ride” means
Watch one short attempt in a flat, open area away from traffic. Is the difficulty getting on, touching down, balancing while moving, starting the pedals, steering, or stopping? A child who can coast but cannot start needs different practice from one who cannot comfortably hold the bike upright.
Also notice whether your child looks frightened or physically overextended. Repeated wobbling, staring at the pedals, gripping tightly, or avoiding the brakes can indicate that the task or bicycle feels difficult to control. Do not treat hesitation as stubbornness, and do not buy a larger bicycle simply to allow room for growth.
Measure the rider and compare the wheel size
Measure your child’s height without shoes. Measure inseam from the floor to the crotch while the child stands straight with feet slightly apart. Height provides a starting range; inseam helps you check whether the child can stand over and manage the actual frame.
| Wheel size | Starting age | Rider height |
|---|---|---|
| 12 Inch | 3–4 | 34–40 in / 86–102 cm |
| 14 Inch | 3–6 | 37–45 in / 94–114 cm |
| 16 Inch | 4–7 | 40–48 in / 102–122 cm |
| 18 Inch | 5–9 | 43–52 in / 109–132 cm |
| 20 Inch | 7–12 | 48–60 in / 122–152 cm |
| 24 Inch | 10–14 | 54–64 in / 137–163 cm |
| 26 Inch | Youth and adults | Over 60 in / 153 cm |
These XBikes ranges are starting points, not proof of fit. Where ranges overlap, prioritize measured height, inseam, reach, brake control and current confidence rather than age. Two children of the same age may need different bicycles.
Check fit on the actual bicycle
Have your child try the bike. The child should be able to stand over it without the frame preventing a stable stance, get on and off without struggling, reach the handlebar without stretching, and turn it while remaining in control. They must also reach and operate the brakes reliably. This follows the fit-first approach recommended by the American Academy of Pediatrics through HealthyChildren.
If the child cannot put a foot down promptly, reaches excessively, cannot squeeze or operate the braking controls, or becomes less stable when turning, the bike is not a useful learning platform in its present setup. Check the exact product manual for permitted adjustments. Ask a qualified bicycle mechanic about assembly, mechanical condition or adjustments when the manual does not resolve the problem.
Use the catalog choices as size comparisons
The catalog’s 26-Inch XJD Beach Cruiser Bike for Girls – Purple, V-Brake is relevant when comparing larger wheel options. Its available SKU labels include Mint Green or Pink in 20, 24 and 26 Inch, plus Purple in 26 Inch. Those sizes let you compare the rider against three XBikes height starting points, but a labeled size never replaces an individual stand-over, reach and brake-control check.

For a rider under 48 in / 122 cm, none of these available 20-, 24- or 26-inch labels matches the XBikes starting height ranges. They are nearest-size comparison points, not substitutes for a required 12-, 14-, 16- or 18-inch option. For taller riders, compare only the appropriately labeled SKU with the measured range and an actual fit check. The product title’s wording is a catalog label, not independent fit evidence.
Practise the missing skill separately
Once fit and mechanical condition are suitable, reduce the task into manageable steps:
- Let the child become comfortable getting on, getting off and holding the bicycle upright.
- Practise looking ahead, steering gently and stopping on command in a clear, level space.
- Work on balance without demanding an immediate pedal start.
- Add starting and pedaling only after the child can remain composed and stop predictably.
Keep attempts short enough that fatigue does not turn into loss of control. If fear rises, step back to the last skill the child could repeat calmly. Training aids or component changes should be used only when compatible with the exact bicycle according to its manual or a qualified bicycle mechanic.
Make safety part of the decision
Use a bicycle helmet that fits properly, sits level and has straps arranged according to the helmet manufacturer’s instructions, consistent with U.S. Consumer Product Safety Commission guidance. Choose a traffic-free practice area and supervise the attempt.
Your next decision is specific: measure height and inseam, compare the measured height with the table, and test stand-over, reach and braking on the actual bike. If any fit check fails, change the bike or obtain qualified adjustment help before more riding practice; if fit passes, practise the single skill your observation identified.
Bikes for your next adventure
-
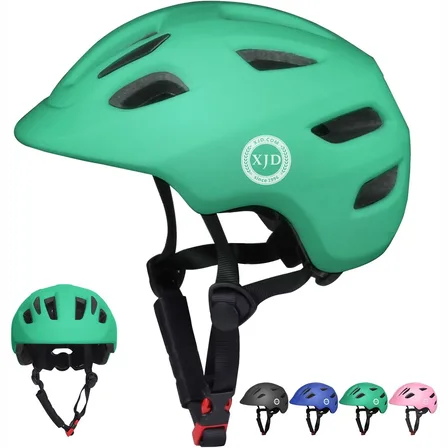
Green XJD Toddler Bike Helmet with Adjustable Fit, XS (46–51 cm)
The XJD toddler bike helmet in Green is built for the youngest riders — the size…$20.39
$23.99 -

Kids Bike Helmet by XJD for Boys & Girls – Black, Blue, Green, Pink, Purple
The XJD Kids Bike Helmet covers a wide 2-to-8-year age range thanks to two head-…$59.99
-

Kids Bike Helmet by XJD for Girls – Pink
The XJD Kids Bike Helmet in Pink is a lightweight multi-sport helmet for girls r…$59.99
$99