

A kid with a bike trailer
A kid can ride in a bike trailer only when the trailer manual permits the child’s size and condition, the towing bicycle is compatible, and the adult can control the complete setup.
Start with the trailer, not the child’s age
Before riding, identify the exact trailer model and read its manual. Confirm its passenger requirements, load limit, harness instructions, helmet guidance, seating arrangement, and rules for single or multiple occupants. Do not estimate these details or transfer limits from another model.
The child must fit the supplied restraint as the manufacturer describes and remain seated as required throughout the ride. If the child cannot maintain the position required by the manual, does not fit the restraint correctly, or exceeds any stated limit, do not use the trailer.
A properly fitted bicycle helmet should sit level, with its straps adjusted according to the helmet manufacturer’s instructions. Also check that the helmet and the trailer’s interior allow the child to sit in the required position without interference.
Confirm that the towing bicycle is suitable
A bicycle that fits its rider is not automatically approved to pull a trailer. Check both the bicycle manual and trailer manual for hitch compatibility, permitted attachment points, load restrictions, and any component exclusions. If either manual is missing or unclear, ask the manufacturer or a qualified bicycle mechanic before attaching the trailer.
With the trailer disconnected, the adult rider should already be able to start, steer, brake, stop, and put a foot down confidently. After correct installation, practice without a passenger in a quiet, traffic-free area. The added length and load can affect turning, stopping, reversing, and clearance.
- Inspect the bicycle, hitch, retention device, wheels, tires, restraint, and enclosure as directed by their manuals.
- Use only the specified attachment method and hardware.
- Follow the manuals for assembly, maintenance, compatibility, and torque; do not improvise a procedure.
- Stop if the connection moves unexpectedly, interferes with a wheel or brake, or makes control uncertain.
Measure a child who will ride their own bike
If “a kid with a bike trailer” means choosing a child’s bicycle to accompany a family trailer ride, measure the child’s standing height and inseam first. Then have the child try the bicycle. Check stand-over clearance, reach to the handlebar, access to the brakes, and the ability to start, steer, stop, and dismount with current confidence. Do not buy an oversized bicycle merely to allow room for growth.
| Wheel label | XBikes starting point |
|---|---|
| 12 Inch | Ages 3–4; 34–40 in / 86–102 cm |
| 14 Inch | Ages 3–6; 37–45 in / 94–114 cm |
| 16 Inch | Ages 4–7; 40–48 in / 102–122 cm |
| 20 Inch | Ages 7–12; 48–60 in / 122–152 cm |
| 24 Inch | Ages 10–14; 54–64 in / 137–163 cm |
| 26 Inch | Youth and adults over 60 in / 153 cm |
These ranges are starting points, not proof of fit. Measured height, inseam, reach, brake control, and confidence take priority over age.
How the supplied bicycles help with comparison
The catalog choices below cover several wheel labels for a child riding independently and two larger cruiser sizes for comparison. They help narrow a fit check, but the supplied facts do not establish trailer-hitch compatibility, load capacity, or suitability as towing bicycles.
 Pink XJD Beach Cruiser Bike, 24"/26", U-Brake
A 24 Inch or 26 Inch cruiser comparison for a taller youth or adult rider; the supplied facts do not confirm compatibility with a child trailer or hitch.
 Light Pink XJD Girls' Bicycle with Basket & Training Wheels
Offers 12 Inch, 14 Inch, 16 Inch, and 20 Inch labels for comparing a child’s measured fit when they will ride independently alongside a trailer setup.
 Blue XJD Girls Bike with Training Wheels – 12/14/16 Inch
Offers 12 Inch, 14 Inch, and 16 Inch labels as fit-check starting points for a child riding independently; no trailer compatibility is established by the supplied facts.
The Light Pink XJD Girls' Bicycle with Basket & Training Wheels is offered in 12 Inch, 14 Inch, 16 Inch, and 20 Inch labels. The Blue XJD Girls Bike with Training Wheels – 12/14/16 Inch covers 12 Inch, 14 Inch, and 16 Inch labels. Compare only labels that match the child’s measured-height starting point, then verify individual control in person.
The Pink XJD Beach Cruiser Bike, 24"/26", U-Brake is offered in 24 Inch and 26 Inch labels. Those sizes may provide useful fit comparisons for a taller youth or adult rider, but its catalog facts alone do not confirm that it can tow a child trailer. Approval must come from the exact bicycle and trailer documentation.
Decide what to do next
- Measure the child’s height and inseam if they will ride their own bicycle.
- Record the exact bicycle and trailer models, then compare both manuals for compatibility and limits.
- Fit the helmet and restraint exactly as their manufacturers direct.
- Have a qualified bicycle mechanic inspect the setup if installation, braking, attachment, or maintenance is uncertain.
- Practice the complete setup without a child before considering a passenger ride.
If every manual requirement, fit check, and control check passes, plan a short first outing in a low-traffic setting. If any requirement is unknown or the adult cannot confidently control the attached trailer, pause the ride until the correct documentation or mechanic resolves it.
Bikes for your next adventure
-

Kids Bike Helmet by XJD for Girls – Pink
The XJD Kids Bike Helmet in Pink is a lightweight multi-sport helmet for girls r…$59.99
$99 -
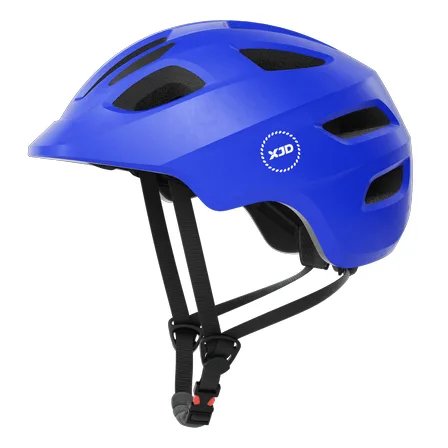
Blue XJD Kids Bike Helmet for Boys & Girls
The Blue XJD Kids Bike Helmet is a lightweight, adjustable multi-sport helmet fo…$59.99
$99 -
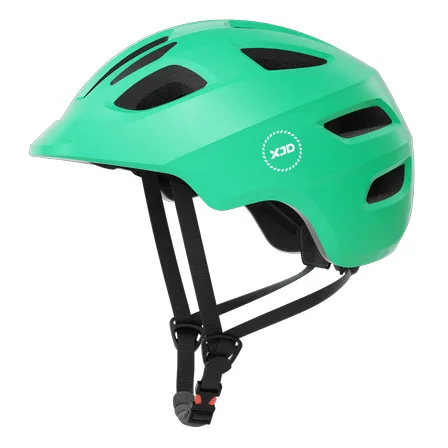
Green XJD Kids Bike Helmet for Boys & Girls
The Green XJD Kids Bike Helmet is a lightweight multi-sport helmet for toddlers …$59.99
$99