

Can you take the brakes off a toddler bike
You can physically remove brakes from some toddler bikes, but you generally should not do it. Keep every fitted brake working unless the exact bike manual permits a specific change or a qualified bicycle mechanic confirms the bike remains appropriate and controllable.
Why removing the brakes is usually the wrong move
A young rider needs a dependable way to slow down and stop. Taking off a brake can change how the bicycle is controlled, leave exposed or loose parts, and make the bike inconsistent with its intended setup. A child who expects a lever to work may also react incorrectly when it does not.
Do not assume that removing a hand brake turns a pedal bike into a suitable balance bike. The bike may have another braking system, and its frame, pedals, crank and riding position remain unchanged. Because no brake type or conversion instructions are supplied here, check the exact product manual before altering anything. If the manual is unavailable or unclear, use a qualified bicycle mechanic.
First identify what is actually causing trouble
Before changing the bike, watch the child start, steer, slow and stop in a flat, traffic-free area. The problem may be fit or adjustment rather than the presence of brakes.
- Measure standing height: compare it with the wheel-size starting points below, but do not use height alone.
- Measure inseam: check whether the child can stand over the bike as directed by its manual and get on and off without struggling.
- Check reach: seated in a normal riding position, the child should reach the handlebar without stretching or losing steering control.
- Check brake control: confirm the child can reach and operate every fitted control while maintaining a secure grip.
- Check confidence: hesitation, rigid arms or an inability to stop on command means practice or a different fit is needed before independent riding.
If the brake lever is difficult to reach or operate, do not remove the braking system as a shortcut. Follow the bike manual for any permitted adjustment, or ask a qualified mechanic to inspect fit, adjustment and operation. Do not improvise cable, component or torque changes.
Compare the rider with the XBikes size starting points
For the toddler-sized options relevant here, XBikes lists these starting points. Age overlaps, so measured height and an individual fit check matter more than the age label.
| Wheel size | Age starting point | Rider height starting point |
|---|---|---|
| 12 Inch | Ages 3–4 | 34–40 in / 86–102 cm |
| 14 Inch | Ages 3–6 | 37–45 in / 94–114 cm |
| 16 Inch | Ages 4–7 | 40–48 in / 102–122 cm |
These ranges help narrow the comparison; they do not prove that a bike fits. Have the child try the bicycle. Do not choose an oversized model merely to allow growth. Compare stand-over clearance, mounting and dismounting, handlebar reach, brake reach, steering control and the child’s present confidence.
How the supplied bike helps with the comparison
The Purple XJD Girls' Bike with Doll Seat & Basket is listed in the Training Wheel Bikes category with 12 Inch, 14 Inch and 16 Inch SKU labels. Those three sizes let you compare the rider’s measurements against the relevant XBikes starting points, but the catalog facts do not identify its brake type or authorize brake removal. Confirm the chosen size and all brake-related instructions in the exact product manual.
This particular catalog option is relevant because its available wheel-size labels cover the three smaller XBikes comparison ranges shown above, helping you narrow which complete bike the child should try before considering any mechanical change.

What to do next
- Record the child’s height and inseam, then identify the plausible wheel size from the XBikes starting points.
- Have the child try that size and assess stand-over, reach, steering, brake operation and confidence. Move to a different size if control is poor; do not size up solely for growth.
- Read the exact bike manual to identify every braking system and any manufacturer-approved adjustments.
- If reach, resistance, assembly or compatibility is uncertain, have a qualified bicycle mechanic inspect the bike instead of removing parts.
- For every ride, use a bicycle helmet that fits properly, sits level and has its straps positioned according to the helmet manufacturer’s instructions.
The decision is simple: leave the toddler bike’s brakes installed and functional unless its exact manual expressly permits the proposed change and the child can still demonstrate reliable control. If the child cannot comfortably reach or use the brakes, solve the fit or adjustment problem before the next ride.
Bikes for your next adventure
-

Light Pink XJD Girls' Bicycle with Basket & Training Wheels
The Light Pink XJD Girls' Bicycle with Basket & Training Wheels is a retro-style…$109.99
$129.99 -
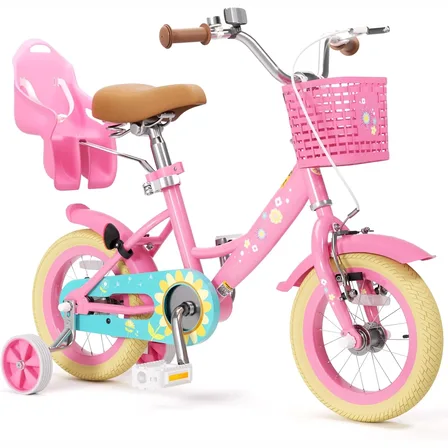
Flower Pink XJD Girls Bike with Doll Seat & Basket
The XJD Flower Pink girls' bike is made for riders 71–122 cm tall (roughly ages …$69.99
-
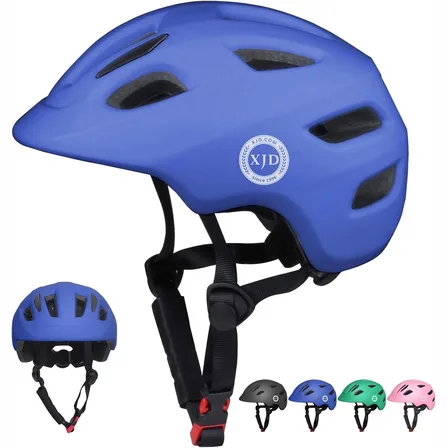
Blue XJD Kids' Bike Helmet, Adjustable Fit – Sizes XS & S
The Blue XJD Kids' Bike Helmet is a lightweight, adjustable helmet for toddlers …$20.39