

How does a bicycle work for kids
A bicycle works for kids when pedaling turns the rear wheel, steering guides the front wheel, and brakes slow both bike and rider—and when every control fits the child.
What happens when a child rides?
The child pushes the pedals in circles. That motion travels through the bicycle’s drive system and rotates the rear wheel, which pushes the bicycle forward. Faster pedaling generally makes the wheel turn faster.
The handlebars turn the front wheel. Small, smooth steering movements change direction, while looking ahead helps the child hold a steadier line. The wheels keep rolling most predictably when the rider balances their body over the bicycle rather than making sudden corrections.
Brakes reduce wheel rotation so the bicycle slows. The exact controls and operating procedure depend on the bicycle, so teach the child using its product manual. Before riding, confirm that the child can reach, operate and release every fitted brake control without losing their grip or changing to an awkward hand position.
Fit makes those parts usable
A bicycle may function mechanically yet still be difficult for a child to control. Measure the child’s standing height and inseam, then have them try the actual bicycle. Check that they can stand over it appropriately, mount and dismount without struggling, reach the handlebars comfortably, turn them without overreaching, and control the brakes.
Do not choose an oversized bicycle merely to allow room for growth. Age is only a starting point; measured height, inseam, reach, brake control and current confidence decide whether the bicycle works for this rider now.
Compare the wheel-size starting points
| Wheel size | Age starting point | Rider-height starting point |
|---|---|---|
| 12 Inch | 3–4 | 34–40 in / 86–102 cm |
| 14 Inch | 3–6 | 37–45 in / 94–114 cm |
| 16 Inch | 4–7 | 40–48 in / 102–122 cm |
| 18 Inch | 5–9 | 43–52 in / 109–132 cm |
| 20 Inch | 7–12 | 48–60 in / 122–152 cm |
| 24 Inch | 10–14 | 54–64 in / 137–163 cm |
| 26 Inch | Youth and adults | Over 60 in / 153 cm |
Overlapping ranges are intentional starting points, not proof that two sizes fit equally. If a child falls within more than one range, compare the real bicycles and favor confident control over extra growing room. If the child falls outside a listed range, do not force the choice based on age.
How training wheels change the job
Training wheels support the bicycle at very low speeds and can let a child concentrate on pedaling, steering and stopping before balancing independently. They do not remove the need to steer, brake, wear a helmet or learn awareness of the riding area.
Set-up details can affect how the bicycle behaves. For installation, adjustment, compatibility, fastener torque, maintenance and removal, follow the exact product manual or use a qualified bicycle mechanic. Do not guess at settings.
Where the supplied bicycles are relevant
The supplied catalog choices help illustrate how the same basic bicycle operation can be considered across 12 Inch, 14 Inch and 16 Inch options with training wheels. They are relevant only after the child’s measurements and hands-on control check point toward one of those sizes.
 Black XJD Kids' BMX Bicycle with Training Wheels
A Kids' BMX Bike offered in 12 Inch, 14 Inch and 16 Inch SKU labels with training wheels; relevant when the rider’s measurements and hands-on fit check support one of those sizes.
 Pink Girls' 12/14/16" Bike by XJD – Basket & Doll Seat
A Training Wheel Bike offered in 12 Inch, 14 Inch and 16 Inch SKU labels; its exact title also identifies a basket and doll seat. Confirm size through an individual fit check.
Black XJD Kids' BMX Bicycle with Training Wheels is categorized as a Kids' BMX Bike and has 12 Inch, 14 Inch and 16 Inch SKU labels. Pink Girls' 12/14/16" Bike by XJD – Basket & Doll Seat is categorized as a Training Wheel Bike, also with 12 Inch, 14 Inch and 16 Inch SKU labels.
Based only on the supplied facts, both cover the same three labeled wheel-size choices and include training wheels. The second title also identifies a basket and doll seat. The catalog does not supply enough information to compare price, weight, materials, brake type, load limits, assembly, certification or other components. Check each exact product page and manual for those details.
Neither supplied product is a substitute when the fit check points to 18, 20, 24 or 26 Inch. In that case, treat these products only as smaller-wheel comparison points and continue looking for the measured size.
What to do before the first ride
- Measure standing height and inseam, then select a wheel-size starting point from the table.
- Have the child try the bicycle and verify stand-over clearance, comfortable reach, steering control and brake operation.
- Follow the exact manual for assembly, adjustment, maintenance, compatibility, load limits and torque, or ask a qualified bicycle mechanic.
- Use a properly fitting bicycle helmet. It should sit level, with straps adjusted according to the helmet manufacturer’s instructions.
- Begin in a controlled riding area where the child can practise starting, pedaling, steering and stopping.
The practical decision is simple: choose the bicycle on which this child can make the pedals, steering and brakes work together confidently today—not the one they may grow into later.
Bikes for your next adventure
-

XJD Boys 12/14/16" Training Wheel Bike – Blue
The XJD Boys Bike in Blue is a training wheel bike for riders 71–122 cm tall—rou…$169
$199 -
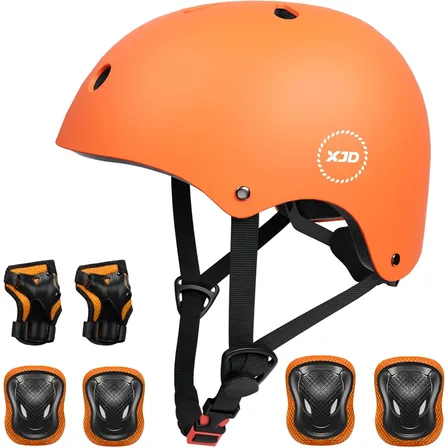
Orange Kids Helmet & Pad Set by XJD – Sizes S & M
The Orange XJD Kids Helmet & Pad Set is built for children around 3 to 8 years o…$24.64
-

Kids Bike Helmet by XJD for Boys & Girls – Black, Blue, Green, Pink, Purple
The XJD Kids Bike Helmet covers a wide 2-to-8-year age range thanks to two head-…$59.99