

How does a child bike seat attached
A child bike seat attaches to a compatible bicycle with its manufacturer-supplied mounting system—usually at the frame, rear rack or front of the bike.
Identify the seat’s attachment type
Start with the child-seat manual and identify the exact mounting system. A rear frame-mounted seat uses a dedicated bracket on a permitted part of the adult bicycle’s frame. A rack-mounted seat connects only to a rear rack that the seat manufacturer declares compatible. A front-mounted seat uses its specified front bracket or support.
These systems are not interchangeable. Do not improvise with generic clamps, substitute hardware or a rack whose compatibility and load limit are unknown. Use every required part in the orientation specified by the manufacturer. If the manual is missing, the mount does not match the bicycle, or any instruction is unclear, stop and ask a qualified bicycle mechanic.
What to measure and compare
Before installation, record the bicycle make and model, frame shape, frame-tube dimensions at the proposed mounting point, and the available clearance around cables, brakes, wheels and moving parts. For a rack mount, identify the rack model and its stated load limit. Also note the child’s current weight and compare it with every limit in the seat, mount, rack and bicycle manuals.
- Compatibility: Confirm that the seat maker permits the bicycle, frame or rack type.
- Mounting space: Compare the measured attachment area with the manual’s permitted dimensions.
- Clearance: Check that the installed seat, child’s feet and straps cannot contact a wheel or interfere with steering, pedalling, braking or cables.
- Limits: Follow the lowest applicable load limit stated by the manufacturers.
- Hardware: Use the supplied fasteners and the exact tightening sequence and torque in the product manual.
No universal measurement or torque applies to every child seat. Those values must come from the exact manuals, not from a general article.
How to attach and check it
- Stabilise the bicycle and inspect the proposed mounting area for damage or obstruction.
- Fit the manufacturer-supplied bracket, rack interface or front mount exactly as its manual directs.
- Secure the seat and any required retention device, then apply the manual’s specified tightening values.
- Check wheel, brake, cable, pedal and steering clearance through their full normal movement.
- With no child aboard, confirm that the seat cannot lift, slide, rotate or release unintentionally.
- Have a qualified bicycle mechanic inspect the installation if compatibility, rack capacity, hardware condition or positioning remains uncertain.
Recheck the mount before each ride and follow the manual’s inspection and maintenance schedule. A properly fitted bicycle helmet should sit level and use its straps according to the helmet manufacturer’s instructions.
Are the supplied XBikes products relevant?
The supplied catalog items are complete children’s bicycles, not identified child-carrier seats or verified host bicycles for one. They help distinguish a child riding independently from a child being carried, and their wheel sizes provide fit comparison points only. They do not establish seat-mount compatibility.
 Black XJD Kids' BMX Bicycle with Training Wheels
A children’s BMX bicycle offered in 12 Inch, 14 Inch and 16 Inch labels. It is relevant for independent-rider sizing comparisons, not as a verified child-seat mount.
 24-Inch Purple XJD Beach Cruiser Bike with U-Brake
This 24-inch beach cruiser provides an independent-rider size comparison. The supplied facts do not establish compatibility with any frame-mounted, rack-mounted or front-mounted child seat.
 Blue XJD Freestyle BMX Bike, 20-Inch – No Pegs
This 20-inch kids’ BMX bicycle is a comparison point for a child riding independently. No supplied catalog fact verifies it as compatible with a child-carrier seat.
Black XJD Kids' BMX Bicycle with Training Wheels is offered in 12 Inch, 14 Inch and 16 Inch labels. Blue XJD Freestyle BMX Bike, 20-Inch – No Pegs supplies a 20-inch comparison, while 24-Inch Purple XJD Beach Cruiser Bike with U-Brake supplies a 24-inch comparison. None should be chosen as a child-seat carrier without explicit approval in both the bicycle and seat manuals.
If the child will ride instead
Use measured height as the starting point, then check inseam, stand-over room, reach, brake control and confidence on the actual bicycle. Do not buy an oversized bicycle merely for growth.
| Wheel label | XBikes starting point |
|---|---|
| 12 Inch | Ages 3–4; 34–40 in / 86–102 cm |
| 14 Inch | Ages 3–6; 37–45 in / 94–114 cm |
| 16 Inch | Ages 4–7; 40–48 in / 102–122 cm |
| 20 Inch | Ages 7–12; 48–60 in / 122–152 cm |
| 24 Inch | Ages 10–14; 54–64 in / 137–163 cm |
Age is only a starting point; an individual fit check takes priority. The next decision is therefore specific: if carrying the child, match the seat’s mounting requirements to measured bicycle details and both manuals; if the child will ride, measure the rider and arrange a hands-on fit check.
Bikes for your next adventure
-
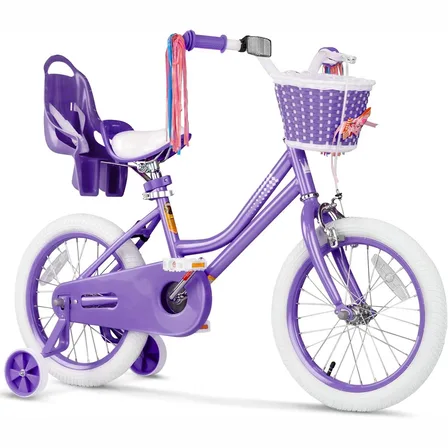
XJD Girls Bike for Kids Ages 3-8, 12/14/16 Inch with Training Wheels – Purple
The XJD Girls Bike in Purple is a training-wheel bicycle for kids ages 3 to 8, f…$149
$169 -

Kids Bike Helmet by XJD for Boys & Girls – Black, Blue, Green, Pink, Purple
The XJD Kids Bike Helmet covers a wide 2-to-8-year age range thanks to two head-…$59.99
-

Kids Bike Helmet by XJD for Girls – Pink
The XJD Kids Bike Helmet in Pink is a lightweight multi-sport helmet for girls r…$59.99
$99