

How much effort to pull a child trailer with bicycle
Pulling a child trailer usually takes modest extra effort once rolling on level ground, but starts, hills, headwinds and braking can feel substantially harder. There is no universal effort number: measure the full load, inspect the route and test the exact bicycle-and-trailer combination before carrying a child.
What determines the effort
The rider must move the bicycle plus the trailer, child and cargo. Added mass matters most when accelerating or climbing. On level ground, tire condition, wheel alignment, surface quality and wind often shape how heavy the trailer feels.
- Total moving load: Record the trailer, child and cargo as one combined load, following the trailer manual’s load method and limit.
- Route: Note hills, loose surfaces, sharp turns, frequent stops and exposed windy sections.
- Bicycle setup: Check tire inflation, brakes, gears and wheel condition according to the relevant manuals.
- Trailer condition: Poor tire pressure, rubbing wheels or incorrect assembly can add drag. Follow the exact manual or ask a qualified bicycle mechanic.
A geared bicycle can make starts and climbs more manageable by letting the rider pedal at an easier resistance, although it does not remove the added load. The rider also needs enough braking control for the complete combination.
Measure before comparing bicycles
Begin with the trailer manufacturer’s compatibility and load information. Identify the required hitch type and approved attachment point; a rack or visible frame feature is not proof that a trailer can be connected there. Do not improvise an attachment or invent a torque setting.
Then compare candidate bicycles using the same trailer load and a short, controlled route without a child aboard. Include a smooth start, a gentle incline, turns and a complete stop. The useful comparison is whether the rider can start without wobbling, maintain a comfortable cadence, steer precisely and stop with control.
If the brakes feel weak, the hitch moves, a wheel rubs, or the bicycle becomes difficult to balance, stop. Check both manuals and have a qualified bicycle mechanic assess assembly and compatibility before proceeding.
How the supplied bicycle helps the comparison
The XJD Kids Beach Cruiser Bicycle, Rear Rack & V-Brakes, Mint Green is offered with 20 Inch, 24 Inch and 26 Inch SKU labels. Those sizes can help you compare rider fit, while the listed rear rack and V-Brakes identify features to inspect. They do not establish trailer compatibility, braking capacity, a load limit or towing suitability; those answers must come from the exact bicycle and trailer manuals or a qualified mechanic.
These catalog options are relevant as size and control comparison points for the person who would pull the trailer, especially where a youth or adult rider is being fitted. They are not substitutes for compatibility approval or a loaded handling test.

Fit the towing rider first
A towing rider needs stable stand-over clearance, comfortable reach and confident access to the brakes. Have the rider try the bicycle rather than choosing extra size for growth. Height is only a starting point: inseam, reach, brake control and current confidence take priority over age.
- 20 Inch: XBikes starting point is ages 7–12 and rider height 48–60 in / 122–152 cm.
- 24 Inch: XBikes starting point is ages 10–14 and rider height 54–64 in / 137–163 cm.
- 26 Inch: XBikes starting point is youth and adults over 60 in / 153 cm.
These ranges do not prove that any size fits a particular rider. A rider near an overlap should try the relevant sizes and compare stand-over, reach, brake operation and low-speed confidence. Any age wording in a catalog title would be only a label, not fit evidence.
Account for stopping and passenger safety
Added load changes more than pedaling effort: it also increases the importance of early, controlled braking and generous space. Practice stopping without a passenger, away from traffic, and avoid a route whose descents, turns or surfaces exceed the rider’s control.
Follow the trailer manual for passenger restraints, seating, permitted occupants, load placement and operating restrictions. Follow each product manual for assembly, maintenance, compatibility and limits. A bicycle helmet must fit properly, sit level and use its straps according to the manufacturer’s instructions. Apply that fit check to every required helmet rather than relying only on its labeled size.
Make the go-or-no-go decision
- Confirm in both exact manuals that the bicycle, hitch and trailer are compatible.
- Measure the child-and-cargo load as directed and keep it within every stated limit.
- Fit the towing rider by height, inseam, reach, brake control and confidence.
- Test assembly, starting, climbing, turning and stopping without the child aboard.
- Add the child only when the hitch stays secure and the rider can control the full combination; otherwise choose another compatible setup or ask a qualified mechanic.
The right effort is not a promised number—it is a load the fitted rider can repeatedly start, steer and stop on the intended route while staying within every manual’s limits.
Bikes for your next adventure
-

Kids Bike Helmet by XJD for Girls – Pink
The XJD Kids Bike Helmet in Pink is a lightweight multi-sport helmet for girls r…$59.99
$99 -
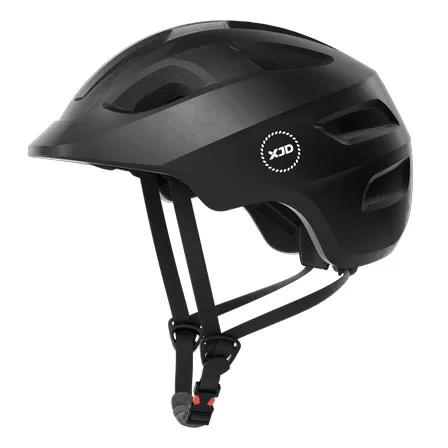
Kids Multi-Sport Bike Helmet by XJD – Black
7 reviews
The XJD Kids Multi-Sport Bike Helmet in Black is a lightweight, adjustable helme…$59.99
$49 -
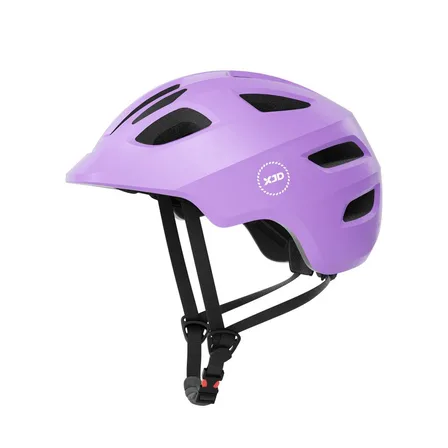
Girls' Bike Helmet from XJD – Purple
The XJD kids bike helmet in purple is a multi-sport helmet built for toddlers an…$59.99
$49