

How to buy a bicycle for a child
Measure your child’s height and inseam, then choose a wheel-size starting point and confirm the bicycle fits in person. Buy only when the child can stand over, reach, steer and brake with control; never choose an oversized bicycle merely to allow room for growth.
Measure the rider before comparing bicycles
Have the child wear the shoes they will normally use for riding. Measure total height while they stand straight against a wall. For inseam, measure from the floor to the crotch with their feet slightly apart. Record both measurements rather than relying on age or clothing size.
Height narrows the wheel-size choices, while inseam helps you judge stand-over clearance and whether the child can get on and off comfortably. Age is only a starting point because children of the same age can differ substantially in size, coordination and confidence.
Use wheel size as a starting point
| Wheel size | Starting age | Rider height |
|---|---|---|
| 12 Inch | 3–4 | 34–40 in / 86–102 cm |
| 14 Inch | 3–6 | 37–45 in / 94–114 cm |
| 16 Inch | 4–7 | 40–48 in / 102–122 cm |
| 18 Inch | 5–9 | 43–52 in / 109–132 cm |
| 20 Inch | 7–12 | 48–60 in / 122–152 cm |
| 24 Inch | 10–14 | 54–64 in / 137–163 cm |
| 26 Inch | Youth and adults | Over 60 in / 153 cm |
Overlapping ranges are intentional. If your child falls into two ranges, do not automatically select the larger size. Compare both through an individual fit check and favor the bicycle the child can presently control with greater confidence.
Perform the fit and control check
Have the child try the bicycle rather than deciding from the size label alone. Check these points before buying:
- Stand-over: The child should be able to straddle the bicycle without the frame preventing a stable stance.
- Mounting and stopping: They should be able to get on, get off and come to a controlled stop without struggling against the bicycle’s size.
- Reach: The handlebars should be reachable without excessive stretching, locked elbows or an awkwardly folded posture.
- Steering: The child should turn the handlebars while remaining balanced and in control.
- Brake control: They must be able to reach and operate the bicycle’s actual braking controls reliably.
- Confidence: Watch for hesitation caused by the bicycle feeling tall, long or difficult to manage.
A child who cannot complete these checks needs a different fit, even when their age and height appear inside a listed range. Do not assume that a seat adjustment can correct every reach or control problem.
Compare the supplied XBikes options
These catalog options help when your fit check points to a training-wheel bicycle in one of their listed wheel sizes. They let you compare 12, 14 and 16 Inch choices across all three products, with one additional 20 Inch option; the titles and listed sizes do not replace trying the bicycle.
 Light Pink XJD Girls' Bicycle with Basket & Training Wheels
Relevant when the fit check indicates 12, 14, 16 or 20 Inch wheels. It is a training-wheel bicycle, and its catalog title also identifies a basket.
 Blue XJD Girls Bike with Training Wheels – 12/14/16 Inch
A training-wheel bicycle to compare when the rider’s measurements and hands-on fit check point to a listed 12, 14 or 16 Inch size.
 XJD Boys 12/14/16" Training Wheel Bike – Blue
Listed as a blue training-wheel bicycle in 12, 14 and 16 Inch sizes. The title’s gender wording is not fit evidence; use measurements and control checks.
Light Pink XJD Girls' Bicycle with Basket & Training Wheels is listed in 12, 14, 16 and 20 Inch sizes. It is the only supplied option with a 20 Inch SKU label and the only title that mentions a basket.
Blue XJD Girls Bike with Training Wheels – 12/14/16 Inch is listed in 12, 14 and 16 Inch sizes. XJD Boys 12/14/16" Training Wheel Bike – Blue has the same three listed size labels. Their gendered wording is part of each catalog title, not evidence of fit; choose according to measurements, control and the child’s preference.
None of these supplied products is a direct catalog match if the fit check calls for 18, 24 or 26 Inch wheels. If 20 Inch is indicated, only the light pink model has that supplied SKU label. Availability of a size label still does not prove that its geometry, reach or braking controls suit an individual rider.
Include the helmet and exact setup instructions
Choose a bicycle helmet that fits properly, sits level on the child’s head and has straps adjusted according to its manufacturer’s instructions. Recheck the helmet each time the child rides, especially after adjustments or growth.
Assembly and adjustment details can vary. Follow the exact product manual for assembly, maintenance, load limits, compatibility and torque requirements. If the instructions are unavailable, unclear or beyond your experience, use a qualified bicycle mechanic. Do not improvise technical specifications.
Make the purchase decision
- Measure height and inseam.
- Use the table to shortlist wheel sizes.
- Have the child try the shortlisted bicycle or bicycles.
- Confirm stand-over, mounting, reach, steering, braking and present confidence.
- Reject any bicycle that is oversized or difficult to control, even if it offers growing room.
Buy the bicycle only after the measured size and hands-on check agree. If they do not, pause the purchase and compare another size rather than asking the child to grow into an unsuitable bicycle.
Bikes for your next adventure
-

Kids Bike Helmet by XJD for Boys & Girls – Black, Blue, Green, Pink, Purple
The XJD Kids Bike Helmet covers a wide 2-to-8-year age range thanks to two head-…$59.99
-
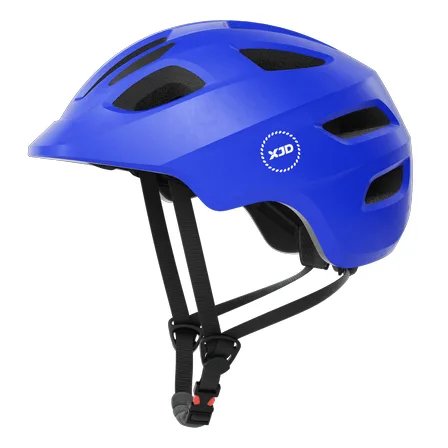
Blue XJD Kids Bike Helmet for Boys & Girls
The Blue XJD Kids Bike Helmet is a lightweight, adjustable multi-sport helmet fo…$59.99
$99 -
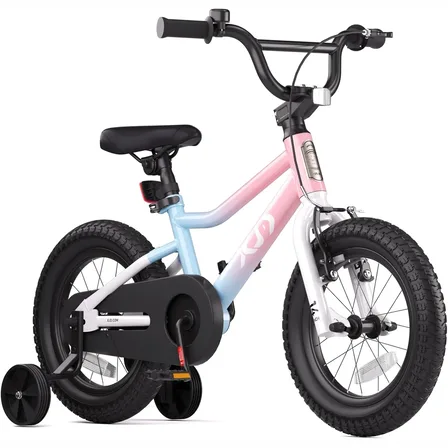
XJD Girls BMX Bike 12/14/16 Inch with Training Wheels – Pink Blue
The XJD Girls BMX Bike in Pink/Blue is built as a first pedal bike for kids roug…$99.99
$119.99