

How to buy a bike for a toddler
To buy a bike for a toddler, measure the child’s height and inseam, then choose the smallest wheel size they can stand over, reach and control comfortably. Never size up simply to allow room for growth.
Measure the rider before comparing bikes
Measure height without shoes, with the child standing straight against a wall. Measure inseam from the floor to the crotch while the child stands with feet slightly apart. Record both measurements in inches or centimetres and take them when shopping.
Height identifies a useful wheel-size starting point, while inseam helps you assess stand-over clearance and whether the child can place their feet down confidently. Age is only a rough guide because toddlers of the same age can differ considerably in size, coordination and confidence.
Use wheel size as a starting point
| Wheel size | XBikes age guide | Rider height |
|---|---|---|
| 12 Inch | Ages 3–4 | 34–40 in / 86–102 cm |
| 14 Inch | Ages 3–6 | 37–45 in / 94–114 cm |
| 16 Inch | Ages 4–7 | 40–48 in / 102–122 cm |
For most toddler purchases, these are the relevant starting sizes. If the child is shorter than the 12-inch starting range, do not force a fit based on age or the desire to buy a bicycle now. Look for an appropriately smaller option and assess it in person. The larger 18-, 20-, 24- and 26-inch ranges are not normal toddler starting points under the supplied XBikes standard.
When height overlaps two rows, begin by trying the smaller wheel size. Move up only if the child still has suitable stand-over clearance, an easy reach and full control. A larger wheel label does not prove that the complete bicycle will fit.
Perform the fit check with the child
Have the toddler try the actual bicycle rather than relying on a chart alone. The American Academy of Pediatrics advises against buying an oversized bike for growth and recommends checking stand-over position, control and brake reach.
- Stand-over: Ask the child to straddle the bicycle with both feet on the ground. They should not be pressed against the frame or forced onto tiptoes.
- Starting and stopping: Check that they can get into position, put their feet down and stop without panic or an adult holding the bicycle upright.
- Reach: Their hands should meet the controls without an extreme forward stretch, locked elbows or a twisted posture.
- Brake control: If the bicycle has hand-operated controls, confirm that the child can reach and operate them. Follow the exact product manual for the fitted system.
- Confidence: Watch for relaxed steering and attention to the path. A technically possible fit is not useful if the size overwhelms the rider.
Compare the supplied XBikes options
The two catalog options help because their available wheel-size labels cover different parts of the toddler-relevant range: one includes a 12-inch choice, while both include 14- and 16-inch choices for riders whose measurements and trial fit support them.
 Girls' Training Wheel Bike by XJD with Basket – Purple
Available in 14 Inch, 16 Inch and 20 Inch labels. Its 14 Inch option may be relevant for a measured toddler within that starting range who passes the full fit check.
 Flower Pink XJD Girls Bike with Doll Seat & Basket
The only supplied option with a 12 Inch SKU label; it also comes in 14 Inch and 16 Inch. Its relevance still depends on the toddler’s measurements and individual fit check.
Option beginning at 12 inches
Flower Pink XJD Girls Bike with Doll Seat & Basket is offered in 12 Inch, 14 Inch and 16 Inch SKU labels. Among the supplied products, it is the only one with a 12-inch option, corresponding to the XBikes starting point of ages 3–4 and 34–40 in / 86–102 cm. The doll seat and basket are catalog features, not evidence of fit.
Option beginning at 14 inches
Girls' Training Wheel Bike by XJD with Basket – Purple is offered in 14 Inch, 16 Inch and 20 Inch SKU labels. Its 14-inch option starts at the XBikes guide of ages 3–6 and 37–45 in / 94–114 cm. Its 16- and 20-inch choices correspond to larger starting ranges, so they should not be selected merely to extend the years of use.
Both products are categorized as training wheel bikes. That classification can narrow the shopping format, but it does not establish that either bicycle suits a particular toddler. Compare the SKU label with measured height, then verify inseam, reach, brake operation and present confidence on the assembled bicycle.
Check setup and protective equipment
Before riding, follow the exact product manual for assembly, adjustment, maintenance, compatibility, load limits and torque. If the instructions are missing, unclear or beyond your experience, use a qualified bicycle mechanic. Do not improvise mechanical settings.
Choose a bicycle helmet that fits the individual child. U.S. Consumer Product Safety Commission guidance says it should fit properly, sit level and use its straps according to the helmet manufacturer’s instructions. Recheck the fit each time rather than assuming a familiar helmet remains correctly adjusted.
Make the buying decision
Take the measurements and the child to the fit check. Start with 12 inches at 34–40 in / 86–102 cm or 14 inches at 37–45 in / 94–114 cm, then buy only if the toddler can stand over, reach, steer and stop confidently. If no supplied size passes every check, neither supplied product is the right purchase yet.
Bikes for your next adventure
-

Kids Bike Helmet by XJD for Boys & Girls – Black, Blue, Green, Pink, Purple
The XJD Kids Bike Helmet covers a wide 2-to-8-year age range thanks to two head-…$59.99
-
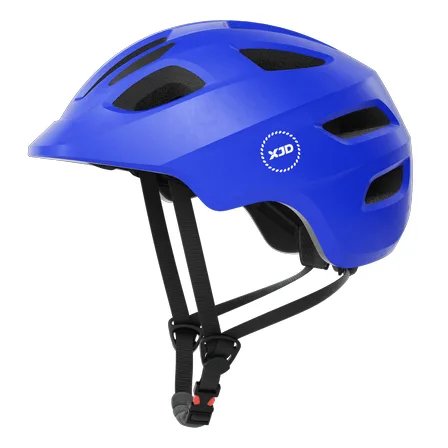
Blue XJD Kids Bike Helmet for Boys & Girls
The Blue XJD Kids Bike Helmet is a lightweight, adjustable multi-sport helmet fo…$59.99
$99 -
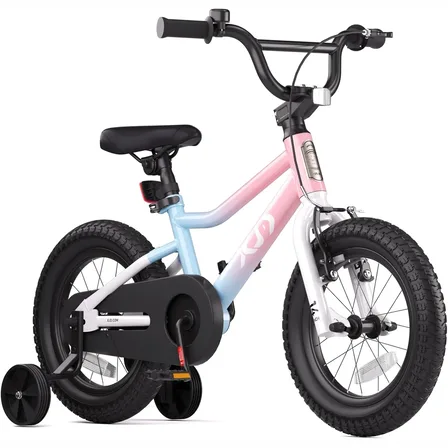
XJD Girls BMX Bike 12/14/16 Inch with Training Wheels – Pink Blue
The XJD Girls BMX Bike in Pink/Blue is built as a first pedal bike for kids roug…$99.99
$119.99