

How to buy bicycles for kids
To buy a bicycle for a child, measure the rider’s height and inseam, shortlist a wheel size, then check stand-over clearance, reach, braking and control in person. Never choose an oversized bicycle simply to allow room for growth.
Measure before comparing bicycles
Begin with the child’s current height, measured without shoes against a wall. Then measure inseam from the floor to the crotch while the child stands naturally. Height narrows the wheel-size range; inseam helps you judge whether the child can stand over a particular frame comfortably.
Record both measurements rather than relying on age, clothing size or another child’s bicycle. Two children of the same age can need different fits. Also note the rider’s present confidence: a cautious beginner may need easier ground contact and a less demanding reach than a confident rider of similar height.
Use wheel size only as a starting point
Compare the measured height with the XBikes starting points below. Overlapping ranges are intentional. When a child falls into two ranges, the answer comes from trying the actual bicycles—not automatically selecting the larger wheels.
| Wheel size | Starting age | Rider height |
|---|---|---|
| 12 Inch | 3–4 | 34–40 in / 86–102 cm |
| 14 Inch | 3–6 | 37–45 in / 94–114 cm |
| 16 Inch | 4–7 | 40–48 in / 102–122 cm |
| 18 Inch | 5–9 | 43–52 in / 109–132 cm |
| 20 Inch | 7–12 | 48–60 in / 122–152 cm |
| 24 Inch | 10–14 | 54–64 in / 137–163 cm |
| 26 Inch | Youth and adults | Over 60 in / 153 cm |
Age is only a rough prompt. Prioritize measured height, inseam, reach, brake control and current confidence. If measurements sit near a boundary, compare both candidate sizes through an individual fit check.
Have the child try each candidate
The American Academy of Pediatrics advises having the child try the bicycle and avoiding an oversized model bought for future growth. During the trial, work through these checks:
- Stand-over: With the child straddling the frame and feet on the ground, confirm there is comfortable clearance rather than contact or a precarious stance.
- Seated position: Check that the child can settle onto the seat, start and stop without struggling, and place feet as needed for their skill level.
- Reach: The handlebars should be reachable without an extreme stretch, locked arms or an awkwardly folded posture.
- Braking: Ask the child to operate the bicycle’s brakes. They must be able to reach and control them reliably with their hands in a stable riding position.
- Overall control: Look for calm steering, manageable starts and stops, and the ability to handle the bicycle without it overwhelming the rider.
A larger model that fails any check is not the right purchase today, even if its age band appears suitable. Choose for present control; reassess sizing as the child grows.
When the supplied catalog option is relevant
The Purple XJD Girls' Bike with Doll Seat & Basket is cataloged under Training Wheel Bikes and is offered with 12 Inch, 14 Inch and 16 Inch SKU labels. It is relevant when the rider’s measured height points toward one of those three starting ranges and the family is specifically comparing a training-wheel bicycle. The three labels make it possible to shortlist adjacent sizes where the height ranges overlap, but they do not replace trying the selected bicycle.
These catalog options help answer how to buy by giving you three size labels to compare after measuring the child, followed by the same stand-over, reach, brake-control and confidence checks required for any candidate.

This product is not the relevant supplied option when measurements indicate 18 Inch, 20 Inch, 24 Inch or 26 Inch wheels, or when a training-wheel bicycle is not what the rider needs. Its title and category also do not establish fit, brake type, construction, weight, load capacity or suitability for a particular child.
Check setup and helmet fit before riding
For assembly, adjustment, maintenance, load limits, compatibility and torque, follow the exact product manual. If the instructions are missing, unclear or beyond your experience, use a qualified bicycle mechanic rather than improvising a procedure or specification.
Add a properly fitting bicycle helmet to the purchase decision. U.S. Consumer Product Safety Commission guidance says the helmet should fit properly, sit level on the head and use its straps according to the helmet manufacturer’s instructions. A helmet’s age label or appearance is not a substitute for checking its actual fit.
Make the buying decision
Take the child’s height and inseam measurements to the comparison, shortlist the corresponding wheel size or two overlapping sizes, and have the child try each bicycle. Buy only when the child has comfortable stand-over clearance, a natural reach, reliable brake control and confident present-day handling. For the supplied product, proceed only if 12 Inch, 14 Inch or 16 Inch is supported by that complete fit check.
Bikes for your next adventure
-

Kids Bike Helmet by XJD for Boys & Girls – Black, Blue, Green, Pink, Purple
The XJD Kids Bike Helmet covers a wide 2-to-8-year age range thanks to two head-…$59.99
-
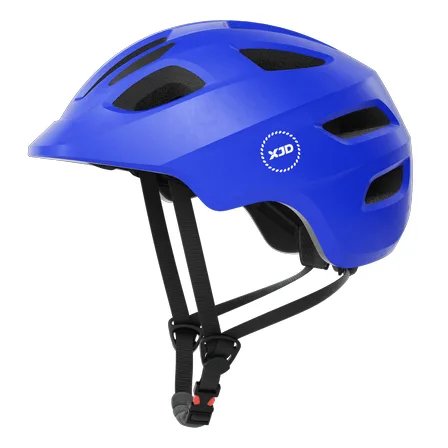
Blue XJD Kids Bike Helmet for Boys & Girls
The Blue XJD Kids Bike Helmet is a lightweight, adjustable multi-sport helmet fo…$59.99
$99 -
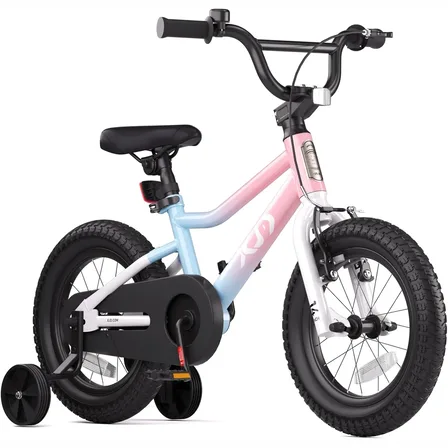
XJD Girls BMX Bike 12/14/16 Inch with Training Wheels – Pink Blue
The XJD Girls BMX Bike in Pink/Blue is built as a first pedal bike for kids roug…$99.99
$119.99