

How to carry a kids bike while riding a bike
Carry a kids bike with a purpose-built, compatible cycle rack, cargo bike, or bicycle-towing system—never by holding it while you ride. Measure the child’s bicycle first, compare those measurements with the carrier’s limits, and secure it exactly as the carrier and bicycle manuals direct.
Choose the transport method before measuring
A rack or cargo platform carries the entire bicycle off the ground. This can suit shorter bikes when the carrier provides secure support for the frame or wheels. A towing system leaves part of the kids bike rolling behind you. Use one only if its manufacturer explicitly approves the bicycle’s wheel size, geometry, connection point and total load.
Do not improvise with rope, a loose strap, a handlebar hook, or one-handed carrying. Keep the kids bike clear of your steering, pedals, brakes, wheels and the road. A child should not sit on a bicycle that is merely being transported; carrying a child requires a separately approved child-transport arrangement.
Measure the kids bike and your carrying bike
Record these values with both bicycles in their normal riding configuration:
- Kids-bike wheel size: read the marked size and confirm it against the carrier’s compatibility instructions.
- Overall length and width: include the tyres, pedals and handlebar at their widest points.
- Frame and attachment geometry: note the available tube shapes, axle area, seatpost area or other connection point specified by the carrier.
- Total bicycle weight: weigh the bike with any basket, bottle, stand or other item that will remain attached.
- Clearance on the carrying bike: check space around the rear wheel, heel path, brakes, cables, lights and steering.
Compare every measurement with the exact carrier manual. Its approved load, wheel range, attachment requirements and hardware matter more than appearance. If a limit or compatibility detail is missing, ask the manufacturer or a qualified bicycle mechanic rather than estimating.
Use wheel size to anticipate bulk, not compatibility
Wheel size helps you anticipate how much space a kids bike may occupy, but it does not prove that a rack or towing device fits. XBikes uses these starting points for rider fit:
| Wheel size | Starting rider range |
|---|---|
| 12 Inch | Ages 3–4; 34–40 in / 86–102 cm |
| 14 Inch | Ages 3–6; 37–45 in / 94–114 cm |
| 16 Inch | Ages 4–7; 40–48 in / 102–122 cm |
| 18 Inch | Ages 5–9; 43–52 in / 109–132 cm |
| 20 Inch | Ages 7–12; 48–60 in / 122–152 cm |
| 24 Inch | Ages 10–14; 54–64 in / 137–163 cm |
| 26 Inch | Youth and adults over 60 in / 153 cm |
These ranges help describe the likely change in bicycle size. They are not carrier specifications or a substitute for fitting the child. Prioritize measured height, inseam, reach, brake control and current confidence over age, and never buy an oversized bicycle merely for growth.
How the supplied catalog option helps
The 26-Inch XJD Beach Cruiser Bike for Girls – Purple, V-Brake provides a useful large-wheel comparison. Its available SKU labels include 20 Inch, 24 Inch and 26 Inch options in the listed colors, so those sizes illustrate why carrier clearance and approved wheel range must be checked separately. They are comparison points, not proof that any particular carrier fits.

The exact title identifies the featured configuration as Purple, 26 Inch and V-Brake. Do not infer its weight, dimensions, tubing, attachment compatibility or load limits from that title. Obtain those details from the exact product manual or have a qualified bicycle mechanic assess the bicycle and intended carrier together.
Fit, secure and inspect the setup
- Install the carrier using its supplied instructions and approved hardware. Follow every stated compatibility, load and torque requirement.
- Remove or secure loose accessories only as directed. Do not alter brake cables, frame parts or safety equipment to force a fit.
- Load the kids bike and engage every required cradle, clamp, pin and retention strap. Confirm that nothing can reach either bicycle’s wheels, drivetrain or brakes.
- Check that steering and braking remain unobstructed, lights and reflectors remain visible, and the carried bike cannot swing into traffic or the ground.
- Perform the manufacturer’s pre-ride checks, then begin in a traffic-free area at low speed. Stop promptly if the load shifts, rattles, affects control or reduces clearance.
Recheck the attachment during the trip as the carrier instructions require. Follow local road rules, because permitted bicycle width, lighting and towing arrangements can vary.
Decide whether to ride or use another vehicle
Ride only when the exact carrier approves both bicycles, every measurement is within its limits, the attachment is secure, and you can steer and brake confidently. Use another transport method if compatibility is uncertain, the bicycle obstructs controls or visibility, the load moves, or the route exceeds your confidence.
Your next step is simple: measure wheel size, total dimensions, weight and attachment geometry, then compare all four with one carrier manual. If every requirement cannot be confirmed, do not carry the kids bike on that setup.
Bikes for your next adventure
-

XJD Kids Bike for Girls – Pink, 12/14/16/20 Inch with Training Wheels
The XJD Kids Bike for Girls in Pink is a training-wheel bike built to carry your…$139
$159 -

XJD Boys 12/14/16" Training Wheel Bike – Blue
The XJD Boys Bike in Blue is a training wheel bike for riders 71–122 cm tall—rou…$169
$199 -
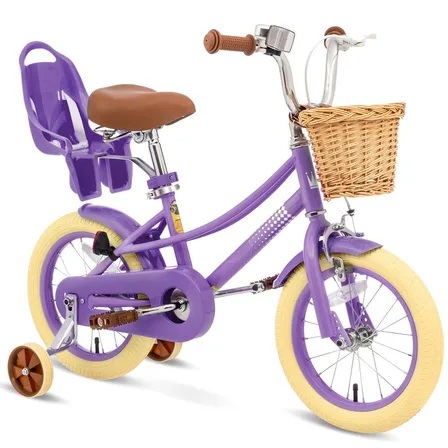
XJD Girls' Bike with Training Wheels, 12/14/16/20 Inch – Purple
The XJD girls' bike with training wheels in Purple is built to grow with your ri…$139
$159