

How to carry an older child on your bike
To carry an older child on your bike, first measure the child and compare their weight and size with the carrier’s limits and your bicycle’s compatibility. If any limit is exceeded—or steering, braking or balance becomes uncertain—do not carry them on that setup.
Measure before choosing a setup
Record the child’s current weight and height while they are wearing their usual riding clothes and shoes. Then find the exact permitted passenger weight, child-size range and total load limit in the manuals for both the bicycle and the carrying equipment. Include anything else the bike will carry, such as bags.
Do not estimate a carrier’s capacity from its appearance or assume that a child seat suitable last year remains suitable now. Older children may outgrow a seat by weight, body size, harness fit or available leg clearance. If a limit or compatibility statement is missing, ask the manufacturer or a qualified bicycle mechanic rather than improvising.
Compare the practical carrying options
A child seat is relevant only while the child fits it exactly and the bicycle is approved for its mounting method and load. A passenger-rated cargo or long-tail bicycle may accommodate a larger child, but only with the specified passenger equipment, contact points and load limits. A cycle trailer can separate the passenger load from the bicycle frame, yet the trailer’s own size, weight and bicycle-connection requirements still apply.
For any option, compare:
- The child’s weight and body dimensions with the equipment limits.
- The bicycle’s approved load and attachment points with the carrier requirements.
- Whether the child can remain securely positioned without feet, clothing or hands approaching moving parts.
- Whether the adult can mount, start, steer, stop and park the loaded bicycle confidently.
- Whether the setup complies with local passenger and helmet rules.
Check the complete setup, not just the carrier
Follow the exact bicycle and carrier manuals for assembly, compatible components, fastener torque, load limits and maintenance. These details are specific to the products and should not be guessed. Have a qualified bicycle mechanic inspect the combination if the manuals are unclear, the mounting points do not match, or the bicycle handles differently after installation.
Before riding in traffic, practise with the complete load in a quiet area. Check that you can hold the bike upright, start smoothly, turn without interference, brake under control and use the stand or parking system as intended. Stop if the bike flexes, an attachment moves, the child cannot stay properly positioned, or braking and steering no longer feel controlled.
Fit the child’s helmet correctly
The child should wear a bicycle helmet that fits properly. Following U.S. Consumer Product Safety Commission guidance, position it level and adjust its straps according to the helmet manufacturer’s instructions. Replace or stop using a helmet when its manufacturer says it should no longer be used.
Also check clothing and belongings before every trip. Secure loose straps, laces and garments away from wheels and other moving parts. Never add unapproved cushions, footrests, handles or restraints to make an outgrown carrier seem usable.
When a separate child’s bicycle is more relevant
If the child has outgrown the available passenger equipment, can ride independently and can be supervised appropriately, a correctly fitted bicycle may be the next option. This is a different decision from carrying them: wheel size does not establish whether a child can safely ride alone.
XBikes uses these starting points: 12 Inch for 34–40 in (86–102 cm), 14 Inch for 37–45 in (94–114 cm), 16 Inch for 40–48 in (102–122 cm), 18 Inch for 43–52 in (109–132 cm), 20 Inch for 48–60 in (122–152 cm), 24 Inch for 54–64 in (137–163 cm), and 26 Inch for youth and adults over 60 in (153 cm). Age bands are only secondary guides: 3–4, 3–6, 4–7, 5–9, 7–12 and 10–14 respectively through 24 Inch.
The Light Pink XJD Girls' Bicycle with Basket & Training Wheels is offered in 12 Inch, 14 Inch, 16 Inch and 20 Inch catalog options. Those sizes make it useful for comparing an independently ridden bicycle against the child’s measured height; it is not equipment for carrying a child as a passenger, and its listed sizes are not substitutes for an individually appropriate size.

Make the final fit decision in person
Have the child try any bicycle rather than buying an oversized model for growth. Following American Academy of Pediatrics guidance, check stand-over clearance, comfortable reach, control of the bicycle and the ability to reach and operate the brakes. Current confidence matters alongside height and inseam.
Your next step is therefore specific: weigh and measure the child, read the bicycle and carrier manuals together, and reject the passenger setup if any limit, attachment requirement or control check fails. If independent riding is the alternative, compare the measured height with the XBikes starting points and complete an individual fit check before choosing a wheel size.
Bikes for your next adventure
-

XJD Kids Bike for Girls – Pink, 12/14/16/20 Inch with Training Wheels
The XJD Kids Bike for Girls in Pink is a training-wheel bike built to carry your…$139
$159 -

XJD Boys 12/14/16" Training Wheel Bike – Blue
The XJD Boys Bike in Blue is a training wheel bike for riders 71–122 cm tall—rou…$169
$199 -
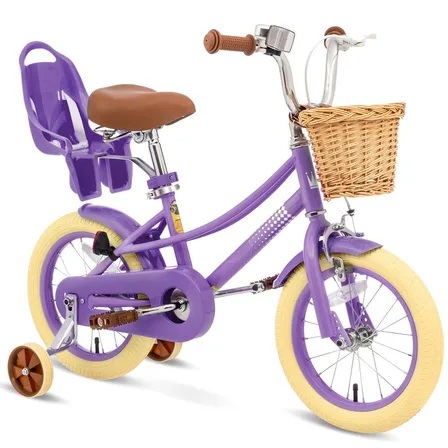
XJD Girls' Bike with Training Wheels, 12/14/16/20 Inch – Purple
The XJD girls' bike with training wheels in Purple is built to grow with your ri…$139
$159