

How to get a child to ride a bike
To get a child to ride a bike, remove pressure, choose a bike they can control, practise one skill at a time, and stop while the experience is still positive.
Begin with the reason they are not riding
Ask one calm question: What part feels difficult? The answer determines the next step. Fear of falling calls for low-pressure balance practice. Trouble starting calls for help with the first push. Difficulty stopping means brake control should come before riding farther. A child who simply does not want to ride may need choice and time, not more persuasion.
Set a small goal the child can accept, such as sitting on the bike, walking it forward, or making one controlled stop. Avoid racing siblings, surprise pushes, or promises that training aids will make every concern disappear. Let the child decide when to repeat a step.
Measure the rider before choosing a bike
Measure the child's height without shoes. Also measure inseam from the floor to the crotch while the child stands straight. These measurements help narrow the options, but the child must still try the bicycle.
| Wheel size | XBikes starting age | Rider height |
|---|---|---|
| 12 Inch | 3–4 | 34–40 in / 86–102 cm |
| 14 Inch | 3–6 | 37–45 in / 94–114 cm |
| 16 Inch | 4–7 | 40–48 in / 102–122 cm |
| 18 Inch | 5–9 | 43–52 in / 109–132 cm |
| 20 Inch | 7–12 | 48–60 in / 122–152 cm |
| 24 Inch | 10–14 | 54–64 in / 137–163 cm |
| 26 Inch | Youth and adults | Over 60 in / 153 cm |
Use age only as a starting point. When ranges overlap, compare the actual fit and the child's confidence. Do not buy an oversized bicycle for future growth; extra size can make mounting, steering and stopping harder to manage.
Check control on the actual bicycle
Have the child try the bike before deciding. Check that they can stand over it without being forced against the frame, reach the handlebars without stretching, turn the bars while remaining balanced, and operate the brakes reliably. Their feet and legs should allow confident starts and stops in the setup permitted by the product manual.
If the child cannot manage the stand-over position, reach or brakes, reject that fit even when the age or height chart appears to match. Do not improvise assembly, adjustment or compatibility procedures: follow the exact product manual or ask a qualified bicycle mechanic.
Choose the simplest useful practice setup
The Black XJD Kids Bike for Boys – 12, 14 & 16 Inch Sizes is cataloged under Training Wheel Bikes and offers 12 Inch, 14 Inch and 16 Inch SKU labels. Those options are relevant when the rider's measured height points to one of those ranges and a training-wheel bike suits the child's current learning plan. They are comparison options, not proof of fit; the wording in the product title is a catalog label, not fit evidence.
These particular catalog options help because a parent can compare three adjacent starting sizes against the child's height, then verify stand-over clearance, reach, brake control and confidence on the selected bicycle.

This product is not a substitute when the child's measurements and control check indicate an 18 Inch, 20 Inch, 24 Inch or 26 Inch bicycle. Training wheels may support early pedaling practice, but they do not remove the need to learn starting, steering and controlled stopping.
Teach one action at a time
- Walking: Let the child walk the bicycle and learn its weight and steering response.
- Stopping: Practise using the brakes from very low speed until stopping is deliberate rather than surprising.
- Starting: Rehearse placing the pedals, pushing off and finding the second pedal without rushing.
- Looking: Encourage eyes toward the intended path instead of down at the front wheel.
- Linking skills: Combine a start, a short straight ride, a gentle turn and a controlled stop.
Use a level area away from traffic and obstacles. Keep sessions short enough that concentration remains good. If frustration rises, return to the last comfortable skill or finish for the day.
Make helmet fit part of every attempt
Use a bicycle helmet that fits the child properly. It should sit level, with its straps adjusted according to the helmet manufacturer's instructions. Recheck the fit rather than assuming a helmet still fits because it was used previously.
Also inspect the bicycle as directed by its manual before practice. For assembly, maintenance, load limits, compatibility and torque requirements, use the exact product instructions or a qualified bicycle mechanic rather than guessing.
Know what to do next
Measure height and inseam first, shortlist the matching wheel-size range, and let the child perform the stand-over, reach and brake checks. Then choose one skill for the next short session. If the bike cannot be controlled comfortably, change the fit—not the amount of pressure placed on the child.
Bikes for your next adventure
-
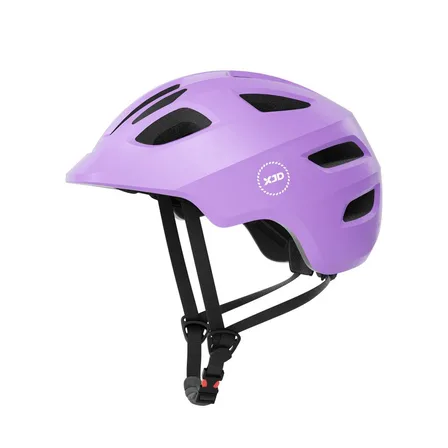
Girls' Bike Helmet from XJD – Purple
The XJD kids bike helmet in purple is a multi-sport helmet built for toddlers an…$59.99
$49 -

XJD Boys 12/14/16" Training Wheel Bike – Blue
The XJD Boys Bike in Blue is a training wheel bike for riders 71–122 cm tall—rou…$169
$199 -

Light Pink XJD Girls' Bicycle with Basket & Training Wheels
The Light Pink XJD Girls' Bicycle with Basket & Training Wheels is a retro-style…$109.99
$129.99