

How to get your child to ride a bike
To get your child riding, choose a bike they can control now, practise in small steps, and stop each session while confidence is still growing.
Measure before choosing a bike
Measure your child’s standing height and inseam while they wear the shoes they will use for riding. Age is only a starting point. Height narrows the wheel-size range, while inseam, reach, brake control and confidence determine whether a particular bicycle actually fits.
Use these XBikes starting points, then have your child try the bike:
| Wheel size | Starting age | Rider height |
|---|---|---|
| 12 Inch | 3–4 | 34–40 in / 86–102 cm |
| 14 Inch | 3–6 | 37–45 in / 94–114 cm |
| 16 Inch | 4–7 | 40–48 in / 102–122 cm |
| 18 Inch | 5–9 | 43–52 in / 109–132 cm |
| 20 Inch | 7–12 | 48–60 in / 122–152 cm |
| 24 Inch | 10–14 | 54–64 in / 137–163 cm |
| 26 Inch | Youth and adults | Over 60 in / 153 cm |
Do not buy an oversized bicycle for future growth. On the actual bike, check that your child can stand over it, reach the handlebar without straining, steer comfortably and operate the brakes reliably. If those checks fail, the age or height range does not make the bike suitable.
Remove the reasons they hesitate
Ask one simple question: What feels hard? The answer determines the next step. A child worried about falling needs balance practice and close support. One who cannot start needs repeated push-off practice. One who struggles to stop needs brake practice before riding farther. If the bike feels awkward or intimidating, return to the fit checks instead of treating reluctance as misbehaviour.
Pick a flat, open practice area away from traffic and obstacles. Use short sessions with one goal at a time. Avoid racing, surprise pushes or comparing siblings; predictable practice makes progress easier to recognise.
Teach the sequence in small pieces
- Walking control: Have your child walk beside the bike, turn it and bring it to a stop.
- Starting position: Practise getting seated, placing hands correctly and preparing to push off.
- Stopping: Rehearse braking at walking speed until the child can stop on request without panic.
- Balance and direction: Work on looking ahead and following a straight, short path.
- Pedalling: Add a few pedal turns, then a controlled stop. Increase distance only when the previous step feels repeatable.
Stay close enough to help, but reduce assistance as control improves. Praise a specific action—such as looking ahead or stopping smoothly—rather than demanding a complete independent ride.
Use safety equipment correctly
A bicycle helmet must fit properly, sit level and have its straps adjusted according to the helmet manufacturer’s instructions. Check the fit before every session. Choose a suitable riding area and supervise according to your child’s current control, not simply their age.
Before riding, follow the exact bicycle manual for assembly, maintenance and adjustment. If the instructions are missing, unclear or beyond your experience, use a qualified bicycle mechanic. Do not guess at compatibility, load limits or torque settings.
Compare the supplied bikes by fit and confidence
These catalog options help because they provide several wheel-size comparison points and include both training-wheel and cruiser categories. They do not replace an individual fit check, and an unavailable wheel size is not equivalent to a nearby one.
 XJD Boys & Girls BMX Bike with Training Wheels, 12/14/16" – Blue
A Kids’ BMX Bikes option with 12 Inch, 14 Inch and 16 Inch labels. Its training-wheel wording makes it relevant when added stability suits the child, subject to an individual fit and control check.
 XJD Pink Beach Cruiser for Girls – Rear Rack & V-Brake
A Beach Cruiser Bikes option offered in 20 Inch, 24 Inch and 26 Inch labels. Compare the rider’s measured height, reach and brake control with the distinct size starting points before choosing.
 Girls' Training Wheel Bike by XJD with Basket – Purple
A Training Wheel Bikes option with 14 Inch, 16 Inch and 20 Inch labels. It provides multiple comparison sizes for a child who may benefit from training wheels, but fit must be checked individually.
The XJD Boys & Girls BMX Bike with Training Wheels, 12/14/16" – Blue is a Kids’ BMX Bikes option offered in 12 Inch, 14 Inch and 16 Inch labels. Those sizes cover several smaller-rider starting points in the table, while the title’s training wheels may make it relevant when added stability matches the child’s current confidence.
The Girls' Training Wheel Bike by XJD with Basket – Purple is in the Training Wheel Bikes category and is offered in 14 Inch, 16 Inch and 20 Inch labels. Compare those distinct sizes against measured height and the child’s ability to stand over, reach, steer and brake; do not choose the larger label merely for growth.
The XJD Pink Beach Cruiser for Girls – Rear Rack & V-Brake is a Beach Cruiser Bikes option offered in 20 Inch, 24 Inch and 26 Inch labels. Its listed sizes make it relevant for taller riders within the supplied starting points. The V-brake wording in its title does not prove fit: your child still needs to demonstrate comfortable reach and reliable brake control.
If your child’s fit check indicates 18 Inch, none of these products supplies that exact label. Treat the 16 Inch and 20 Inch products only as nearest-size comparison points, not substitutes; another size is not equal to an 18 Inch bike.
Decide what to do next
First measure height and inseam, then identify the starting wheel size and arrange a real fit check. If your child can stand over the bike, reach comfortably, steer and brake with control, begin short step-by-step sessions. If not, change the bike or size before trying to persuade them to ride.
Bikes for your next adventure
-
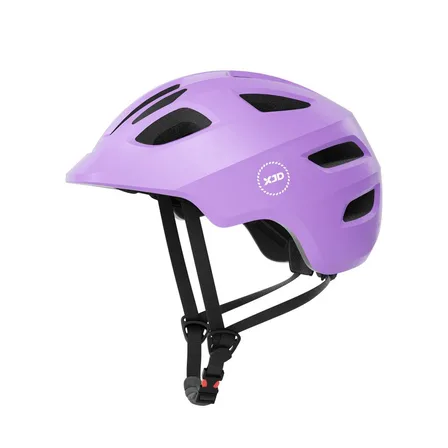
Girls' Bike Helmet from XJD – Purple
The XJD kids bike helmet in purple is a multi-sport helmet built for toddlers an…$59.99
$49 -

XJD Boys 12/14/16" Training Wheel Bike – Blue
The XJD Boys Bike in Blue is a training wheel bike for riders 71–122 cm tall—rou…$169
$199 -

Light Pink XJD Girls' Bicycle with Basket & Training Wheels
The Light Pink XJD Girls' Bicycle with Basket & Training Wheels is a retro-style…$109.99
$129.99