

How to get your child to ride their bike
To get your child to ride their bike, begin with a correctly fitted bicycle, let them progress without pressure, and practise one manageable skill at a time in a quiet, open area.
Measure first, then compare sizes
Measure your child’s standing height and inseam before choosing a bike. Height gives you a wheel-size starting point; inseam helps you judge stand-over clearance. Age is only a rough reference and should never override the child’s actual fit, reach, brake control or confidence.
| Wheel size | Starting age | Rider height |
|---|---|---|
| 12 Inch | 3–4 | 34–40 in / 86–102 cm |
| 14 Inch | 3–6 | 37–45 in / 94–114 cm |
| 16 Inch | 4–7 | 40–48 in / 102–122 cm |
| 18 Inch | 5–9 | 43–52 in / 109–132 cm |
| 20 Inch | 7–12 | 48–60 in / 122–152 cm |
| 24 Inch | 10–14 | 54–64 in / 137–163 cm |
| 26 Inch | Youth and adults | Over 60 in / 153 cm |
Where ranges overlap, compare both plausible sizes in person. Do not choose an oversized bicycle merely to leave room for growth. Your child should be able to stand over the bike, reach the controls comfortably, steer without stretching and operate the brakes confidently.
Make the first goal feel achievable
A reluctant child may be reacting to poor fit, fear of falling, difficult controls or pressure to perform. Ask what feels hard before beginning. The useful next step depends on the answer: adjust the fit if reaching is difficult, return to balance practice if falling is the worry, or shorten the session if frustration is building.
Choose a level, traffic-free practice area with plenty of clear space. Set one small goal for the session, such as sitting comfortably, walking the bike, gliding briefly or stopping at a chosen marker. End after a successful attempt instead of waiting until the child is exhausted.
Build control in a simple sequence
- Comfort: Let the child sit on the bike and become familiar with the handlebars and brakes.
- Balance: Practise moving slowly and looking ahead rather than down at the front wheel.
- Stopping: Make sure the child can reach and use the available brake controls before adding speed.
- Starting: Rehearse a controlled push-off over a short distance.
- Pedalling and turning: Add gentle pedalling, wide turns and predictable stopping points only after balance and braking are dependable.
Stay close enough to reassure without pulling the handlebars or forcing speed. Give one brief instruction at a time. If control deteriorates, return to the previous step rather than treating the attempt as a failure.
Use encouragement without creating pressure
Offer choices that preserve the child’s sense of control: where to practise, which marker to ride toward or whether to try once more. Praise a specific action such as looking ahead or making a controlled stop. Avoid comparisons with siblings or other children, because confidence develops at different rates.
If your child refuses, pause and identify the obstacle. A different practice location, a shorter session or another fit check may be more helpful than stronger persuasion. Pain, repeated loss of control or an inability to reach the brakes means it is time to stop and reassess the bicycle.
Check helmet fit and bicycle condition
Use a bicycle helmet that fits properly, sits level and has straps positioned according to the helmet manufacturer’s instructions. Before each practice, check that the bicycle appears ready to ride and that the child can operate its controls. Follow the exact bicycle manual for assembly, adjustment, maintenance, compatibility, load limits and torque specifications; use a qualified bicycle mechanic when the instructions are unclear or the bike needs repair.
When the supplied catalog option is relevant
The XJD Pink Beach Cruiser for Girls – Rear Rack & V-Brake is offered with 20 Inch, 24 Inch and 26 Inch SKU labels. Those three options provide useful comparison points when your child’s measured height falls within the corresponding XBikes starting ranges. The V-brake also makes brake reach and confident operation an essential part of the individual fit check. The rear rack does not help a child learn to ride; consult the exact product manual for its load limits and use.
These catalog options help answer the sizing part of the title by letting families compare three larger wheel-size starting points, but the label, color and listed size alone cannot establish fit or readiness.

This product is not relevant for a child who needs a 12, 14, 16 or 18 Inch starting point, and its larger options are not substitutes for those sizes. Even within the 20, 24 or 26 Inch height guidance, have the child try the bicycle and verify stand-over clearance, reach, steering control and brake use.
Decide what to do next
Measure height and inseam today, identify the matching starting range, and arrange a real fit check. Then choose one short practice goal based on what currently worries your child. Proceed only when they can control and stop the correctly fitted bike; otherwise adjust the fit, compare another size or ask a qualified bicycle mechanic for help.
Bikes for your next adventure
-
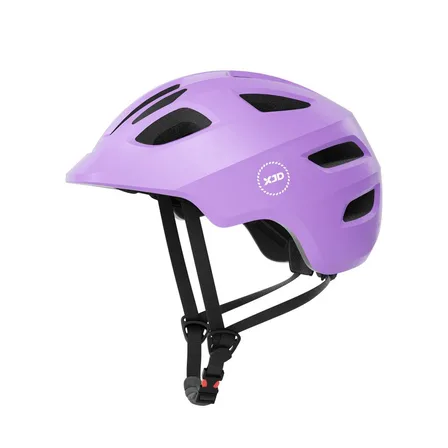
Girls' Bike Helmet from XJD – Purple
The XJD kids bike helmet in purple is a multi-sport helmet built for toddlers an…$59.99
$49 -

XJD Boys 12/14/16" Training Wheel Bike – Blue
The XJD Boys Bike in Blue is a training wheel bike for riders 71–122 cm tall—rou…$169
$199 -

Light Pink XJD Girls' Bicycle with Basket & Training Wheels
The Light Pink XJD Girls' Bicycle with Basket & Training Wheels is a retro-style…$109.99
$129.99