

How to help kids learn to ride a bike
Help a child learn to ride by choosing a correctly fitted bike, practising balance before pedalling, and building control in a quiet, open space.
Measure the rider before choosing a bike
Measure the child’s height and inseam while they are wearing the shoes they will ride in. Height gives you a wheel-size starting point; inseam helps you judge whether the child can stand over the bicycle comfortably. Then have the child try the actual bike.
Check that they can mount and dismount without struggling, reach the handlebar without stretching, steer while looking ahead, and operate the brakes confidently. Do not buy an oversized bicycle simply to allow room for growth. Age is only a rough starting point; measured fit, reach, brake control and current confidence matter more.
Use wheel size as a starting point
| Wheel size | Starting age | Rider height |
|---|---|---|
| 12 Inch | 3–4 | 34–40 in / 86–102 cm |
| 14 Inch | 3–6 | 37–45 in / 94–114 cm |
| 16 Inch | 4–7 | 40–48 in / 102–122 cm |
| 18 Inch | 5–9 | 43–52 in / 109–132 cm |
| 20 Inch | 7–12 | 48–60 in / 122–152 cm |
| 24 Inch | 10–14 | 54–64 in / 137–163 cm |
| 26 Inch | Youth and adults | Over 60 in / 153 cm |
Overlapping ranges are normal. When a child falls within more than one row, compare the actual bikes rather than automatically selecting the larger wheel. The right choice is the one the child can stand over and control now.
Teach balance before adding more tasks
Choose a flat, traffic-free area with plenty of clear space. Begin with the child seated and moving the bike forward using their feet. Ask them to look toward where they want to go, take longer gliding steps, and briefly lift both feet when they feel steady.
Keep sessions short enough that the child remains attentive. A useful progression is:
- Walk the bike and practise stopping on request.
- Glide with feet close to the ground.
- Steer around wide, visible markers.
- Start pedalling only after balance and stopping feel controlled.
- Practise starting, riding straight, turning and stopping as separate skills before joining them together.
Stay close enough to assist, but avoid pulling the handlebar because that removes the child’s chance to learn steering corrections. If you steady them, support the child rather than taking control of the bike.
Decide whether training wheels fit the lesson
Training wheels can help a hesitant beginner become familiar with sitting, pedalling and steering. They do not teach two-wheel balance in the same way as gliding, so consider them a temporary confidence aid rather than the finish line.
The supplied catalog options are relevant when you specifically want a training-wheel bicycle and the child’s individual fit check points to one of their listed sizes. The XJD Kids Bike for Girls – Pink, 12/14/16/20 Inch with Training Wheels offers 12, 14, 16 and 20 Inch labels. The XJD Pink Girls' Bike – Kids 12/14/16 Inch Training Wheel Bicycle offers 12, 14 and 16 Inch labels. Those labels allow comparison across several starting ranges, but they do not prove fit by themselves.
These particular catalog options help answer the learning question because both are training-wheel bikes, letting parents compare listed wheel sizes after measuring the rider and deciding whether temporary pedal support suits the child’s current confidence.
 XJD Kids Bike for Girls – Pink, 12/14/16/20 Inch with Training Wheels
A training-wheel bicycle offered with 12, 14, 16 and 20 Inch SKU labels; relevant when measured fit and the child’s confidence support one of those sizes.
 XJD Pink Girls' Bike – Kids 12/14/16 Inch Training Wheel Bicycle
A training-wheel bicycle offered with 12, 14 and 16 Inch SKU labels; useful as a comparison after checking the rider’s height, inseam, reach and brake control.
Neither supplied product lists an 18, 24 or 26 Inch option. If the fit check points to one of those sizes, these products are nearest-size comparison points only, not substitutes; another wheel size is not equivalent.
Set up each practice session safely
Use a bicycle helmet that fits properly, sits level, and has its straps adjusted according to the helmet manufacturer’s instructions. Before riding, confirm that the child can reach and use the brakes, steer freely, and place their feet where needed for the exercise.
Check the riding area for traffic, slopes, loose debris and fixed obstacles. An adult should supervise and give one instruction at a time. For bicycle assembly, maintenance, adjustments, compatibility, load limits or torque settings, follow the exact product manual or ask a qualified bicycle mechanic; do not guess.
Know when to progress or pause
Move forward when the child can repeat the current skill without being held: controlled gliding before pedalling, predictable stopping before gaining speed, and wide turns before tighter ones. Wobbling is part of learning, but repeated difficulty reaching the ground, steering or operating the brakes calls for another fit check rather than more pressure.
Your next step is simple: measure height and inseam, shortlist the matching wheel-size range, have the child test stand-over, reach and brake control, then begin with stopping and balance in a clear practice area.
Bikes for your next adventure
-

Black XJD Kids Bike for Boys – 12, 14 & 16 Inch Sizes
For a son between roughly 3 and 8 years old, the XJD Kids Bike in Black covers t…$169
$199 -

Blue XJD Girls Bike with Training Wheels – 12/14/16 Inch
If you're shopping for a first pedal bike for a daughter roughly 3 to 8 years ol…$149
$169 -
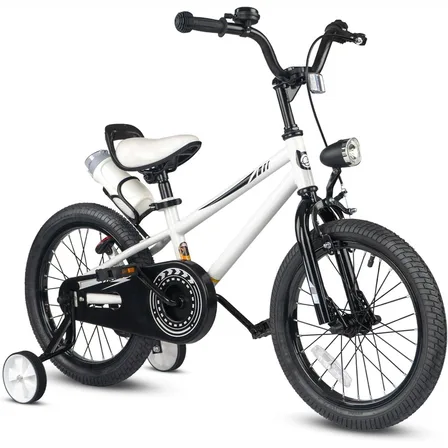
XJD Kids' Training Wheel Bike for Boys & Girls, 12/14/16 Inch – White
The XJD kids' training wheel bike in White is made for riders ages 3–8 (roughly …$169
$199