

How to help my child learn to ride a bike
Help your child learn to ride by checking fit first, then practising balance, braking, steering and pedalling in small, calm steps. Use training wheels only if they support confidence without preventing progress toward balance.
Measure before the first practice
Measure your child’s standing height and inseam while they wear the shoes they will ride in. Age is only a starting clue: height, leg clearance, reach, brake control and present confidence determine whether a bicycle is manageable.
Have your child try the actual bicycle. They should be able to stand over it with comfortable clearance, reach the handlebar without stretching, turn it while remaining in control and operate the brakes reliably. Do not buy an oversized bicycle for future growth; a bike that is difficult to mount, stop or steer can make learning harder.
| Wheel size | Starting age | Rider height |
|---|---|---|
| 12 Inch | 3–4 | 34–40 in / 86–102 cm |
| 14 Inch | 3–6 | 37–45 in / 94–114 cm |
| 16 Inch | 4–7 | 40–48 in / 102–122 cm |
| 18 Inch | 5–9 | 43–52 in / 109–132 cm |
| 20 Inch | 7–12 | 48–60 in / 122–152 cm |
| 24 Inch | 10–14 | 54–64 in / 137–163 cm |
| 26 Inch | Youth and adults | Over 60 in / 153 cm |
These ranges overlap deliberately. Use the measured height to identify possible sizes, then compare actual stand-over clearance, reach and controls. Inseam does not select a size by itself, but it helps reveal whether mounting and putting a foot down feel comfortable.
Prepare a simple learning area
Choose a flat, open space away from traffic, parked cars, obstacles and steep slopes. Before every session, follow the bicycle’s exact product manual for assembly and checks. If anything is loose, damaged, unclear or difficult to adjust, use a qualified bicycle mechanic rather than guessing at compatibility, maintenance steps or torque.
A bicycle helmet should fit properly, sit level on the head and have its straps adjusted according to the helmet manufacturer’s instructions. Secure shoelaces and avoid loose clothing that could interfere with moving parts.
Teach one skill at a time
- Walking the bike: Ask your child to hold the handlebar, walk beside the bicycle and practise using the brakes to stop it.
- Mounting and stopping: Rehearse getting on, looking ahead, stopping under control and putting a foot down. Repeat until this feels ordinary.
- Balance and steering: Let the child move at a comfortable pace while keeping their eyes toward the intended path. Use only manual-approved adjustments; do not improvise component changes.
- Pedalling: Once balance and stopping are consistent, practise starting with a ready pedal, making a few smooth turns and braking before feet touch down.
- Turning: Add wide turns before tighter ones. Keep sessions short enough that fatigue and frustration do not replace control.
Stay close enough to assist, but avoid pulling the handlebar because that changes the child’s steering. Give one brief instruction at a time. End a session after a controlled stop or another small success, then repeat the same skill next time before adding difficulty.
Decide whether training wheels are useful
Training wheels may help a child who is not yet comfortable supporting the bicycle while learning to pedal and steer. They are less relevant when the child can already balance, coast, steer and stop confidently, because the next task is independent balance rather than extra side support.
If you use them, follow the bicycle manual exactly for installation, adjustment and removal. Watch the child rather than the calendar: when pedalling, steering and braking are controlled and confidence is steady, begin the transition only in the manner permitted by the manual or with help from a qualified bicycle mechanic.
Compare the supplied bicycle option
The XJD Girls Bike for Kids Ages 3-8, 12/14/16 Inch with Training Wheels – Purple is relevant when you are comparing training-wheel bicycles in 12 Inch, 14 Inch or 16 Inch labels. Its available sizes align with three starting points in the XBikes table, but the “Ages 3-8” wording is a catalog label, not evidence that it fits any particular child.
These particular catalog options help answer the title because they let you compare three adjacent wheel-size starting points while considering whether training wheels suit the child’s current learning stage. None replaces an individual fit and control check.

Begin with measured height: consider 12 Inch at 34–40 in / 86–102 cm, 14 Inch at 37–45 in / 94–114 cm and 16 Inch at 40–48 in / 102–122 cm. Where ranges overlap, have your child try the sizes and compare stand-over clearance, reach, brake operation and confidence. Do not assume a larger label offers an equivalent fit.
If your child’s measured starting point is 18 Inch, 20 Inch, 24 Inch or 26 Inch, this product is not the requested size; its 12/14/16 Inch choices are comparison points only, not substitutes.
Know what to do next
Write down height and inseam, identify the possible wheel-size range, and arrange an actual fit check. Confirm that your child can mount, stand over, reach, steer and brake without strain. Then choose one first-session goal: controlled stopping if they are new, balance if pedalling is already familiar, or independent starts if balance and braking are consistent.
Pause and reassess the fit if your child repeatedly cannot reach a control, cannot put a foot down comfortably, stretches toward the handlebar or loses control during ordinary turns. The right next step is the bicycle your child can control now, followed by calm practice of the single skill that is still missing.
Bikes for your next adventure
-
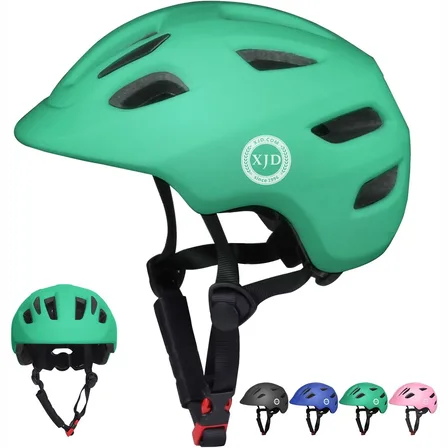
Green XJD Toddler Bike Helmet with Adjustable Fit, XS (46–51 cm)
The XJD toddler bike helmet in Green is built for the youngest riders — the size…$20.39
$23.99 -

Kids Bike Helmet by XJD for Boys & Girls – Black, Blue, Green, Pink, Purple
The XJD Kids Bike Helmet covers a wide 2-to-8-year age range thanks to two head-…$59.99
-

Kids Bike Helmet by XJD for Girls – Pink
The XJD Kids Bike Helmet in Pink is a lightweight multi-sport helmet for girls r…$59.99
$99