

How to help my child ride a bike
Help your child ride a bike by choosing a correctly fitted cycle, practising balance and braking in a clear area, and adding pedals only when control is steady.
Measure your child before choosing a bike
Measure standing height without shoes. Then measure inseam from the floor to the crotch while the child stands naturally. Age is only a starting point: height, inseam, reach, brake control and current confidence decide whether a bicycle actually fits.
Have your child try the bike. They should be able to stand over it comfortably, hold the handlebars without stretching, steer without strain and operate the brakes they will use. Do not buy an oversized bicycle for future growth; extra size can make starting, stopping and turning harder to control.
Compare the measurement with a wheel-size starting point
| Wheel size | Age starting point | Rider-height starting point |
|---|---|---|
| 12 Inch | 3–4 | 34–40 in / 86–102 cm |
| 14 Inch | 3–6 | 37–45 in / 94–114 cm |
| 16 Inch | 4–7 | 40–48 in / 102–122 cm |
| 18 Inch | 5–9 | 43–52 in / 109–132 cm |
| 20 Inch | 7–12 | 48–60 in / 122–152 cm |
| 24 Inch | 10–14 | 54–64 in / 137–163 cm |
| 26 Inch | Youth and adults | Over 60 in / 153 cm |
Overlapping ranges are intentional starting points, not proof of fit. If your child falls between sizes, compare both in person. Choose according to stand-over clearance, comfortable reach, brake access and the size on which the child can remain calm and controlled.
Teach one control at a time
- Begin with the bike stationary. Show your child how to get on and off, hold the bars and use the brakes. Confirm that small hands can reach and operate the controls.
- Practise balance. In a flat, open area away from traffic and obstacles, let the child make short, controlled movements while looking ahead. Stay close enough to assist without pulling the handlebars.
- Add starting and stopping. Ask for short runs toward a visible stopping point. Practise braking smoothly before introducing longer rides or tighter turns.
- Add pedalling and turning. Once balance and stopping are repeatable, practise a few pedal strokes followed by a controlled stop. Increase distance gradually.
Keep sessions short enough that fatigue and frustration do not replace control. Move to the next step because the current one is consistent, not because a particular number of minutes has passed.
Decide whether training wheels are relevant
Training wheels can provide temporary lateral support for a child who is not yet comfortable holding the bicycle upright. They are less relevant when the child can already balance, steer and stop independently. If used, they should support confidence without replacing regular opportunities to practise balance.
The supplied catalog options are relevant when a child needs a 12, 14 or 16 Inch starting point and temporary training-wheel support: both are categorized as Training Wheel Bikes and offer those supplied size labels. Final suitability still depends on an individual fit check.
 Girls 12/14/16 Inch Kids Bike by XJD with Training Wheels – Peach
A Training Wheel Bike offered with supplied 12 Inch, 14 Inch and 16 Inch SKU labels; relevant for comparing fit and temporary training-wheel support within those size starting points.
 XJD Light Purple Girls Bike with Basket, Training Wheels, 12/14/16/20 Inch
A Training Wheel Bike with a basket named in its title and supplied 12 Inch, 14 Inch and 16 Inch SKU labels. Confirm the selectable size because the exact title also mentions 20 Inch.
How the two catalog options compare
Girls 12/14/16 Inch Kids Bike by XJD with Training Wheels – Peach is a Training Wheel Bike with supplied 12 Inch, 14 Inch and 16 Inch SKU labels.
XJD Light Purple Girls Bike with Basket, Training Wheels, 12/14/16/20 Inch is also categorized as a Training Wheel Bike. Its exact catalog title mentions a basket and 12/14/16/20 Inch, while the supplied available SKU labels are 12 Inch, 14 Inch and 16 Inch. Confirm the selectable size rather than assuming every size named in the title is available.
Neither product should be treated as a substitute when the fit check points to 18, 20, 24 or 26 Inch. In that case, these are comparison points only; choose a bicycle in the measured size range and test its fit.
Prepare for the first ride
- Use a bicycle helmet that fits properly, sits level and has straps adjusted according to its manufacturer’s instructions.
- Choose a flat practice area separated from moving vehicles, steep slopes and avoidable obstacles.
- Check that the child can mount, look ahead, steer, reach the brakes and stop on command.
- Follow the exact product manual for assembly, adjustment, maintenance, compatibility, load limits and torque. If anything is unclear or does not operate correctly, use a qualified bicycle mechanic.
Make the next decision
Measure height and inseam now, identify the two closest wheel-size starting points, and have your child try them. Select only the bike on which stand-over, reach and brake control work together; then begin with balance and controlled stops before extending the ride.
Bikes for your next adventure
-
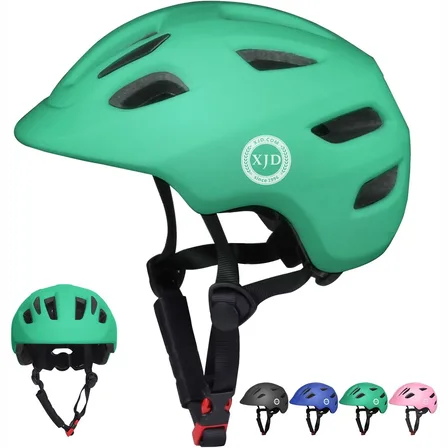
Green XJD Toddler Bike Helmet with Adjustable Fit, XS (46–51 cm)
The XJD toddler bike helmet in Green is built for the youngest riders — the size…$20.39
$23.99 -

Kids Bike Helmet by XJD for Boys & Girls – Black, Blue, Green, Pink, Purple
The XJD Kids Bike Helmet covers a wide 2-to-8-year age range thanks to two head-…$59.99
-

Kids Bike Helmet by XJD for Girls – Pink
The XJD Kids Bike Helmet in Pink is a lightweight multi-sport helmet for girls r…$59.99
$99