

How to learn a child to ride a bike
Teach a child to ride a bike by checking fit first, practising balance without pedalling, then adding pedals, braking and gentle turns.
Measure the rider before choosing a bike
Measure the child’s height without shoes and use it as the first wheel-size filter. If possible, also measure inseam from the floor to the crotch. Inseam is useful during the actual fit check: the child needs comfortable clearance when standing over the bicycle rather than being pressed against the frame.
Age is only a starting point. A child near the edge of a range may need to compare two adjacent sizes. Have the child try each bicycle and check whether they can stand over it, reach the handlebar without stretching, steer at low speed and operate the brakes confidently. Do not buy an oversized bicycle merely to leave room for growth.
| Wheel size | Starting age | Rider height |
|---|---|---|
| 12 Inch | 3–4 | 34–40 in / 86–102 cm |
| 14 Inch | 3–6 | 37–45 in / 94–114 cm |
| 16 Inch | 4–7 | 40–48 in / 102–122 cm |
| 18 Inch | 5–9 | 43–52 in / 109–132 cm |
| 20 Inch | 7–12 | 48–60 in / 122–152 cm |
| 24 Inch | 10–14 | 54–64 in / 137–163 cm |
| 26 Inch | Youth and adults | Over 60 in / 153 cm |
Set up a calm first practice
Choose a flat, open area away from traffic, parked vehicles and obstacles. The child should wear closed shoes and a properly fitting bicycle helmet. The helmet should sit level; adjust and use its straps according to the manufacturer’s instructions.
Before moving, show the child how the brakes work. Ask them to demonstrate that they can reach and operate the controls while holding the handlebar normally. If the reach is strained, the bicycle is difficult to hold upright, or the child cannot brake deliberately, stop and reconsider the fit or setup.
Teach balance before pedalling
- Begin with short glides. Let the child propel the bicycle with their feet and lift them briefly when ready. Keep sessions short enough that concentration remains steady.
- Encourage eyes forward. Looking toward the intended path helps the child steer more smoothly than watching the front wheel.
- Practise controlled stops. Name a stopping point and have the child slow down, brake and place a foot down. Repeat until stopping feels predictable.
- Add pedals only after steady gliding. Start with one pedal positioned for an easy first push. Let the child push away, place the second foot, pedal a short distance and stop.
Support the child lightly at the torso if needed, without steering the handlebar for them. Release gradually as balance improves. Avoid surprise pushes: the child needs to know when support is changing so confidence grows alongside control.
Add starting, turning and independent stopping
Once the child can pedal several metres, practise the whole sequence: look ahead, start, ride straight, make a wide turn, brake and put one foot down. Work on one element at a time. Narrow turns, slopes, shared paths and traffic can wait until starts and stops are reliable on flat ground.
Compare progress with the child’s previous attempt, not with another rider. If fear or fatigue appears, return to easier gliding or finish the session. A smaller successful step is more useful than forcing a longer ride with poor control.
When the supplied bike is relevant
The XJD Pink Beach Cruiser for Girls – Rear Rack & V-Brake is available in 20 Inch, 24 Inch and 26 Inch labels. Those options make it relevant when the measured rider falls near the corresponding XBikes height starting points and can pass an individual stand-over, reach and brake-control check. The V-brake should be tested for comfortable reach during that check.
These catalog options help a parent compare three larger wheel-size starting points while deciding whether a learner’s measured height, reach and confidence match the bicycle in front of them.

It is not a suitable substitute when the child needs a 12, 14, 16 or 18 Inch bicycle; the listed versions are larger comparison points, not equivalent sizes. The rear rack is a supplied feature, but no load limit or compatibility details are provided here. Follow the exact product manual or ask a qualified bicycle mechanic about assembly, adjustment, maintenance and rack use.
Make the go-or-wait decision
Proceed only when the child can stand over the bicycle comfortably, reach the handlebar and brakes without strain, hold the bike upright, glide with growing control and stop on request. If any check fails, compare another size or have the setup assessed rather than asking the child to compensate. The next practical step is simple: measure height, shortlist the matching wheel-size range, try the bicycle, and begin with balance-and-stop practice on flat ground.
Bikes for your next adventure
-

Black XJD Kids Bike for Boys – 12, 14 & 16 Inch Sizes
For a son between roughly 3 and 8 years old, the XJD Kids Bike in Black covers t…$169
$199 -

Blue XJD Girls Bike with Training Wheels – 12/14/16 Inch
If you're shopping for a first pedal bike for a daughter roughly 3 to 8 years ol…$149
$169 -
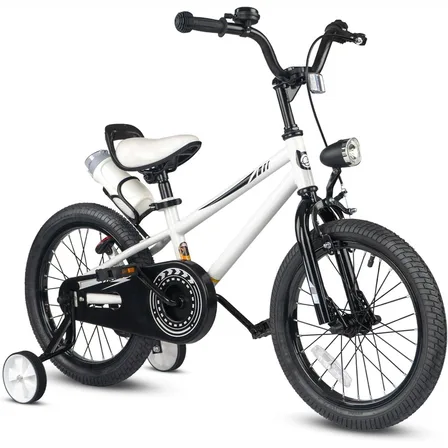
XJD Kids' Training Wheel Bike for Boys & Girls, 12/14/16 Inch – White
The XJD kids' training wheel bike in White is made for riders ages 3–8 (roughly …$169
$199