

How to learn child to ride bike
To teach a child to ride a bike, start with a correctly fitted bicycle, practise balance before pedalling, then add steering, braking and independent starts in short sessions.
Measure the rider before choosing the bike
Measure the child’s height without shoes, then check inseam, reach and hand control on the actual bicycle. Age is only a starting point because children of the same age can have different proportions and confidence.
Have the child stand over the frame and sit on the saddle. They should be able to support themselves securely, reach the handlebar without stretching, turn it comfortably and operate the brakes they will use. Do not buy an oversized bicycle merely to allow room for growth. If reach, stand-over clearance or brake control is uncertain, compare another size or ask a qualified bicycle mechanic to assess the fit.
| Wheel size | XBikes starting age | Rider height |
|---|---|---|
| 12 Inch | 3–4 | 34–40 in / 86–102 cm |
| 14 Inch | 3–6 | 37–45 in / 94–114 cm |
| 16 Inch | 4–7 | 40–48 in / 102–122 cm |
| 18 Inch | 5–9 | 43–52 in / 109–132 cm |
| 20 Inch | 7–12 | 48–60 in / 122–152 cm |
| 24 Inch | 10–14 | 54–64 in / 137–163 cm |
| 26 Inch | Youth and adults | Over 60 in / 153 cm |
Where ranges overlap, compare both candidate sizes in person. Choose according to measured fit, comfortable reach, reliable brake operation and the child’s present confidence—not the largest wheel listed for their age.
Prepare a simple, safe practice area
Use a flat, open space away from traffic, parked vehicles, steep slopes and obstacles. Dress the child in closed shoes and practical clothing. A bicycle helmet should fit properly, sit level and have its straps adjusted according to the helmet manufacturer’s instructions.
Before each session, check that the bicycle is assembled and operating as described in its exact product manual. Do not improvise torque settings, compatibility decisions or maintenance procedures. If anything is loose, damaged or unclear, stop and use a qualified bicycle mechanic.
Teach balance before pedalling
Begin with the child seated and able to stabilise the bike. Let them move forward using their feet, first walking and then taking longer gliding steps. The useful milestone is not speed: it is the ability to look ahead, keep a steady line and place both feet down calmly.
- Ask the child to look toward a nearby destination rather than at the front wheel.
- Practise several short glides with relaxed arms.
- Add wide, gentle turns in both directions.
- Repeat controlled stops until stopping feels predictable.
Support the child lightly at the torso if necessary. Avoid steering the handlebar for them, because they need to feel how their own small movements affect balance.
Add braking, pedalling and independent starts
Explain and practise the bike’s actual braking controls at very low speed. The child must be able to reach and operate them consistently. Follow the bicycle manual for its specific controls; do not assume every children’s bicycle stops in the same way.
Once gliding is controlled, position one pedal ready for a strong first push. Have the child look ahead, press that pedal, bring the second foot up and continue pedalling. Walk beside them without holding the handlebar. Next, practise the complete sequence repeatedly: set the pedal, look ahead, push, pedal, brake smoothly and put a foot down.
Keep sessions brief and finish after a small success. If frustration or fatigue changes the child’s control, pause. Return to gliding when starts, turns or stops become rushed.
Decide whether training wheels help
Training wheels can let a child practise pedalling and basic steering while receiving lateral support, but they do not replace the balance practice needed for two-wheel riding. If used, follow the exact bicycle manual for installation, adjustment and removal. A mechanic should handle any uncertain fit or compatibility issue.
The supplied catalog choices are relevant when the fit check points to 12, 14 or 16 Inch wheels and a training-wheel bicycle suits the current learning stage. They allow a size and style comparison without treating age alone as proof of fit.
 Flower Pink XJD Girls Bike with Doll Seat & Basket
A Training Wheel Bike offered in 12 Inch, 14 Inch and 16 Inch labels. Its exact title identifies a flower-pink style, doll seat and basket; confirm the child’s measured fit and control.
 Purple XJD Girls' Bike with Doll Seat & Basket
A purple Training Wheel Bike available in 12 Inch, 14 Inch and 16 Inch labels. Its title identifies a doll seat and basket; use height, inseam, reach and brake control to select.
 Black XJD Kids' BMX Bicycle with Training Wheels
A Kids' BMX Bike with training wheels, offered in 12 Inch, 14 Inch and 16 Inch labels. It is relevant when one of those sizes fits and training-wheel practice suits the child.
Flower Pink XJD Girls Bike with Doll Seat & Basket and Purple XJD Girls' Bike with Doll Seat & Basket are Training Wheel Bikes offered in 12 Inch, 14 Inch and 16 Inch labels. Their supplied distinctions are their exact color titles; both titles also identify a doll seat and basket.
Black XJD Kids' BMX Bicycle with Training Wheels is categorized as a Kids' BMX Bike and is likewise offered in 12 Inch, 14 Inch and 16 Inch labels. Compare it with the other two by category and stated features, then verify individual fit and controls on the actual bicycle.
None of these three is a fit substitute when measurements indicate 18 Inch, 20 Inch, 24 Inch or 26 Inch. In that case, they are smaller-wheel comparison points only, and the next step is to try the indicated size range elsewhere.
Know when the child is ready to ride alone
Remove hands-on support only when the child can start, look ahead, steer around gentle turns, brake on command and stop with control several times in succession. Stay in the traffic-free practice area until those skills remain consistent without prompts.
Your next decision is concrete: measure height, test inseam clearance, reach and brake control, choose the correctly fitting wheel size, then begin with gliding and controlled stops before expecting independent pedalling.
Bikes for your next adventure
-

Black XJD Kids Bike for Boys – 12, 14 & 16 Inch Sizes
For a son between roughly 3 and 8 years old, the XJD Kids Bike in Black covers t…$169
$199 -

Blue XJD Girls Bike with Training Wheels – 12/14/16 Inch
If you're shopping for a first pedal bike for a daughter roughly 3 to 8 years ol…$149
$169 -
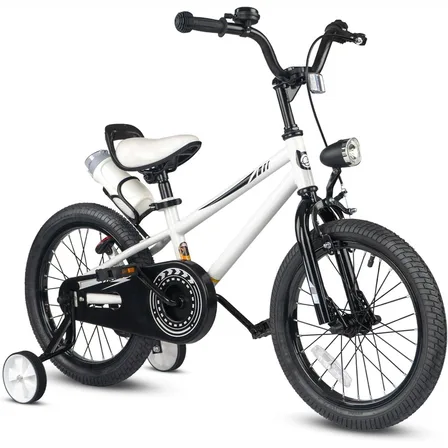
XJD Kids' Training Wheel Bike for Boys & Girls, 12/14/16 Inch – White
The XJD kids' training wheel bike in White is made for riders ages 3–8 (roughly …$169
$199