

How to learn my child to ride a bike
Teach your child to ride by choosing a correctly fitted bike, practising balance before pedalling, and adding one skill at a time in a quiet, open area.
Measure your child before choosing the bike
Measure your child’s height without shoes and note their inseam. Height gives you an XBikes wheel-size starting point; inseam helps with the physical fit check. Age is only a rough reference and should never override measurements, reach or confidence.
Have your child try the actual bicycle. They should be able to stand over it comfortably, reach the handlebars without stretching, steer while remaining in control, and operate the brakes confidently. Check that their hands can reach and use the brake controls. If they appear cramped, overextended or unable to control the bike, compare another size or setup.
Do not buy an oversized bicycle simply to allow room for growth. HealthyChildren guidance emphasizes trying the bike and checking stand-over clearance, control and brake reach. A bike that fits later may be intimidating or difficult to manage now.
Compare the relevant wheel-size starting points
| Wheel size | XBikes age starting point | XBikes height starting point |
|---|---|---|
| 12 Inch | Ages 3–4 | 34–40 in / 86–102 cm |
| 14 Inch | Ages 3–6 | 37–45 in / 94–114 cm |
| 16 Inch | Ages 4–7 | 40–48 in / 102–122 cm |
Overlapping ranges are normal. If your child’s height falls into two rows, compare both bicycles in person. Choose according to inseam clearance, reach, brake operation and current confidence—not the larger number or the longest possible period of use.
Prepare for the first practice
Choose a quiet, level, open area away from traffic, parked vehicles, steep slopes and obstacles. A properly fitting bicycle helmet is essential. Following U.S. Consumer Product Safety Commission guidance, place it level on the head and adjust its straps according to the helmet manufacturer’s instructions. Replace guesswork with the helmet’s exact fitting directions.
Before each session, follow the bicycle’s product manual for assembly and pre-ride checks. If the manual is missing, the setup is unclear or any part does not operate correctly, use a qualified bicycle mechanic. Do not improvise torque settings, compatibility decisions or mechanical procedures.
Teach balance, control and pedalling in order
- Make stopping predictable. Show your child where the brakes are and practise using them while you stabilize the bicycle. They should understand how to stop before gaining speed.
- Build balance at low speed. Let the child move slowly and experience keeping the bicycle upright. If changing or removing components would be required for balance practice, consult the exact product manual or a qualified mechanic first.
- Add steering. Ask the child to look toward an easy target and make broad, gentle turns. Keep the practice area simple rather than setting a complicated course.
- Introduce pedalling. Once balance and stopping are becoming consistent, help the child begin from a stable position and pedal a short distance. Support the child only as much as needed; avoid pulling the handlebars, which can interfere with steering.
- Repeat short successes. Stop when concentration or confidence drops. Several calm sessions are usually more useful than pushing through fear or fatigue.
Decide whether training wheels are relevant
Training wheels can help a child become familiar with sitting, steering and pedalling, but they support the bicycle and therefore do not reproduce independent two-wheel balance. They may be relevant when the immediate goal is confidence with controls. If the goal is balance, include practice that progressively develops that skill, following the bicycle manual for any equipment changes.
The Purple XJD Girls' Bike with Doll Seat & Basket is a cataloged Training Wheel Bike offered in 12 Inch, 14 Inch and 16 Inch SKU labels. Those three options help you compare the child’s measured height against the relevant XBikes starting points before completing an individual fit check.

The doll seat and basket are catalog features, not evidence of fit or riding readiness. Select among the three wheel labels only after comparing stand-over position, inseam, reach, brake control and confidence. If your child needs an 18 Inch, 20 Inch, 24 Inch or 26 Inch starting point under the XBikes standard, this product’s listed sizes are comparison points only and are not substitutes for the required size.
Know when your child is ready to progress
Progress when your child can start with manageable support, look ahead, steer a chosen path and stop on request without panic. Return to a simpler exercise if the child repeatedly loses control, cannot reach the brakes properly or becomes fearful. A different bike size may be necessary when the controls remain difficult despite clear instruction.
Your next step is straightforward: measure height and inseam, shortlist the matching wheel-size starting points, and have your child compare those bikes in person. Begin the first lesson only after confirming stand-over comfort, reach, braking control, helmet fit and confidence.
Bikes for your next adventure
-
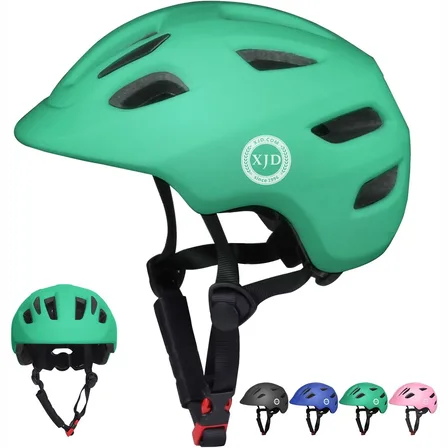
Green XJD Toddler Bike Helmet with Adjustable Fit, XS (46–51 cm)
The XJD toddler bike helmet in Green is built for the youngest riders — the size…$20.39
$23.99 -

Kids Bike Helmet by XJD for Boys & Girls – Black, Blue, Green, Pink, Purple
The XJD Kids Bike Helmet covers a wide 2-to-8-year age range thanks to two head-…$59.99
-

Kids Bike Helmet by XJD for Girls – Pink
The XJD Kids Bike Helmet in Pink is a lightweight multi-sport helmet for girls r…$59.99
$99