

How to learn ride a bike for children
To teach a child to ride a bike, choose a correctly fitting bicycle, practise balance before pedalling, and add each new skill in a quiet, open area.
Measure the child before choosing a bike
Measure the child’s height and inseam while they are wearing the shoes they will ride in. Age is only a starting point. Compare the measurements with the bicycle’s fit information, then have the child try the actual bike.
During that fit check, confirm that the child can stand over the bike comfortably, reach the handlebars without stretching, turn the bars without losing balance, and operate the brakes with control. The American Academy of Pediatrics advises against buying an oversized bicycle for a child to grow into. A bike that is too large can make starting, stopping and steering harder.
| Wheel size | XBikes age starting point | Rider height starting point |
|---|---|---|
| 12 Inch | Ages 3–4 | 34–40 in / 86–102 cm |
| 14 Inch | Ages 3–6 | 37–45 in / 94–114 cm |
| 16 Inch | Ages 4–7 | 40–48 in / 102–122 cm |
| 18 Inch | Ages 5–9 | 43–52 in / 109–132 cm |
| 20 Inch | Ages 7–12 | 48–60 in / 122–152 cm |
| 24 Inch | Ages 10–14 | 54–64 in / 137–163 cm |
| 26 Inch | Youth and adults | Over 60 in / 153 cm |
These ranges overlap deliberately. Prioritize measured height, inseam, reach, brake control and current confidence over age alone.
Prepare a simple learning area
Choose a flat, spacious place away from traffic, parked vehicles, steep slopes and obstacles. The child should wear closed-toe shoes and comfortable clothing that cannot catch in moving parts. An adult should stay close enough to assist without gripping the bicycle continuously.
Use a bicycle helmet made for cycling. Following U.S. Consumer Product Safety Commission guidance, check that it fits properly, sits level on the head and has straps adjusted according to the helmet manufacturer’s instructions. Replace guesswork about bicycle assembly or adjustments with the exact product manual or help from a qualified bicycle mechanic.
Teach balance before pedalling
- Walk the bike: Let the child hold the handlebars and walk beside it. This introduces steering and the bicycle’s weight.
- Sit and scoot: With the saddle set appropriately for the learning stage, have the child sit, push along with both feet and stop with their feet. Follow the bike manual or ask a mechanic for adjustment instructions.
- Glide briefly: Encourage gentle pushes followed by short coasts. Look ahead rather than down at the front wheel.
- Practise stopping: Before adding speed, make sure the child understands how the bike’s brakes work and can reach and use them reliably.
- Add pedals: When gliding and steering look controlled, practise placing one pedal in a useful starting position, pushing off and beginning to pedal.
Keep sessions short enough that concentration remains steady. If the child becomes tense or repeatedly loses control, return to walking, scooting or gliding rather than pushing ahead.
Support without steering for the child
Stand beside or slightly behind the learner and, when necessary, steady the child rather than turning the handlebars for them. Give one instruction at a time: look ahead, push, pedal, or stop. Gradually reduce assistance as the child begins to make corrections independently.
Training wheels can introduce pedalling and steering, but they do not reproduce the leaning and balancing used on two wheels. If a bike has them, treat their use as one possible learning stage. Follow that bicycle’s manual for installation, adjustment and removal; no universal setup or torque should be assumed.
How the supplied bikes relate to learning
The two catalog options make useful comparisons because both are offered in 12 Inch, 14 Inch and 16 Inch labels, covering several of the XBikes starting ranges above. Their catalog categories also let a parent compare a Kids’ BMX Bikes option with a Training Wheel Bikes option, while the child’s individual fit and control still decide suitability.
 Black XJD Kids' BMX Bicycle with Training Wheels
Available in 12 Inch, 14 Inch and 16 Inch labels, this Kids’ BMX Bikes option includes training wheels in its exact title. Compare the selected size with the child’s measurements and confirm reach, stand-over and brake control.
 Pink Girls' 12/14/16" Bike by XJD – Basket & Doll Seat
This Training Wheel Bikes option is available in 12 Inch, 14 Inch and 16 Inch labels. Its title mentions a basket and doll seat, but suitability still depends on an individual fit and control check.
The Black XJD Kids' BMX Bicycle with Training Wheels is categorized as a Kids’ BMX Bike and is available in 12 Inch, 14 Inch and 16 Inch labels. Its title identifies training wheels, but fit must still be checked on the selected size.
The Pink Girls' 12/14/16" Bike by XJD – Basket & Doll Seat is categorized as a Training Wheel Bike and likewise has 12 Inch, 14 Inch and 16 Inch labels. The basket and doll seat appear in its catalog title; they do not establish fit or learning readiness.
Neither supplied listing provides an 18, 20, 24 or 26 Inch option. If the child’s measurements point to one of those sizes, these products are comparison points only, not substitutes. Also consult the exact manual or a qualified bicycle mechanic for assembly, maintenance, load limits, compatibility and torque information.
Decide what to do next
Measure height and inseam, identify a starting wheel size, and arrange an actual fit check. Choose only a bike on which the child can stand over, reach, steer and brake confidently. Then begin with walking and gliding in a traffic-free area; move to pedalling only after the child can balance, steer and stop with control.
Bikes for your next adventure
-

Black XJD Kids Bike for Boys – 12, 14 & 16 Inch Sizes
For a son between roughly 3 and 8 years old, the XJD Kids Bike in Black covers t…$169
$199 -

Blue XJD Girls Bike with Training Wheels – 12/14/16 Inch
If you're shopping for a first pedal bike for a daughter roughly 3 to 8 years ol…$149
$169 -
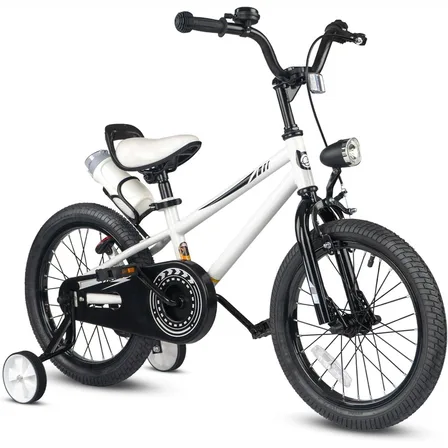
XJD Kids' Training Wheel Bike for Boys & Girls, 12/14/16 Inch – White
The XJD kids' training wheel bike in White is made for riders ages 3–8 (roughly …$169
$199