

How to pick out a bike for a child
Pick a child’s bike by measuring height and inseam, choosing a likely wheel size, then checking stand-over clearance, reach, brakes and control in person.
Measure the child before comparing bikes
Start with the child’s current height, without shoes. Then measure inseam from the floor to the crotch while the child stands straight with feet slightly apart. Height narrows the wheel-size range; inseam helps you judge whether the child can stand over and manage a particular frame.
Record both measurements rather than relying on clothing size, school year or a recent birthday. Age is only a starting point because children of the same age can differ substantially in height, proportions and riding confidence.
Use wheel size as a shortlist
Compare measured height with the XBikes starting points below. Where ranges overlap, keep both sizes under consideration until the child tries them.
| Wheel size | Age starting point | Rider-height starting point |
|---|---|---|
| 12 Inch | 3–4 | 34–40 in / 86–102 cm |
| 14 Inch | 3–6 | 37–45 in / 94–114 cm |
| 16 Inch | 4–7 | 40–48 in / 102–122 cm |
| 18 Inch | 5–9 | 43–52 in / 109–132 cm |
| 20 Inch | 7–12 | 48–60 in / 122–152 cm |
| 24 Inch | 10–14 | 54–64 in / 137–163 cm |
| 26 Inch | Youth and adults | Over 60 in / 153 cm |
Do not automatically choose the larger overlapping size or buy an oversized bike for future growth. The useful size is the one the child can control now. Measured height, inseam, reach, brake control and present confidence take priority over age.
Check the fit on the actual bicycle
Have the child try the bicycle, ideally wearing the shoes used for riding. A suitable paper size can still fail the real-world fit check because frame shapes and a child’s proportions vary.
- Stand-over: Ask the child to straddle the bicycle with both feet planted. The frame should not prevent a comfortable, stable stance.
- Starting and stopping: The child should be able to get into position, set off and stop without the bicycle pulling them off balance.
- Reach: With hands on the handlebar, the child should not have to stretch, lock the elbows or lean so far that steering becomes awkward.
- Brake control: The child must be able to reach and operate the bicycle’s braking controls confidently. Confirm the controls on the exact bicycle rather than assuming how they work.
- Steering: Ask for slow turns in both directions. Look for deliberate control rather than wobbling caused by struggling with the bike’s size.
If any check fails, try another size or frame instead of assuming the child will quickly adapt.
Match the bicycle to current confidence
Size and readiness are separate decisions. A child who fits a wheel size may still need a simpler learning setup, while a confident rider may be ready to progress without training wheels. Choose for the skills the child can demonstrate today.
The supplied catalog option is relevant when you are considering a training-wheel bike in one of four listed wheel sizes. The XJD Girls' Bike with Training Wheels, 12/14/16/20 Inch – Purple is offered with 12 Inch, 14 Inch, 16 Inch and 20 Inch SKU labels, so it can help you compare several shortlisted sizes within the same catalog option. Its title and labels do not prove individual fit.

This product is not the relevant choice if the child needs an 18 Inch, 24 Inch or 26 Inch starting point, if purple is not wanted, or if training wheels do not match the rider’s current learning needs. No supplied facts establish its brake type, weight, material, load limit or other component details; consult the exact product information and manual before deciding.
Check safety and setup before the first ride
Choose a bicycle helmet that fits the child properly. It should sit level, with its straps adjusted according to the helmet manufacturer’s instructions. Recheck the fit whenever the helmet is worn rather than treating its size label as enough.
Confirm that the bicycle is correctly assembled and that its controls work before riding. For assembly, maintenance, load limits, compatibility and torque settings, follow the exact product manual or use a qualified bicycle mechanic. Do not improvise specifications that are absent from the documentation.
Make the final decision
Measure height and inseam now, shortlist the matching wheel sizes, and arrange an individual fit check. Buy only when the child can stand over the bicycle, reach comfortably, operate the brakes and steer, start and stop with control. If two sizes appear possible, choose by those demonstrated checks—not by extra growing room.
Bikes for your next adventure
-
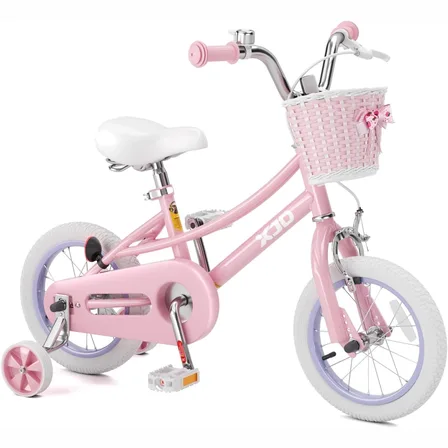
Pink 12/14/16/20" XJD Girls Bike with Training Wheels & Basket
The Pink XJD Girls Bike with Training Wheels & Basket is a first-bike pick f…$65.99
$75.99 -

Light Pink XJD Girls' Bicycle with Basket & Training Wheels
The Light Pink XJD Girls' Bicycle with Basket & Training Wheels is a retro-style…$109.99
$129.99 -

Black XJD Kids Bike for Boys – 12, 14 & 16 Inch Sizes
For a son between roughly 3 and 8 years old, the XJD Kids Bike in Black covers t…$169
$199