

How to put a baby seat on a bike
To put a baby seat on a bike, first match the seat’s mounting system to the bicycle, confirm every fit and load limit in both manuals, then install and test it exactly as directed. If compatibility is unclear, use a qualified bicycle mechanic.
Identify the seat and mounting location
Start with the exact baby-seat model. Seats generally attach at the rear using a rack-based or frame-based system, or at the front using a mount specified by the manufacturer. These systems are not interchangeable merely because a clamp appears to fit.
Find the bicycle make and model, then read its manual for child-seat restrictions. Also check the seat manufacturer’s compatibility list. A bicycle may lack a suitable mounting point, or its frame, rack, steering area or other components may not be approved for that seat. Do not drill the frame, improvise brackets or substitute hardware.
Measure and compare before installation
Record the dimensions requested by the seat manual. The relevant measurements depend on the mounting system, so use this checklist to collect rather than guess the needed information:
| Check | What to compare |
|---|---|
| Bicycle structure | Frame-tube or rack dimensions, shape and permitted mounting area |
| Clearance | Space around the wheel, saddle, pedals, cables, steering and rider |
| Capacity | Seat, rack and bicycle load limits stated by their manufacturers |
| Child fit | Child size and developmental requirements in the seat manual |
| Hardware | Exact brackets, fasteners and tools specified for that model |
For a rack-mounted seat, verify that the rack itself is explicitly suitable for the seat and permitted load; the presence of a rear rack alone is not enough. For a frame-mounted seat, compare the required tube size, shape and clear mounting area with the bicycle. For a front-mounted seat, check the specified mounting interface and confirm that steering and controls will remain unobstructed.
Install only after compatibility is confirmed
- Stabilize the unloaded bicycle in a safe work area.
- Use every supplied component in the position and orientation shown in the baby-seat manual.
- Keep clamps and hardware clear of cables, moving parts and areas prohibited by the bicycle manufacturer.
- Tighten fasteners in the stated sequence and to the exact torque in the relevant manual. Do not invent a torque or judge it by feel.
- Attach any required secondary retention device exactly as instructed.
- Adjust the child restraint and foot supports according to the seat manual, without placing the child in the seat during installation.
If instructions conflict, parts are missing, the mount shifts, or the required dimensions and limits cannot be verified, stop. The appropriate next step is help from the seat manufacturer or a qualified bicycle mechanic, not a makeshift installation.
Check the completed setup without the child
Confirm that the seat and mount do not rotate, slide or contact the wheel. Turn the handlebar fully in both directions, operate the brakes, spin the wheels and move the pedals while checking for interference. Make sure straps and loose ends cannot reach wheels, spokes, brakes or the drivetrain.
A baby seat changes balance, steering, stopping and the way a bicycle behaves while being parked or mounted. Practise starting, braking, turning and stopping in a traffic-free area with suitable non-living ballast only if the seat manufacturer permits that test method. Never leave a child unattended in a bicycle seat, especially when the bicycle is supported only by a stand.
Prepare the child and rider
Follow the baby-seat manual’s developmental, size and restraint requirements; age alone does not establish readiness. Each ride, check that the restraint is secure, feet are contained as designed, clothing and straps are away from moving parts, and the seat has not loosened.
The child needs a properly fitting bicycle helmet. It should sit level, and its straps must be adjusted according to the helmet manufacturer’s instructions. The adult rider should also wear an appropriate helmet and begin with short rides in controlled conditions.
How the supplied kids’ bikes relate
The catalog options below help distinguish a child’s own training-wheel bicycle from the adult or caregiver bicycle being evaluated for a baby seat. Their supplied facts identify wheel-size choices, but provide no baby-seat mounting, load-limit or compatibility information; therefore, they should not be treated as confirmed baby-seat carriers.
 XJD Kids' Training Wheel Bike for Boys & Girls, 12/14/16 Inch – White
A training-wheel bike offered in 12, 14 and 16 Inch labels. No supplied fact confirms baby-seat mounting or load compatibility, so it is relevant only as a future child-rider comparison.
 Girls' Training Wheel Bike by XJD, 12–20 Inch Wheels – Blue
A training-wheel bike with 12, 14, 16 and 20 Inch labels. Its catalog facts do not establish baby-seat compatibility; use it only to compare later child-rider wheel-size options.
XJD Kids' Training Wheel Bike for Boys & Girls, 12/14/16 Inch – White is a training-wheel bike offered in 12, 14 and 16 Inch labels. Girls' Training Wheel Bike by XJD, 12–20 Inch Wheels – Blue is also a training-wheel bike, with 12, 14, 16 and 20 Inch labels. Those facts make them relevant only as comparisons for a child transitioning to an independently ridden bike, not as evidence that either accepts a baby seat.
For that later transition, XBikes’ starting points are: 12 Inch for heights 34–40 in / 86–102 cm, 14 Inch for 37–45 in / 94–114 cm, 16 Inch for 40–48 in / 102–122 cm, and 20 Inch for 48–60 in / 122–152 cm. Have the child try the bicycle; prioritize measured height, inseam, reach, brake control and confidence, and never buy oversized solely for growth.
Your decision now is simple: install the baby seat only when its manual and the carrier bicycle’s manual confirm the exact mount and limits. Otherwise, take both bicycle and seat to a qualified mechanic before carrying the child.
Bikes for your next adventure
-

Kids Bike Helmet by XJD for Boys & Girls – Black, Blue, Green, Pink, Purple
The XJD Kids Bike Helmet covers a wide 2-to-8-year age range thanks to two head-…$59.99
-
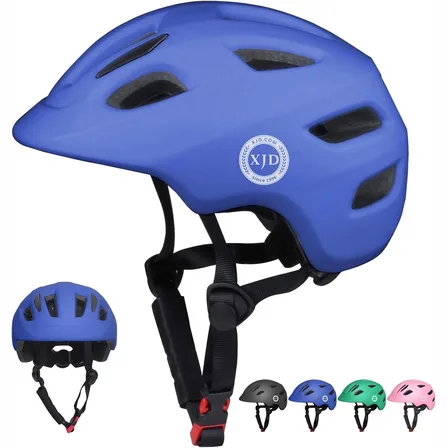
Blue XJD Kids' Bike Helmet, Adjustable Fit – Sizes XS & S
The Blue XJD Kids' Bike Helmet is a lightweight, adjustable helmet for toddlers …$20.39
-

Kids Bike Helmet by XJD for Girls – Pink
The XJD Kids Bike Helmet in Pink is a lightweight multi-sport helmet for girls r…$59.99
$99