

How to put a child in a bike seat
To put a child in a bike seat, first confirm that the seat, bicycle and child meet the seat manufacturer’s fit and compatibility rules. Stabilize the bicycle, secure the child exactly as the manual directs, fit a level helmet, and check every restraint before riding.
Check the child, seat and bicycle first
Find the exact bike-seat manual and compare its stated child-size, developmental, load and installation requirements with your situation. Do not estimate missing limits or assume that one seat’s rules apply to another. If the label or manual is unavailable, contact the manufacturer or ask a qualified bicycle mechanic before carrying a child.
Confirm that the seat’s mounting system is approved for the bicycle’s frame, rack or other specified attachment point. Check any restrictions involving the bicycle design or components. Use only the hardware and tightening instructions identified by the manufacturer; torque values and assembly sequences are product-specific.
The child must meet every requirement in the manual, not merely look large enough. Clothing, footwear and carried items also need to remain clear of wheels and other moving parts. Do not proceed if the seat is damaged, loose, incomplete or incompatible.
Put the child into the seat
- Choose a safe loading place. Stop on firm, level ground away from traffic. Hold the bicycle securely; a kickstand alone should not be treated as a guarantee that it cannot tip.
- Prepare the seat first. Open the restraint system and move straps out of the way so the child is not placed on twisted or trapped webbing.
- Lift and lower the child carefully. Keep control of both the bicycle and child. If you cannot do that confidently by yourself, have another adult stabilize the bicycle.
- Position the child fully in the seat. Place the child as the seat manual illustrates, then route and fasten every harness, buckle, foot restraint and guard in the specified locations.
- Adjust the restraints. They should be secure without being twisted or incorrectly routed. Use the manufacturer’s fit test rather than inventing a gap or tension measurement.
Fit the helmet and perform a final check
Use a bicycle helmet that fits the child properly. It should sit level and its straps should be adjusted and fastened according to the helmet manufacturer’s instructions. A helmet cannot correct an unsuitable seat, poor installation or loose restraint.
Before moving, check that all buckles are latched, the child is positioned as directed, and hands, feet, clothing and straps cannot reach moving parts. Gently verify that the seat and mount do not shift. If anything seems loose or unclear, unload the child and resolve it before riding.
Start only when you can mount, balance, steer and brake with control. A passenger changes how a bicycle handles. Begin in a traffic-free area and stop immediately if the seat moves, a restraint loosens or the child becomes uncomfortable.
Know when not to use the seat
- The child does not meet every requirement stated in the exact seat manual.
- The bicycle or mounting point is not explicitly compatible with the seat.
- Required hardware, guards, restraints or instructions are missing.
- The child’s helmet cannot be fitted level and securely.
- You cannot stabilize the bicycle while loading or control it confidently with the passenger.
- Installation, maintenance or torque requirements remain uncertain after reading the manual.
In any of these cases, do not improvise. Use a qualified bicycle mechanic for compatibility, assembly and mechanical checks, and follow the seat and bicycle manuals for maintenance and load limits.
How the supplied XBikes products relate
The catalog options below are complete children’s bicycles with training wheels, not child passenger seats. They help only if the real decision is whether the child is ready for a correctly fitted bicycle of their own. They do not replace a compatible passenger seat or its installation instructions.
 Girls' Training Wheel Bike by XJD, 12–20 Inch Wheels – Blue
A training-wheel bicycle offered in 12, 14, 16 and 20 Inch labels. It is relevant only as an independently ridden bike comparison, not as a child passenger seat.
 XJD Girls' Bike with Training Wheels, 12/14/16/20 Inch – Purple
This purple training-wheel bicycle has supplied 12, 14, 16 and 20 Inch options. Compare a child’s measured fit if considering independent riding; it does not substitute for a bike seat.
 XJD Kids Bike for Girls – Pink, 12/14/16/20 Inch with Training Wheels
This pink kids bike with training wheels is listed in 12, 14, 16 and 20 Inch sizes. It may suit an independent-riding comparison after a fit check, but it is not a passenger seat.
Girls' Training Wheel Bike by XJD, 12–20 Inch Wheels – Blue, XJD Girls' Bike with Training Wheels, 12/14/16/20 Inch – Purple, and XJD Kids Bike for Girls – Pink, 12/14/16/20 Inch with Training Wheels each have supplied 12, 14, 16 and 20 Inch SKU labels. Their listed category and topic are Training Wheel Bikes.
| Wheel label | XBikes starting point |
|---|---|
| 12 Inch | Ages 3–4; height 34–40 in / 86–102 cm |
| 14 Inch | Ages 3–6; height 37–45 in / 94–114 cm |
| 16 Inch | Ages 4–7; height 40–48 in / 102–122 cm |
| 20 Inch | Ages 7–12; height 48–60 in / 122–152 cm |
These ranges are starting points, not proof of fit. Measure the rider’s standing height and inseam, then have the child try the bicycle. Check stand-over clearance, reach, brake control and present confidence. Do not buy an oversized bicycle for future growth, and prioritize measured fit over age.
Make the decision before loading
Use the passenger seat only when its manual confirms the child and bicycle are compatible, every mounting and restraint step is complete, and the helmet fits properly. If the child will ride independently instead, compare measured height with the relevant wheel-size starting point and require an individual fit check before choosing among the listed training-wheel bicycles.
Bikes for your next adventure
-

Kids Bike Helmet by XJD for Boys & Girls – Black, Blue, Green, Pink, Purple
The XJD Kids Bike Helmet covers a wide 2-to-8-year age range thanks to two head-…$59.99
-
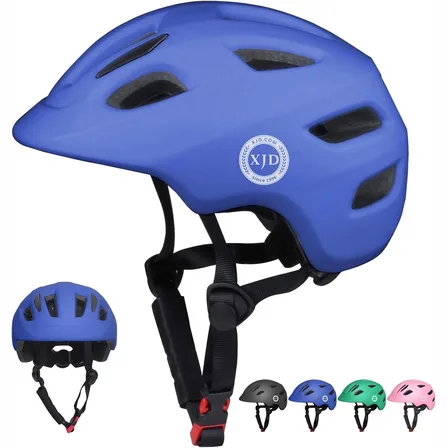
Blue XJD Kids' Bike Helmet, Adjustable Fit – Sizes XS & S
The Blue XJD Kids' Bike Helmet is a lightweight, adjustable helmet for toddlers …$20.39
-

Kids Bike Helmet by XJD for Girls – Pink
The XJD Kids Bike Helmet in Pink is a lightweight multi-sport helmet for girls r…$59.99
$99