

How to put a child seat on a bike
To put a child seat on a bike, first match the seat to the bicycle and child, then install it exactly as its manual directs or use a qualified bicycle mechanic.
Measure before buying or fitting
Record the child’s current height and weight, then compare both with the child-seat manufacturer’s stated limits. Check any minimum developmental requirement in that seat’s manual as well. A child must be able to use the seat as its manufacturer intends; age alone does not establish fit.
Next, identify the bicycle’s frame size and shape, wheel size, available mounting points and—if the seat uses a rack—the rack model and its permitted load. Measure the mounting area specified by the seat maker. Look for cables, batteries, suspension parts, bottle mounts or other components that could obstruct the bracket.
Compare the seat with the bicycle
Child seats commonly attach at the front, to the frame behind the rider, or to a rear rack. These systems are not interchangeable. Check the manuals for both the bicycle and seat to confirm that the particular mounting method is permitted.
- Frame-mounted seat: Confirm that the required frame section has the correct shape, dimensions and uninterrupted space. Do not assume a clamp fits every tube or frame construction.
- Rack-mounted seat: Confirm that the seat and rack are compatible and that the rack’s stated load limit covers the complete installed load. A rack’s presence alone does not prove suitability.
- Front-mounted seat: Check steering clearance, knee clearance and control access. The rider must still turn fully, mount and dismount predictably, and operate the brakes.
If compatibility, load limits or mounting clearance cannot be verified from the exact manuals, pause and ask the manufacturer or a qualified bicycle mechanic.
Install the seat in the right order
- Stabilize the bicycle in a well-lit work area and remove accessories that obstruct the approved mounting location.
- Lay out the supplied bracket, fasteners and retention parts. Use only the parts and arrangement specified for that exact seat.
- Position the mount where the manual indicates, checking that it does not pinch cables or contact moving parts.
- Tighten every fastener in the stated sequence and to the exact torque in the product manual. Do not guess a torque value.
- Attach the seat and engage every lock, latch, safety strap or secondary retention device required by the manufacturer.
- Adjust the child restraint, foot supports and foot retention according to the manual, keeping clothing and feet away from wheels and other moving parts.
Do not improvise with substitute bolts, extra holes, homemade spacers or an unapproved rack. If a part is missing, damaged or unclear, do not carry a child until the installation has been checked.
Check the bike before carrying the child
With the seat empty, turn the handlebars fully in both directions and compress or move relevant parts as the bicycle normally would. Confirm that the seat, mount and straps cannot touch a tire, spokes, chain, brakes or steering controls. Recheck all locking mechanisms.
Then assess the bicycle’s balance in a controlled, traffic-free place. Added weight can change starting, stopping, turning and parking. The adult rider must retain comfortable reach, reliable brake control and enough confidence to manage the bicycle without abrupt movements. Never leave a child unattended on a parked bicycle.
The child needs a properly fitting bicycle helmet. It should sit level and its straps should be adjusted according to the helmet manufacturer’s instructions. Check the seat restraint and foot retention before every ride, and follow the manuals’ inspection and maintenance schedules.
Why the listed kids’ bike is a comparison, not a seat
The supplied catalog contains the XJD Girls' Bike with Training Wheels, 12/14/16/20 Inch – Purple in 12 Inch, 14 Inch, 16 Inch and 20 Inch labels. It is a training-wheel bicycle, not a child seat or documented child-seat mounting system, so it should not be treated as an attachment option. It is relevant only when deciding whether the child may instead be ready for an individually fitted bicycle.

As starting points, XBikes associates 12 Inch with 34–40 in (86–102 cm), 14 Inch with 37–45 in (94–114 cm), 16 Inch with 40–48 in (102–122 cm), and 20 Inch with 48–60 in (122–152 cm). These ranges do not confirm fit. Have the child try the bicycle and assess measured height, inseam, stand-over clearance, reach, brake control and current confidence. Do not choose an oversized bicycle merely for growth.
Make the final decision
Install the child seat only when the child, seat, bicycle and mounting system all satisfy their exact manuals and every control remains usable. Otherwise, have a qualified bicycle mechanic verify the combination. If the real goal is independent riding, compare the listed training-wheel bicycle’s available wheel sizes with the child’s measurements and complete an individual fit check instead of mounting it or presenting it as a child-seat substitute.
Bikes for your next adventure
-

Kids Bike Helmet by XJD for Boys & Girls – Black, Blue, Green, Pink, Purple
The XJD Kids Bike Helmet covers a wide 2-to-8-year age range thanks to two head-…$59.99
-
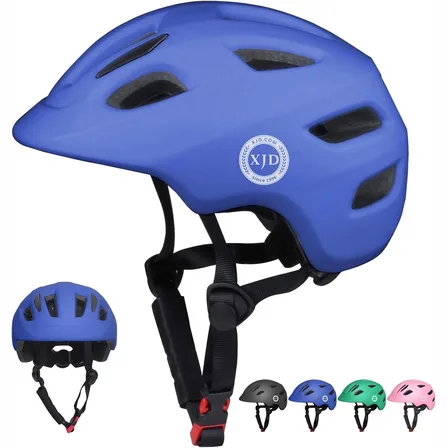
Blue XJD Kids' Bike Helmet, Adjustable Fit – Sizes XS & S
The Blue XJD Kids' Bike Helmet is a lightweight, adjustable helmet for toddlers …$20.39
-

Kids Bike Helmet by XJD for Girls – Pink
The XJD Kids Bike Helmet in Pink is a lightweight multi-sport helmet for girls r…$59.99
$99