

How to put a child seat on bike
To put a child seat on a bike, first match the seat’s mounting system to the bicycle, confirm compatibility and load limits in both manuals, then install it exactly as directed. If anything is unclear or obstructed, use a qualified bicycle mechanic.
Identify what the child seat attaches to
Before buying or fitting anything, read the child-seat manual and identify its required mount. A seat may be designed for a particular frame location or for a compatible rear rack; those systems are not interchangeable unless the manufacturer explicitly says so.
Inspect the bicycle where the mount would sit. Note the frame shape and available clearance, and look for cables, moving parts or accessories in the same area. Compare what you see with the seat maker’s compatibility instructions. Also check the bicycle manual for restrictions on carrying a passenger or attaching a child seat.
Do not assume that a mount fits because it can be clamped loosely into place. If the bicycle or seat documentation does not confirm the combination, ask the manufacturers or a qualified bicycle mechanic before proceeding.
Measure and compare before installation
Record the exact bicycle model and size, then measure only the points requested by the child-seat instructions. Depending on the mounting system, that may include the available mounting space, tube dimensions, rack dimensions or clearance around the rear wheel. Compare the measurements directly with the permitted ranges in the exact manual.
- Confirm the child is within the seat manufacturer’s stated limits.
- Confirm the bicycle and required mounting point are approved for the seat.
- Check that the mount will not trap, bend or rub cables.
- Check clearance from the tire, wheel, pedals and other moving parts.
- Verify that any required rack or adapter is the specified compatible part.
Do not invent a load allowance or treat a general bicycle rack as a passenger rack. The manuals must establish both attachment compatibility and permitted load.
Install the child seat in the stated sequence
Stabilize the unloaded bicycle and lay out every supplied mounting part. Follow the child-seat manual in order, using only the specified hardware and orientation. Do not substitute clamps, bolts, spacers or adapters merely because they appear to fit.
- Position the approved mount at the location shown in the manual.
- Route it clear of cables and moving components.
- Install each fastener and safety retention component exactly as illustrated.
- Tighten fasteners to the manufacturer’s stated torque with the appropriate tool.
- Attach the seat and confirm that every latch or locking indicator is fully engaged.
- Adjust the child restraints and foot supports according to the seat instructions.
If the instructions are missing, the specified torque is unknown, a part does not seat correctly or the installation requires modifying the bicycle, stop. Obtain the exact manual or have a qualified bicycle mechanic complete the work.
Check the fitted seat before carrying a child
With no child aboard, check that the seat is secure and cannot contact the wheel or interfere with steering, pedaling or braking. Operate the bicycle’s controls and compress or move relevant components as the manuals direct so you can check clearance through normal movement.
Next, follow the seat maker’s prescribed pre-ride check. Recheck all fasteners, latches, restraints and foot retention. A bicycle handles differently with a passenger, so the adult rider should become familiar with mounting, balancing, starting, stopping and dismounting in a controlled area before carrying the child.
The child should wear a bicycle helmet that fits properly, sits level and has straps adjusted according to the helmet manufacturer’s instructions. Repeat the installation and restraint checks before each ride, and follow the manuals’ maintenance and inspection schedule.
When the supplied XBikes products are relevant
The two catalog products below are complete children’s bicycles in the Training Wheel Bikes category, not child seats or documented child-seat mounts. They can help only if you are comparing a separate bike for the child to ride; they do not establish compatibility with an adult bicycle or replace a passenger-seat manual.
 XJD Kids Bike for Girls – Pink, 12/14/16/20 Inch with Training Wheels
A complete training-wheel bicycle with 12, 14, 16 and 20 Inch catalog options. It is relevant only as a separate child-riding comparison, not as a child seat or proof of mounting compatibility.
 XJD Pink Girls' Bike – Kids 12/14/16 Inch Training Wheel Bicycle
A complete training-wheel bicycle offered in 12, 14 and 16 Inch catalog options. Consider it only when comparing a bike for the child to ride; it is not a passenger seat or mounting component.
XJD Kids Bike for Girls – Pink, 12/14/16/20 Inch with Training Wheels offers catalog size labels of 12 Inch, 14 Inch, 16 Inch and 20 Inch. XJD Pink Girls' Bike – Kids 12/14/16 Inch Training Wheel Bicycle offers 12 Inch, 14 Inch and 16 Inch labels. The wording in either title is a catalog label, not proof of individual fit.
If considering one as an alternative to carrying the child, begin with measured height: 12 Inch corresponds to 34–40 in / 86–102 cm; 14 Inch to 37–45 in / 94–114 cm; 16 Inch to 40–48 in / 102–122 cm; and 20 Inch to 48–60 in / 122–152 cm. These are starting points only. Have the child try the bicycle and check inseam, stand-over clearance, reach, brake control and current confidence. Do not choose an oversized bicycle merely for growth.
Make the final go-or-stop decision
Proceed only when the exact bicycle manual and child-seat manual agree on the mounting system, measurements, hardware, load limits and installation method, and every clearance and control check passes. Otherwise, stop and take the bicycle, seat, manuals and supplied hardware to a qualified bicycle mechanic; the listed XBikes children’s bicycles are separate riding options, not substitutes for a compatible child seat.
Bikes for your next adventure
-

Kids Bike Helmet by XJD for Boys & Girls – Black, Blue, Green, Pink, Purple
The XJD Kids Bike Helmet covers a wide 2-to-8-year age range thanks to two head-…$59.99
-
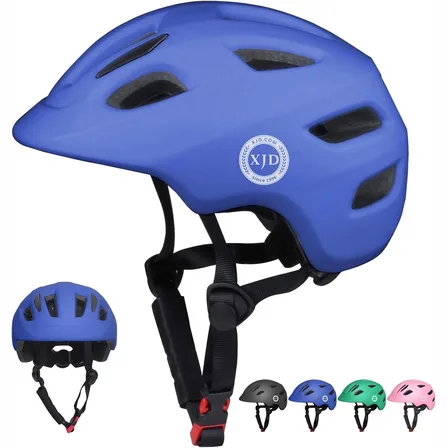
Blue XJD Kids' Bike Helmet, Adjustable Fit – Sizes XS & S
The Blue XJD Kids' Bike Helmet is a lightweight, adjustable helmet for toddlers …$20.39
-

Kids Bike Helmet by XJD for Girls – Pink
The XJD Kids Bike Helmet in Pink is a lightweight multi-sport helmet for girls r…$59.99
$99