

How to put baby seat on bike
To put a baby seat on a bike, first match the seat’s mounting system to the bicycle, confirm both products permit the combination, then install it exactly as the seat and bike manuals specify. If compatibility or any step is uncertain, use a qualified bicycle mechanic.
Identify the seat mount before buying
Baby seats do not all attach in the same place. A rear seat may clamp to the bicycle frame or connect to a compatible rear rack; a front seat uses its own specified mounting area. Determine the exact mount type from the seat manual rather than assuming that a rack, frame tube or handlebar area will accept it.
Then check the bicycle manufacturer’s instructions. Some frames, racks and components are not designed for child-seat loads or particular clamps. The bicycle and seat manuals must both approve the proposed arrangement. A seat that physically appears to fit is not necessarily compatible.
Measure and compare the critical areas
Before installation, measure the locations named by the baby-seat manufacturer and compare them with the manual’s compatibility requirements. These commonly include:
- The diameter, shape and unobstructed length of the tube used by a frame-mounted seat.
- The rear rack’s dimensions and its stated compatibility and load limit for a rack-mounted seat.
- Clearance around cables, brakes, wheels, suspension parts and other moving components.
- Space for the seat, the child’s legs and feet, and the rider’s normal pedalling and steering.
- The combined loads allowed by the bicycle, rack and seat manufacturers.
Do not invent a workaround if a clamp does not fit, a required mounting point is missing or the manuals conflict. Do not add an unapproved rack or adapter. Ask the seat manufacturer or a qualified bicycle mechanic to verify the exact combination.
Install the seat in the specified order
- Park the bicycle on a stable surface and prevent it from rolling or falling. Keep the child away during assembly.
- Lay out the supplied mount, fasteners and retention parts. Confirm that nothing is missing or damaged.
- Position the mount only on the location approved in both manuals. Keep cables and moving parts free.
- Fit every bracket, fastener, safety strap or secondary retention device in the precise orientation shown by the seat manufacturer.
- Tighten fasteners in the stated sequence and to the exact torque in the product manual. If that information is absent or you lack the correct tool, have a qualified bicycle mechanic complete the work.
- Attach the seat and confirm that each lock or indicator reaches the manual’s fully engaged position.
Do not place a child in the seat merely to test an unfinished installation. Never substitute hardware, drill the frame or modify the seat unless the relevant manufacturer expressly instructs you to do so.
Check the finished setup without a child
With the bicycle still supported, firmly check the mount and seat for movement. Turn the handlebar fully in both directions, spin both wheels and operate the brakes. Confirm that no strap, foot support, bracket or fastener can touch a wheel, interfere with steering or obstruct braking.
Next, walk the bicycle and practise mounting, stopping and supporting it without a passenger. A baby seat changes balance and handling. Follow the seat manual for child readiness, restraint adjustment, permitted load and riding conditions; those limits cannot be inferred from appearance.
Secure the child for each ride
Once installation has been verified, adjust the seat’s harness and foot restraints exactly as its manual directs. Clothing, straps and shoelaces must stay away from wheels and moving parts. Never leave a child unattended in a seat on a parked bicycle.
Use a properly fitting bicycle helmet that sits level, with its straps adjusted according to the helmet manufacturer’s instructions. Recheck the seat connection and restraints before every ride, and stop using the setup if anything loosens, cracks, shifts or begins to interfere with the bicycle.
How the supplied kids’ bike relates
The XJD Girls Bike for Kids Ages 3-8, 12/14/16 Inch with Training Wheels – Purple is a training-wheel bicycle offered in 12 Inch, 14 Inch and 16 Inch labels. It can help compare the later stage when a child rides independently, but the catalog facts do not identify it as a bicycle for carrying a baby seat. It is therefore not a substitute for a verified baby-seat-compatible carrier bicycle, rack or mount.
These catalog options are useful only as wheel-size comparison points for a child moving toward an independently ridden training-wheel bike; they do not establish baby-seat compatibility.

Treat the ages in the product’s exact title as a catalog label, not proof of fit. XBikes starting points are 12 Inch for 34–40 in (86–102 cm), 14 Inch for 37–45 in (94–114 cm), and 16 Inch for 40–48 in (102–122 cm). Measure the rider and check stand-over, reach, brake control and confidence; do not buy oversized for growth.
Make the final decision
Install the baby seat only when its manual, the bicycle manual and any rack instructions all confirm compatibility, and every prescribed mount and restraint can be fitted correctly. If one requirement cannot be verified, do not carry the child: take the bicycle and seat to a qualified bicycle mechanic before the next ride.
Bikes for your next adventure
-

Kids Bike Helmet by XJD for Boys & Girls – Black, Blue, Green, Pink, Purple
The XJD Kids Bike Helmet covers a wide 2-to-8-year age range thanks to two head-…$59.99
-
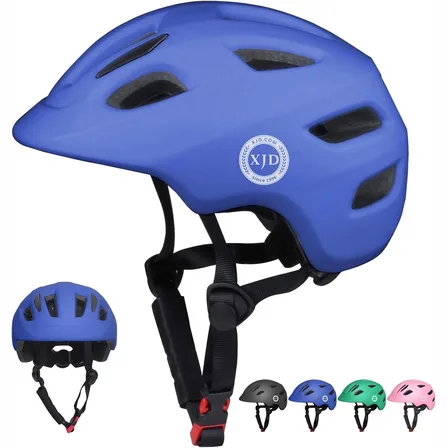
Blue XJD Kids' Bike Helmet, Adjustable Fit – Sizes XS & S
The Blue XJD Kids' Bike Helmet is a lightweight, adjustable helmet for toddlers …$20.39
-

Kids Bike Helmet by XJD for Girls – Pink
The XJD Kids Bike Helmet in Pink is a lightweight multi-sport helmet for girls r…$59.99
$99