

How to put child in bike seat
To put a child in a bike seat, stabilize the bicycle, secure the child exactly as the seat manual directs, fit a helmet, and check every restraint before riding.
Check the seat and bicycle first
Confirm that the child seat is compatible with your exact bicycle and is installed in the approved position. Read both manufacturers’ instructions before use. Check the seat’s stated child size and load limits, mounting requirements, required accessories and prohibited bicycle types. Do not estimate compatibility from appearance.
Before placing the child in the seat, inspect the mount, seat, harness, buckles and foot restraints for looseness, damage or missing parts. Follow the manual for maintenance and every fastener or torque requirement. If the instructions are missing, the fit is uncertain or the mount moves, do not ride; ask a qualified bicycle mechanic to inspect it.
Measure the child and compare the limits
Measure the child’s current weight and height, then compare both with the child-seat manual. Also check every developmental requirement stated by the manufacturer. Clothing, bags and equipment must not cause the total load to exceed any limit.
A child should fit inside the seat without being squeezed or able to slip through the restraints. The harness must route through the positions specified for the child’s size, and the child’s feet must remain within the seat’s protected footrests. If the child is too small, too large or cannot maintain the posture required by the manual, the seat is not appropriate.
Put the child in the seat
- Choose a level place. Keep the bicycle upright with both hands or have another adult stabilize it. Do not rely on a kickstand alone while loading.
- Remove hazards. Secure loose straps, scarves, toys and clothing so nothing can reach a wheel, chain, brake or other moving part.
- Lower the child into position. Seat the child fully against the backrest, facing in the direction required by the manual. Keep the bicycle motionless throughout loading.
- Fasten every restraint. Buckle and adjust the harness in the exact sequence shown by the manufacturer. It should hold the child securely without twisting or restricting breathing.
- Secure both feet. Place the child’s feet in the designated footrests and close the supplied restraints as directed. Feet and legs must not be able to reach moving parts.
- Fit the helmet. Use a properly fitting bicycle helmet. It should sit level, with its straps adjusted according to the helmet manufacturer’s instructions.
Perform a final check before moving
Confirm that every buckle is engaged, the harness is correctly routed, both feet are contained and no strap or garment hangs loose. Ask the child whether anything pinches or feels uncomfortable. Gently check the mounted seat for movement, using only the inspection method permitted by its manual.
A loaded child seat changes the bicycle’s balance, steering and stopping behavior. Begin only in a traffic-free area where the adult rider can test control at very low speed. Stop if the bicycle feels unstable, the child shifts position, a restraint loosens or any part interferes with riding. Never leave a child unattended in a seat on a bicycle.
Are these XBikes products relevant?
The supplied catalog options are children’s bicycles with training wheels, not child passenger seats. They therefore do not answer seat mounting, harness, load-limit or bicycle-compatibility questions. They are relevant only when comparing a child’s transition to riding a separate bicycle: Girls 12/14/16 Inch Kids Bike by XJD with Training Wheels – Peach is offered in 12, 14 and 16 Inch labels, while XJD Light Purple Girls Bike with Basket, Training Wheels, 12/14/16/20 Inch is currently represented by supplied 12, 14 and 16 Inch SKU labels. These are comparison points, not substitutes for a child seat.
 Girls 12/14/16 Inch Kids Bike by XJD with Training Wheels – Peach
A training-wheel bicycle offered in supplied 12, 14 and 16 Inch labels. It is relevant only as a separate-bike transition comparison, not as a child passenger seat or seat-compatibility solution.
 XJD Light Purple Girls Bike with Basket, Training Wheels, 12/14/16/20 Inch
A girls’ bike with basket and training wheels, represented by supplied 12, 14 and 16 Inch SKU labels. Compare it only for independent riding after an individual fit check; it is not a child seat.
If the child is ready for a separate bike
| Wheel size | XBikes starting point |
|---|---|
| 12 Inch | Ages 3–4; height 34–40 in / 86–102 cm |
| 14 Inch | Ages 3–6; height 37–45 in / 94–114 cm |
| 16 Inch | Ages 4–7; height 40–48 in / 102–122 cm |
Age is only a starting point. Measure the rider’s height and inseam, then have the child try the bicycle. Check stand-over clearance, reach, brake control and current confidence; do not choose an oversized bicycle merely for growth. Any age wording in a product title is a catalog label, not proof of fit.
Make the ride-or-stop decision
Ride only when the child matches the seat manual’s requirements, the seat is confirmed compatible and correctly mounted, every restraint is secure, the helmet fits properly, and the adult can control the loaded bicycle. Otherwise, stop and consult the exact manuals or a qualified bicycle mechanic before putting the child in the bike seat again.
Bikes for your next adventure
-

Kids Bike Helmet by XJD for Boys & Girls – Black, Blue, Green, Pink, Purple
The XJD Kids Bike Helmet covers a wide 2-to-8-year age range thanks to two head-…$59.99
-
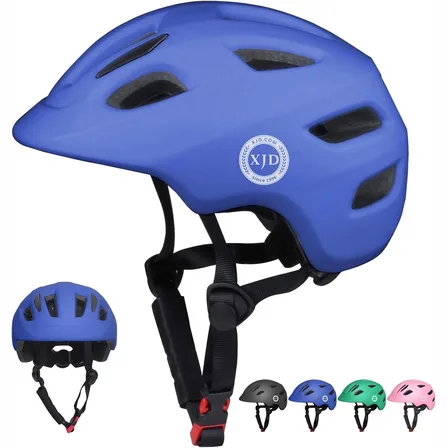
Blue XJD Kids' Bike Helmet, Adjustable Fit – Sizes XS & S
The Blue XJD Kids' Bike Helmet is a lightweight, adjustable helmet for toddlers …$20.39
-

Kids Bike Helmet by XJD for Girls – Pink
The XJD Kids Bike Helmet in Pink is a lightweight multi-sport helmet for girls r…$59.99
$99