

How to put child seat on bike
To put a child seat on a bike, first match the seat’s mounting system to the bicycle, confirm both manuals allow the combination, then install and check it exactly as directed. If compatibility, load limits or required hardware are unclear, use a qualified bicycle mechanic.
Measure and identify before buying
Write down the bicycle’s make, model and size, then identify the proposed seat as front-mounted, frame-mounted rear, or rack-mounted rear. Photograph the frame and any existing rear rack, and measure only the points named in the child-seat manual. Common decision points include available mounting space, tube dimensions, clearance around cables and brakes, and space above the rear wheel.
Also record the child’s current weight and size so you can compare them with the seat manufacturer’s limits. Do not estimate, exceed a stated limit or assume that a seat will fit because another model looks similar.
Compare both sets of instructions
The child-seat manual must list a mounting method compatible with the bicycle. The bicycle manual must not prohibit that seat type or passenger carrying. For a rack-mounted seat, verify that the exact rack and bicycle are approved for the intended child-seat use and load; the mere presence of a rack does not establish compatibility.
- Confirm that every required bracket, fastener and safety retention part is present.
- Check that the mounting area matches the dimensions and shapes specified by the seat maker.
- Follow the stated load limits, assembly sequence and tightening requirements.
- Stop if a clamp would crush, distort or interfere with any bicycle part.
Never invent a substitute bolt, spacer, adapter or torque value. Obtain the correct instructions or ask a qualified bicycle mechanic.
Install the seat in the stated order
- Stabilize the unloaded bicycle in a well-lit work area.
- Attach the approved mount at the exact location shown in the child-seat instructions.
- Fit each supplied fastener, restraint and secondary retention device in the specified orientation.
- Tighten fasteners to the manufacturer’s stated values using the required tool.
- Adjust the child restraints and foot supports according to the seat manual.
Do not place the child in the seat during installation. If the instructions are missing, the parts do not align naturally, or the bicycle becomes damaged or distorted, stop and have the combination inspected.
Check the complete bicycle before carrying a child
With the seat empty, turn the handlebar fully, operate both brakes and spin each wheel. Nothing from the seat or restraints should contact steering, braking, cables, spokes, tires or pedals. Check that the seat locks into its mount and that all retention devices are engaged as instructed.
Next, perform the manufacturer’s prescribed loaded and pre-ride checks in a controlled setting. A child passenger changes how a bicycle balances and handles, especially while starting, stopping and parking. The rider must remain able to control the bicycle confidently. The child should wear a properly fitting bicycle helmet that sits level, with straps adjusted according to its manufacturer’s instructions.
How the supplied XBikes products are relevant
These catalog bicycles are not presented as child-seat mounts. They help with the separate decision of whether a child is ready for an individually fitted bicycle instead of riding as a passenger. Their wheel sizes provide comparison points, but their titles do not prove child-seat compatibility.
 XJD Light Purple Girls Bike with Basket, Training Wheels, 12/14/16/20 Inch
A 12, 14 or 16 Inch training-wheel bicycle comparison for a child moving from passenger travel to their own individually fitted bike; it is not presented as a child-seat mount.
 XJD Kids Beach Cruiser Bicycle, Rear Rack & V-Brakes, Mint Green
Available in 20, 24 and 26 Inch SKUs. Its listed rear rack does not by itself establish child-seat compatibility or an approved load; consult the exact manuals.
 XJD Girls BMX Bike 12/14/16 Inch with Training Wheels – Pink Blue
A kids’ BMX training-wheel bicycle offered in 12, 14 and 16 Inch SKUs. It is relevant as an own-bike fit comparison, not as a child seat.
XJD Light Purple Girls Bike with Basket, Training Wheels, 12/14/16/20 Inch is listed in 12, 14 and 16 Inch SKUs. XJD Girls BMX Bike 12/14/16 Inch with Training Wheels – Pink Blue also has 12, 14 and 16 Inch SKUs. These are training-wheel bicycle options, not child seats.
XJD Kids Beach Cruiser Bicycle, Rear Rack & V-Brakes, Mint Green is offered in 20, 24 and 26 Inch SKUs. Although its catalog title states that it has a rear rack, that fact alone does not show that the rack accepts a child seat or supports its load. Consult the exact bicycle, rack and seat manuals.
If the child is moving to their own bicycle
| Wheel size | XBikes starting point |
|---|---|
| 12 Inch | Ages 3–4; 34–40 in / 86–102 cm |
| 14 Inch | Ages 3–6; 37–45 in / 94–114 cm |
| 16 Inch | Ages 4–7; 40–48 in / 102–122 cm |
| 20 Inch | Ages 7–12; 48–60 in / 122–152 cm |
| 24 Inch | Ages 10–14; 54–64 in / 137–163 cm |
| 26 Inch | Youth and adults over 60 in / 153 cm |
These are starting points, not substitutes for trying the bicycle. Measure the rider’s height and inseam, then check stand-over clearance, reach, brake control and current confidence. Do not buy an oversized bicycle for growth.
Your next step is specific: identify the proposed seat’s mount type, find both exact manuals, and compare mounting dimensions, approved use, hardware and load limits. Install only when every requirement agrees; otherwise, take the bicycle and seat to a qualified mechanic.
Bikes for your next adventure
-

Kids Bike Helmet by XJD for Boys & Girls – Black, Blue, Green, Pink, Purple
The XJD Kids Bike Helmet covers a wide 2-to-8-year age range thanks to two head-…$59.99
-
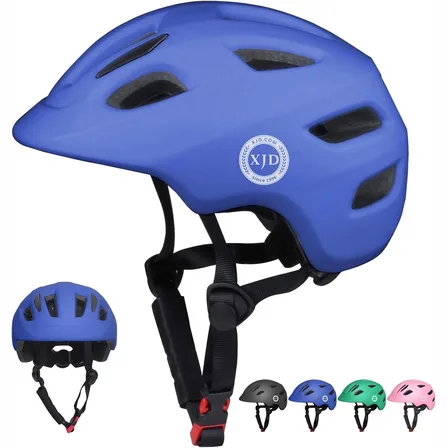
Blue XJD Kids' Bike Helmet, Adjustable Fit – Sizes XS & S
The Blue XJD Kids' Bike Helmet is a lightweight, adjustable helmet for toddlers …$20.39
-

Kids Bike Helmet by XJD for Girls – Pink
The XJD Kids Bike Helmet in Pink is a lightweight multi-sport helmet for girls r…$59.99
$99