

How to teach a child to ride a bike video
Teach a child to ride a bike by checking fit first, then practising balance, braking, starting and turning in short, calm sessions.
Before the first practice
Measure the child’s height and inseam, then compare those measurements with the bicycle rather than choosing by age alone. Have the child try the bike. Check that they can stand over it comfortably, reach the handlebar without stretching, steer with control and operate the brakes confidently.
Do not buy or use an oversized bicycle merely to allow room for growth. A bike that fits later may be difficult to control now. Age-based wheel guidance is only a starting point; measured height, inseam, reach, brake control and current confidence decide whether the setup is suitable.
A bicycle helmet should fit properly, sit level and have its straps adjusted according to the helmet manufacturer’s instructions. Choose a flat, open practice area away from traffic, parked vehicles, steep slopes and other obstacles. Check assembly and adjustment against the exact bicycle manual; if anything is uncertain, use a qualified bicycle mechanic.
Compare the child’s height with wheel-size starting points
| Wheel size | Starting age | Rider height |
|---|---|---|
| 12 Inch | 3–4 | 34–40 in / 86–102 cm |
| 14 Inch | 3–6 | 37–45 in / 94–114 cm |
| 16 Inch | 4–7 | 40–48 in / 102–122 cm |
| 18 Inch | 5–9 | 43–52 in / 109–132 cm |
| 20 Inch | 7–12 | 48–60 in / 122–152 cm |
| 24 Inch | 10–14 | 54–64 in / 137–163 cm |
| 26 Inch | Youth and adults | Over 60 in / 153 cm |
Overlapping ranges are normal. When two sizes appear possible, compare the child’s actual stand-over clearance, reach and brake operation on each bicycle. The larger listed size is not automatically the better choice.
Follow this video-style teaching sequence
- Show the controls. Ask the child to identify where they will look, how they will steer and how they will stop. Confirm that they can operate the brakes before adding speed.
- Practise balance. In a clear, flat area, let the child move slowly while looking ahead. Keep practice focused on a straight path and a controlled stop. Offer light support only when needed; avoid pulling the handlebar, which can interfere with steering.
- Add the start. Have the child place one foot ready to push, look toward the intended path and begin smoothly. Reset without fuss after each attempt.
- Combine start, ride and stop. Mark an obvious stopping point. The child should begin independently, travel toward it and brake under control.
- Introduce wide turns. Use generous loops before attempting tighter steering. Ask the child to look through the turn rather than down at the front wheel.
Move to the next step only after the current one looks repeatable and relaxed. End a session when concentration or confidence drops; a short successful attempt is more useful than forcing another lap.
How to help without taking over
Stand close enough to assist, but let the child make the steering decisions. If support is needed, stabilize the rider gently instead of steering for them. Use one instruction at a time: “look ahead,” “keep rolling,” or “brake now.” Too many corrections at once make it harder to connect movement with the result.
If the child repeatedly struggles to start, stop or hold a line, return to the preceding step. Also recheck fit. Difficulty may come from excessive reach, poor stand-over confidence or brakes the child cannot operate comfortably—not simply from a lack of effort.
When the supplied training-wheel bikes are relevant
The two catalog options are relevant when a family specifically wants to compare training-wheel bicycles in the wheel sizes supplied. They help frame the size decision, but their titles and catalog labels do not replace an individual fit check or prove that a particular learning method suits the child.
XJD Kids' Training Wheel Bike for Boys & Girls, 12/14/16 Inch – White is offered with 12 Inch, 14 Inch and 16 Inch SKU labels. Girls' Training Wheel Bike by XJD, 12–20 Inch Wheels – Blue offers 12 Inch, 14 Inch, 16 Inch and 20 Inch labels. The practical catalog difference is that the blue option adds a listed 20 Inch choice; neither supplied product lists an 18 Inch, 24 Inch or 26 Inch option.
These particular options help answer the title by giving parents training-wheel models to compare after measuring the rider and identifying an appropriate starting wheel size.
 XJD Kids' Training Wheel Bike for Boys & Girls, 12/14/16 Inch – White
A training-wheel bicycle offered in 12 Inch, 14 Inch and 16 Inch SKU labels. Compare the rider’s measured height, inseam, reach, brake control and confidence with the actual bike before choosing.
 Girls' Training Wheel Bike by XJD, 12–20 Inch Wheels – Blue
A training-wheel bicycle with 12 Inch, 14 Inch, 16 Inch and 20 Inch SKU labels. Its listed 20 Inch option broadens the supplied size comparison, but individual fit still takes priority.
Training wheels may be relevant when the parent has deliberately chosen supported riding practice. They are less relevant if the immediate goal is unsupported balance practice or if none of the listed sizes passes the child’s fit check. For installing, adjusting or removing training wheels, follow the exact product manual or ask a qualified bicycle mechanic; no universal procedure or setting should be assumed.
Know when to pause or progress
Pause if the child cannot stand over the bike comfortably, reach the controls, operate the brakes, steer predictably or stop on request. Recheck the bicycle and helmet fit before continuing. Progress when the child can repeat a controlled start, straight ride, stop and wide turn while looking ahead.
The next action is simple: measure height and inseam today, test stand-over, reach and brake control on the actual bike, then begin with the first unfinished step in the sequence.
Bikes for your next adventure
-
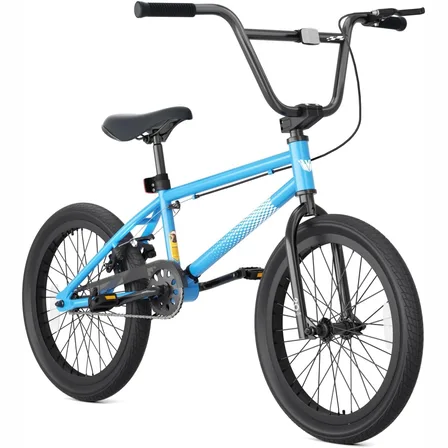
Blue XJD Freestyle BMX Bike, 20-Inch – No Pegs
The XJD 20-Inch Blue Freestyle BMX is an entry-level BMX bike for boys and girls…$189.99
-

Kids Bike Helmet by XJD for Boys & Girls – Black, Blue, Green, Pink, Purple
The XJD Kids Bike Helmet covers a wide 2-to-8-year age range thanks to two head-…$59.99
-

Kids Bike Helmet by XJD for Girls – Pink
The XJD Kids Bike Helmet in Pink is a lightweight multi-sport helmet for girls r…$59.99
$99