

How to teach a kid to ride a bike video
To teach a kid to ride a bike, use a short video to preview the sequence: check fit and helmet, practise braking, glide with feet down, then add pedalling.
Measure before pressing play
Measure the child’s height without shoes and check inseam against the actual bicycle. Age is only a starting point. The rider should be able to stand over the bike, reach the handlebars without stretching, operate the brakes, and control the bicycle at a stop.
Have the child try the exact bicycle whenever possible. Do not choose an oversized bike for future growth: extra size can make starting, stopping and steering harder. Follow the bicycle manual for adjustments or ask a qualified bicycle mechanic when the correct setup is unclear.
| Wheel size | XBikes starting age | Rider-height starting point |
|---|---|---|
| 12 Inch | 3–4 | 34–40 in / 86–102 cm |
| 14 Inch | 3–6 | 37–45 in / 94–114 cm |
| 16 Inch | 4–7 | 40–48 in / 102–122 cm |
These ranges help narrow the comparison, but measured height, inseam, reach, brake control and current confidence decide whether a bike actually fits.
Use the video as a preview, not the lesson
Show one skill at a time rather than expecting the child to copy an entire ride. Pause after each step, demonstrate it slowly, and move to a flat, open area away from traffic and obstacles. Keep practice short enough that attention and confidence remain steady.
- Walk the bike: ask the child to hold the bars, walk beside the bicycle and practise turning it.
- Learn the brakes: while walking or seated with feet down, practise stopping on a clear cue. Confirm the child can reach and operate the controls.
- Glide: with the seat adjusted according to the product manual, let the rider push with both feet, coast briefly and put feet down to stop.
- Steer while looking ahead: place a visible target ahead and encourage gentle corrections rather than sharp handlebar movements.
- Add pedalling: once gliding and braking are controlled, start with one pedal positioned for a strong first push, then look forward and pedal.
A useful teaching video should show these actions from the side and from the child’s viewpoint. Replay only the step being practised; the real evidence of readiness is the child performing it with control.
Set the helmet correctly
Use a bicycle helmet that fits properly. It should sit level on the head, and its straps must be adjusted according to the helmet manufacturer’s instructions. Recheck the fit before every session, especially if the child has changed hairstyle or the helmet has been shared.
A helmet does not correct a poorly fitting bicycle or replace supervision. Stop the session if the rider cannot reliably reach the ground as needed, steer, or use the brakes.
Support without steering for them
Stand close enough to assist, but avoid pulling the handlebars; that removes the child’s chance to learn balance and steering. If support is needed, steady the rider gently at the torso or follow the method specified in the bicycle manual. Release support gradually and say what you are doing before you let go.
Use simple cues such as look ahead, soft arms and brake, then feet down. One cue at a time is easier to apply than a stream of instructions. A wobble is a signal to reset, not to increase speed.
Where the supplied bike fits the decision
The Black XJD Kids Bike for Boys – 12, 14 & 16 Inch Sizes is categorized as a Training Wheel Bike and offers 12 Inch, 14 Inch and 16 Inch SKU labels. Those options make it relevant when comparing the three starting ranges above, but the title wording is a catalog label rather than individual fit evidence.
These particular catalog options help answer the fit step in the teaching video because a parent can compare the child’s measured height with three distinct wheel-size starting points before arranging an in-person control and reach check.

The product is relevant only if one of its listed sizes matches the child’s measurements and the child can stand over, reach, brake and control the actual bike. Its catalog facts do not specify assembly, adjustment procedures, load limits, maintenance details or component compatibility; use the exact product manual or a qualified bicycle mechanic for those questions.
Know when to move to the next clip
Advance from walking to gliding only when stopping is deliberate. Add pedalling only when the child can glide, look ahead, steer a simple line and stop without panic. If control breaks down, return to the last successful step or recheck fit instead of pushing through.
The next action is straightforward: measure height and inseam, test reach and braking on the actual bike, fit the helmet level, then practise only the first unfinished skill from the video.
Bikes for your next adventure
-
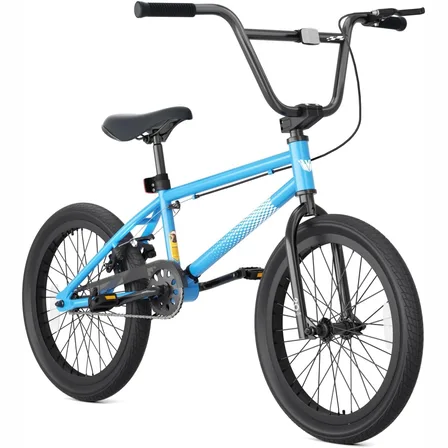
Blue XJD Freestyle BMX Bike, 20-Inch – No Pegs
The XJD 20-Inch Blue Freestyle BMX is an entry-level BMX bike for boys and girls…$189.99
-

Kids Bike Helmet by XJD for Boys & Girls – Black, Blue, Green, Pink, Purple
The XJD Kids Bike Helmet covers a wide 2-to-8-year age range thanks to two head-…$59.99
-

Kids Bike Helmet by XJD for Girls – Pink
The XJD Kids Bike Helmet in Pink is a lightweight multi-sport helmet for girls r…$59.99
$99