

How to train my kid to ride a bike
To train your kid to ride a bike, check the fit first, teach stopping before speed, practise balance in short sessions, then reduce support gradually.
Measure the rider before choosing the bike
Measure your child’s standing height and inseam while they wear the shoes they will ride in. Age is only a starting point. Compare those measurements with wheel-size guidance, then have the child try the actual bicycle.
On that bike, check that they can stand over it, reach the handlebars without stretching, steer comfortably and operate the brakes with control. Do not buy an oversized bicycle for future growth. If the child cannot control the bike confidently now, choose a better-fitting option.
| Wheel size | Starting age | Rider height |
|---|---|---|
| 12 Inch | 3–4 | 34–40 in / 86–102 cm |
| 14 Inch | 3–6 | 37–45 in / 94–114 cm |
| 16 Inch | 4–7 | 40–48 in / 102–122 cm |
| 18 Inch | 5–9 | 43–52 in / 109–132 cm |
| 20 Inch | 7–12 | 48–60 in / 122–152 cm |
| 24 Inch | 10–14 | 54–64 in / 137–163 cm |
| 26 Inch | Youth and adults | Over 60 in / 153 cm |
Overlapping ranges are comparison points, not proof that either size fits. The deciding evidence is the child’s height, inseam, reach, brake control and present confidence on the assembled bike.
Prepare a simple, controlled practice area
Choose a wide, flat area away from traffic, parked vehicles, steep slopes and obstacles. Have the child wear a bicycle helmet that fits properly, sits level and has its straps adjusted according to the helmet manufacturer’s instructions. Closed-toe shoes and practical clothing help avoid distractions.
Before moving, identify how this particular bicycle stops. Follow its manual when adjusting the seat, handlebars, training wheels or other components. If assembly, compatibility or adjustment is unclear, use a qualified bicycle mechanic rather than improvising.
Teach the skills in a deliberate order
- Mount and stop: Let the child practise getting on, placing their feet securely and using the bike’s braking system while you keep the bicycle stationary.
- Look and steer: Ask them to look toward an obvious destination rather than down at the front wheel. Practise gentle steering at walking pace.
- Start: Teach a repeatable starting position, then let the child push off while you provide only enough support to prevent a fall.
- Pedal and brake: Use a short, straight route. Ask for a few controlled pedal turns followed by an intentional stop at a visible marker.
- Turn: Add broad turns only after starts and stops are consistent. Progress to tighter turns gradually.
Support the child at the torso if help is needed; avoid steering the handlebars for them, because they need to feel and correct the bike’s direction. Give one instruction at a time and end a session before fatigue or frustration weakens control.
Move beyond training wheels by watching control
Training wheels can provide initial stability, but they do not replace learning to balance. Do not remove or reposition them merely because of the child’s age. Look instead for calm starts, purposeful braking, eyes forward, predictable steering and the ability to remain composed when the surface is not perfectly even.
When those skills are repeatable, reduce assistance in small steps following the bicycle’s exact manual. If the manual does not explain training-wheel adjustment or removal, ask a qualified bicycle mechanic. Return to more support if the child begins leaning heavily, loses brake control or becomes afraid.
How the supplied XBikes options compare
The three catalog options are relevant because each is a training-wheel bike offered in 12 Inch, 14 Inch and 16 Inch labels. They let you compare the size indicated by your child’s measurements without treating colour or title wording as fit evidence.
 XJD Boys 12/14/16" Training Wheel Bike – Blue
A blue training-wheel bike offered with 12 Inch, 14 Inch and 16 Inch SKU labels; compare the selected size with the rider’s measurements and individual control check.
 Black XJD Kids Bike for Boys – 12, 14 & 16 Inch Sizes
A black training-wheel bike available in 12 Inch, 14 Inch and 16 Inch labels. Its title wording is not fit evidence; use measured height, reach and brake control.
 XJD Kids' Training Wheel Bike for Boys & Girls, 12/14/16 Inch – White
A white training-wheel bike with 12 Inch, 14 Inch and 16 Inch options. It is relevant when one of those starting sizes is supported by an individual fit check.
- XJD Boys 12/14/16" Training Wheel Bike – Blue is listed in 12 Inch, 14 Inch and 16 Inch sizes.
- Black XJD Kids Bike for Boys – 12, 14 & 16 Inch Sizes has the same three available size labels.
- XJD Kids' Training Wheel Bike for Boys & Girls, 12/14/16 Inch – White is also available with 12 Inch, 14 Inch and 16 Inch labels.
Based on the supplied facts, the meaningful catalog differences stated here are their exact titles and colour wording; no brake type, weight, material, load limit or other performance distinction is provided. Treat “boys” or “boys & girls” as catalog wording, not a sizing rule. None of these products supplies an 18, 20, 24 or 26 Inch option, so they are not substitutes when the child’s individual fit check indicates one of those sizes.
Know when to pause or change the setup
Pause if your child cannot reach the controls, consistently stops with their feet instead of the intended braking system, cannot stand over the bicycle appropriately, or must stretch to steer. Recheck the selected size and all adjustments. Persistent discomfort or fear is a signal to simplify the exercise, not to push for more speed.
Your next step is concrete: measure height and inseam, shortlist the matching wheel-size starting point, perform an in-person reach and brake-control check, then begin with mounting and controlled stops before asking your child to pedal farther.
Bikes for your next adventure
-
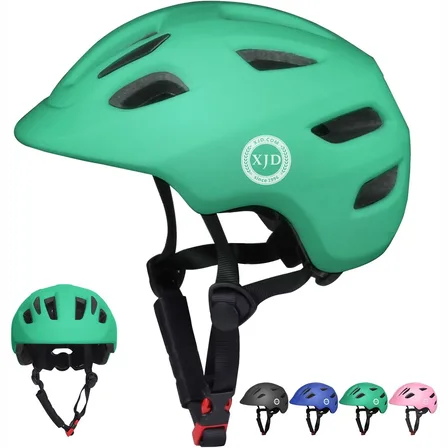
Green XJD Toddler Bike Helmet with Adjustable Fit, XS (46–51 cm)
The XJD toddler bike helmet in Green is built for the youngest riders — the size…$20.39
$23.99 -

Kids Bike Helmet by XJD for Boys & Girls – Black, Blue, Green, Pink, Purple
The XJD Kids Bike Helmet covers a wide 2-to-8-year age range thanks to two head-…$59.99
-

Kids Bike Helmet by XJD for Girls – Pink
The XJD Kids Bike Helmet in Pink is a lightweight multi-sport helmet for girls r…$59.99
$99