

How to wrap a toddler bike
To wrap a toddler bike, first measure its widest, tallest and longest points, then choose either a fitted box or a paper-covered fabric wrap. Protect protruding parts, keep all small pieces together and never force handlebars, pedals, a basket or training wheels into a position the manual does not permit.
Measure before buying wrapping supplies
Measure the actual bike as it will be presented. Do not estimate from wheel size, because handlebars, training wheels and accessories can determine the final package dimensions.
- Length: Measure from the frontmost to the rearmost point.
- Height: Measure from the floor to the highest point.
- Width: Measure the widest point, which may be the handlebars or training wheels.
If using a box, compare all three measurements with its internal dimensions and allow space for padding. If using paper over a reusable sheet or fabric cover, measure enough material to reach beneath the bike from both sides. Add extra paper for overlaps rather than trying to make separate sheets meet edge to edge.
Choose the wrapping method
A fitted bicycle box gives the cleanest rectangular shape and conceals the gift completely. Use padding so the bike cannot shift, and follow the exact product manual for any assembly or repositioning. If compatibility or assembly is unclear, leave the bike intact or ask a qualified bicycle mechanic.
For an assembled bike, place it on a large fabric sheet or opaque reusable cover. Bring the material up around the bike, secure it above the frame without compressing controls or cables, and add paper panels or a large bow. This method works better than forcing ordinary wrapping paper around an irregular outline.
A third option is a reveal wrap: park the bicycle where it will be given, cover it fully with an opaque sheet, and attach a gift tag. This is useful when a box would be cumbersome, but keep the hidden bike stable and out of walkways.
Wrap it without damaging the bike
- Clean and dry the bike so dirt or moisture is not trapped against it.
- Pad exposed ends and projecting parts with clean, soft material. Do not tape directly to painted surfaces, controls, the saddle, basket or tires.
- Place loose accessories and their instructions in a labeled bag or small wrapped box. Keep required hardware with the correct component.
- Put the bike in the measured box or bring the cover around it. Secure the wrapping to itself, not to moving parts.
- Check that the package stands securely and that no sharp or rigid point can pierce the wrapping.
If the bicycle must be partly assembled after unwrapping, retain every manual and follow its exact procedures, compatibility guidance and torque requirements. Use a qualified bicycle mechanic when those instructions are missing or uncertain.
Confirm the bicycle fits before the reveal
Wrapping should come after a fit decision, not hide a guess. Measure the child’s standing height and inseam, then have the child try the bike when practical. They should have suitable stand-over clearance, comfortable reach, reliable control and the ability to operate the brakes. Do not choose an oversized bicycle merely to allow room for growth.
| Wheel size | XBikes starting point |
|---|---|
| 12 Inch | Ages 3–4; 34–40 in / 86–102 cm |
| 14 Inch | Ages 3–6; 37–45 in / 94–114 cm |
| 16 Inch | Ages 4–7; 40–48 in / 102–122 cm |
| 20 Inch | Ages 7–12; 48–60 in / 122–152 cm |
These ranges are starting points only. Measured height, inseam, reach, brake control and current confidence take priority over age. The catalog options below are relevant because each is a training-wheel bicycle offered in multiple listed wheel sizes; one title also identifies a basket, which may affect the wrapped dimensions.
 Light Pink XJD Girls' Bicycle with Basket & Training Wheels
Available in 12, 14, 16 and 20 Inch labels. Its title identifies a basket and training wheels, so measure the complete bicycle before choosing a box or cover.
 Blue XJD Girls Bike with Training Wheels – 12/14/16 Inch
A training-wheel bicycle offered in 12, 14 and 16 Inch labels. Compare the rider’s measurements and individual fit before selecting a size and measuring the actual bike for wrapping.
 XJD Boys 12/14/16" Training Wheel Bike – Blue
A blue training-wheel bicycle with 12, 14 and 16 Inch labels. Use the supplied sizing starting points, then confirm stand-over, reach, brake control and confidence before wrapping.
Compare the supplied options
Light Pink XJD Girls' Bicycle with Basket & Training Wheels is listed in 12 Inch, 14 Inch, 16 Inch and 20 Inch sizes. Its title identifies both a basket and training wheels, so measure the complete presented shape rather than using wheel diameter to estimate wrapping material.
Blue XJD Girls Bike with Training Wheels – 12/14/16 Inch is offered in 12 Inch, 14 Inch and 16 Inch sizes. XJD Boys 12/14/16" Training Wheel Bike – Blue has the same three supplied size labels. Compare the child’s measurements and individual fit first; the wording in either product title does not establish fit.
None of these products is relevant if the child does not fit its available sizes or if a different bicycle type is required. Product titles also do not establish package dimensions, assembly steps or whether parts may be repositioned, so inspect the actual bicycle and consult its manual before wrapping.
Finish safely and make the next step obvious
Include a properly fitting bicycle helmet with the gift, but wrap it separately so its shape is not compressed. The helmet should sit level and its straps should be adjusted according to the helmet manufacturer’s instructions.
Before the reveal, remove ribbons or film that could entangle wheels, confirm the bike is stable, and plan an adult-supervised fit check before riding. Your final decision is simple: measure the child first, choose a fitting wheel-size option, measure the actual presented bike, then use a box only if its internal dimensions clear every protruding part; otherwise use a loose opaque cover.
Bikes for your next adventure
-
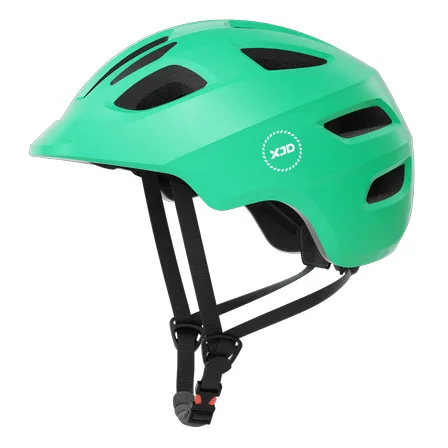
Green XJD Kids Bike Helmet for Boys & Girls
The Green XJD Kids Bike Helmet is a lightweight multi-sport helmet for toddlers …$59.99
$99 -
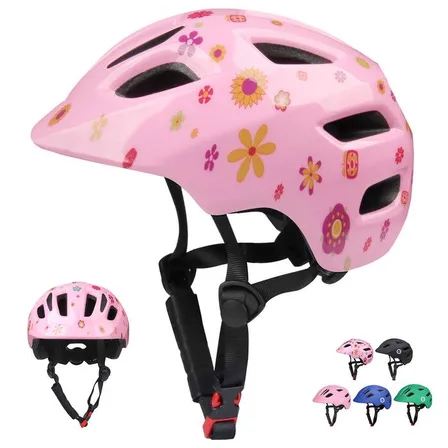
Girls Bike Helmet by XJD, Pink Flower Print
7 reviews
The XJD Girls Bike Helmet in Pink Flower print is a fun, floral kids helmet desi…$59.99
-

Kids Bike Helmet by XJD for Girls – Pink
The XJD Kids Bike Helmet in Pink is a lightweight multi-sport helmet for girls r…$59.99
$99