

Should i let my 12 year old bike alone
A 12-year-old may bike alone if they can control the bike reliably, follow an agreed route and handle predictable problems. Decide from demonstrated skills, fit and local conditions—not age alone.
Measure readiness before giving permission
First, measure your child’s height and inseam, then have them try the actual bicycle. They should be able to stand over it comfortably, reach the handlebars without stretching, operate the brakes confidently and start, stop, turn and look behind without losing control. Do not choose an oversized bicycle merely to allow room for growth.
Next, watch rather than ask. On a supervised ride, can your child hold a steady line, signal before turning, scan driveways and side streets, judge when to wait, and stop under control? Confidence should be calm and repeatable. Speed, enthusiasm or riding confidently in a driveway does not establish readiness for independent travel.
Compare the bike with the rider
Use these XBikes wheel-size starting points only to narrow the choice; they do not replace an individual fit check.
| Wheel size | Starting age | Rider height |
|---|---|---|
| 20 Inch | 7–12 | 48–60 in / 122–152 cm |
| 24 Inch | 10–14 | 54–64 in / 137–163 cm |
| 26 Inch | Youth and adults | Over 60 in / 153 cm |
A 12-year-old could therefore begin near more than one size band. Compare the measured height first, then verify inseam clearance, reach, brake control and present confidence on the exact bike. A nominally suitable wheel size is still wrong if the rider cannot mount, stop or steer comfortably.
Test the route, not just the child
Ride the proposed route together at the same time of day the child would use it alone. Identify crossings, parked cars, blind corners, loose surfaces, steep sections, construction, isolated areas and places where drivers may not expect a cyclist. A child ready for a quiet neighborhood loop may not be ready for a route involving busy junctions or poor visibility.
Set a clear boundary: an exact route, destination, departure and return time. Agree on where to stop and walk, whom to contact, what to do after a fall or mechanical problem, and whether the ride is cancelled by darkness, bad weather or an unexpected route change. Check applicable local cycling and supervision rules before permitting the trip.
Run one supervised independence trial
- Inspect the bicycle using its exact product manual; if its condition or assembly is uncertain, use a qualified bicycle mechanic.
- Fit a bicycle helmet so it sits level, fits properly and uses its straps according to the manufacturer’s instructions.
- Have the child lead while you follow far enough back to avoid prompting every decision.
- Repeat the route and review specific mistakes. Do not approve solo riding until safe choices are consistent.
For a first independent ride, choose the simplest familiar route and a short check-in window. A phone can help if permitted and practical, but it does not replace route judgment or bicycle control.
How the supplied bikes relate to this decision
The catalog options below are training-wheel bikes, so they help mainly as size and confidence comparison points. XJD Girls' Bike with Training Wheels, 12/14/16/20 Inch – Purple and XJD Kids Bike for Girls – Pink, 12/14/16/20 Inch with Training Wheels have supplied SKU labels from 12 through 20 Inch. XJD Light Purple Girls Bike with Basket, Training Wheels, 12/14/16/20 Inch has supplied SKU labels of 12, 14 and 16 Inch, despite 20 Inch appearing in its catalog title.
 XJD Girls' Bike with Training Wheels, 12/14/16/20 Inch – Purple
A training-wheel bike offered in supplied 12, 14, 16 and 20 Inch SKU labels. Its 20 Inch option may be a comparison point only after measuring height, inseam, reach and brake control.
 XJD Kids Bike for Girls – Pink, 12/14/16/20 Inch with Training Wheels
This pink training-wheel model has supplied 12, 14, 16 and 20 Inch SKU labels. For a 12-year-old, consider an offered size only when individual fit and current confidence support it.
 XJD Light Purple Girls Bike with Basket, Training Wheels, 12/14/16/20 Inch
This basket-equipped training-wheel bike has supplied SKU labels of 12, 14 and 16 Inch. Although its exact catalog title mentions 20 Inch, no 20 Inch SKU label was supplied, so verify only the listed options.
For a 12-year-old, these products are relevant only when an individually checked offered size fits and training wheels match the rider’s current needs. The 20 Inch starting band covers heights of 48–60 in / 122–152 cm, while many riders aged 10–14 begin comparison at 24 Inch. None of the supplied products has a verified 24 Inch or 26 Inch SKU, so they are nearest-size comparison points—not substitutes for either size. The 12, 14 and 16 Inch options are below the supplied age starting points for a typical 12-year-old and should never be justified by age wording or appearance.
Make the yes-or-no decision
Say yes only when the child fits and controls the bicycle, repeatedly demonstrates safe decisions, knows the route and emergency plan, and the route itself is appropriate. Say not yet if braking, scanning, judgment, fit or route conditions remain uncertain; practise together and reassess. Before the first solo ride, measure height and inseam, complete the route trial, verify helmet fit and write down the exact riding boundary.
Bikes for your next adventure
-
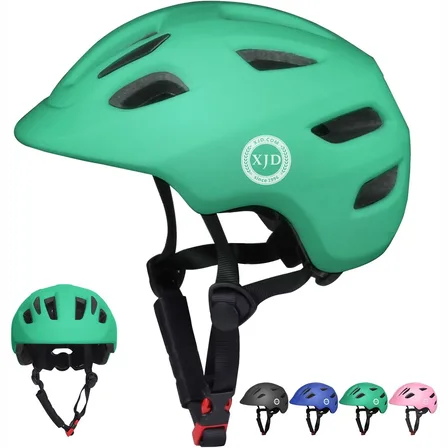
Green XJD Toddler Bike Helmet with Adjustable Fit, XS (46–51 cm)
The XJD toddler bike helmet in Green is built for the youngest riders — the size…$20.39
$23.99 -

Kids Bike Helmet by XJD for Boys & Girls – Black, Blue, Green, Pink, Purple
The XJD Kids Bike Helmet covers a wide 2-to-8-year age range thanks to two head-…$59.99
-

Kids Bike Helmet by XJD for Girls – Pink
The XJD Kids Bike Helmet in Pink is a lightweight multi-sport helmet for girls r…$59.99
$99