

What are some kids bike accessories
Useful kids bike accessories include a properly fitted helmet, visibility gear, a bell, storage, weather protection and learning aids that match the child and bicycle.
Start with the accessory that protects the rider
A bicycle helmet is the first accessory to choose. Measure the child’s head where the helmet maker instructs, then compare that measurement with the manufacturer’s size chart. A helmet should sit level and fit properly, with its straps adjusted according to its instructions. Replace or reassess it whenever its fit, condition or manufacturer guidance calls for that.
Do not choose a larger helmet for future growth. Have the child try it on, check that it remains level when secured and confirm that the straps do not interfere with comfortable head movement.
Add accessories for communication and visibility
A bell can help a child announce their presence, but only if they can reach and operate it without loosening their grip or losing control. Before buying, measure the handlebar where the bell would attach and compare its diameter with the accessory’s stated compatibility.
Lights and reflectors may improve conspicuity, but they do not make every riding environment appropriate for a child. Compare the mounting method with the actual handlebar, seatpost, frame or clothing location. Make sure the fitted item cannot obstruct steering, braking, cables or the rider’s movement. Follow the accessory manual for installation and use.
Choose carrying and comfort items carefully
A small basket, handlebar bag or frame bag can carry light essentials. Check its mounting location, dimensions and stated load limit against the exact bicycle and manual. After fitting it, turn the handlebar fully in both directions and check that the item does not contact a wheel, interfere with controls or affect the child’s view.
A bottle and holder are useful only when the child can reach them without unsafe movement and the bicycle has a compatible mounting arrangement. Mudguards may help on wet paths, while gloves or weather-appropriate clothing can improve comfort. For compatibility, clearances, load limits and installation procedures not stated in the catalog, consult the product manuals or a qualified bicycle mechanic.
Match learning accessories to current confidence
Training wheels or other learning aids are relevant for some beginners, but they should match the exact bicycle and the child’s present ability. Do not assume that an accessory fits merely because its label mentions the same nominal wheel size. Frame shape, axle arrangement and manufacturer requirements can also matter. Use only the approved installation process in the exact manuals, or ask a qualified bicycle mechanic.
The catalog option below helps answer the question because its three supplied wheel-size labels provide concrete bicycle sizes against which parents can compare accessory labels. The Black XJD Kids Bike for Boys – 12, 14 & 16 Inch Sizes is a Training Wheel Bike offered in 12 Inch, 14 Inch and 16 Inch variants; it is a bicycle comparison point, not itself an accessory.

Measure the child and bicycle before ordering
First measure the rider’s standing height and inseam. Then have the child try the bicycle: check stand-over space, reach to the handlebar, ability to control the brakes and overall confidence. Age is only a starting point, and an oversized bicycle should not be bought merely for growth.
| Wheel label | XBikes starting point | Accessory check |
|---|---|---|
| 12 Inch | Ages 3–4; 34–40 in / 86–102 cm | Confirm the accessory names 12 Inch compatibility and fits the exact bicycle. |
| 14 Inch | Ages 3–6; 37–45 in / 94–114 cm | Do not treat a nearby wheel label as interchangeable. |
| 16 Inch | Ages 4–7; 40–48 in / 102–122 cm | Check mounting dimensions, control clearance and the manual. |
These ranges are starting points rather than proof of fit. The rider’s measured height, inseam, reach, brake control and confidence take priority. Any age wording in a product name is a catalog label, not individual fit evidence.
Use a quick compatibility check
- Identify the exact bicycle: record its wheel-size label and model or variant.
- Measure the mounting area: note the relevant handlebar, frame, seatpost or clearance dimensions.
- Read both manuals: compare attachment requirements, permitted locations and stated limits.
- Test controls: confirm the child can steer, brake, mount and dismount without the accessory getting in the way.
- Recheck after fitting: inspect security and positioning before each ride, following manufacturer guidance.
Choose the helmet first, then add only accessories that solve a real need and pass the measurement, compatibility and child-control checks on the exact bike.
Bikes for your next adventure
-
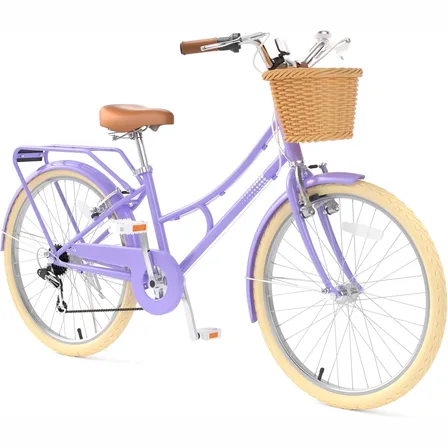
24-Inch Purple XJD Beach Cruiser Bike with U-Brake
The XJD 24-Inch Purple Beach Cruiser is built for girls and young women roughly …$159.99
-

Kids Bike Helmet by XJD for Boys & Girls – Black, Blue, Green, Pink, Purple
The XJD Kids Bike Helmet covers a wide 2-to-8-year age range thanks to two head-…$59.99
-

Kids Bike Helmet by XJD for Girls – Pink
The XJD Kids Bike Helmet in Pink is a lightweight multi-sport helmet for girls r…$59.99
$99