

What do need to put a kids bike together
To put a kids bike together, you need the exact product manual, every supplied part, the manual-specified tools, a clear workspace and a final fit and safety check.
Gather the right information before assembly
Open the box carefully and identify the bicycle, loose components, hardware and instructions. Compare everything with the manual’s parts list before starting. If a component or fastener is missing, damaged or different from the illustration, stop rather than improvising a substitute.
The required tools, assembly sequence and tightening settings vary by bicycle. Use only the tools and torque values named in the exact product manual. If the instructions are missing or unclear, or you do not have the specified equipment, have a qualified bicycle mechanic assemble and inspect the bike.
Measure the child before choosing a wheel size
Assembly does not make an incorrectly sized bike suitable. Measure the child’s standing height and inseam in ordinary riding shoes. Then have the child try the assembled bicycle in a controlled area. Check that there is appropriate stand-over clearance, that the child can mount and dismount without struggling, and that the riding position does not force an uncomfortable stretch.
| Wheel size | Starting age | Starting rider height |
|---|---|---|
| 12 Inch | 3–4 | 34–40 in / 86–102 cm |
| 14 Inch | 3–6 | 37–45 in / 94–114 cm |
| 16 Inch | 4–7 | 40–48 in / 102–122 cm |
| 18 Inch | 5–9 | 43–52 in / 109–132 cm |
| 20 Inch | 7–12 | 48–60 in / 122–152 cm |
| 24 Inch | 10–14 | 54–64 in / 137–163 cm |
| 26 Inch | Youth and adults | Over 60 in / 153 cm |
These are starting points, not proof of fit. Prioritize measured height, inseam, reach, brake control and current confidence over age. Do not choose an oversized bicycle merely to allow room for growth.
Follow the bike’s own assembly sequence
Many boxed bicycles require some final assembly, but the work included cannot be assumed from wheel size or appearance. Follow the manual in order, keeping left- and right-side components distinct where the instructions require it. Do not guess how a part is oriented, whether a fastener needs lubrication or how tightly it should be secured.
- Match every loose part and fastener to the manual.
- Complete each assembly stage in the stated order.
- Use the specified tool and torque instruction for every relevant fastener.
- Apply any manual-required adjustments without exceeding the marked limits on components.
- Repeat the manual’s complete pre-ride inspection after assembly.
Stop if threads resist unexpectedly, a part will not align, cables appear damaged, a wheel does not turn correctly or the controls do not operate as described. Those are reasons for inspection by a qualified bicycle mechanic, not extra force or a homemade workaround.
Check fit, controls and protective equipment
With an adult holding the bicycle steady, let the child check the riding position. The child should be able to reach the handlebar and operate the brakes reliably without losing control of the grip. Confirm stand-over, steering control and comfortable leg movement. A rider who technically falls within a height band may still need another size because proportions, reach and confidence differ.
Complete every safety and operational check required by the manual before riding. A bicycle helmet must fit properly, sit level and have its straps adjusted according to the helmet manufacturer’s instructions. If you cannot confirm correct assembly, adjustment or control operation, arrange a mechanic’s inspection before the first ride.
How the supplied XBikes options help you compare
The catalog options show which wheel-size labels are available for three specific bicycles, helping you compare the child’s measurements with an actual selectable size. They do not reveal the included tools, assembly steps, torque settings or exact fit, so the chosen bike’s manual and an individual try-on remain essential.
 Pink XJD Beach Cruiser Bike, 24"/26", U-Brake
Available in 24 Inch and 26 Inch labels, this Beach Cruiser Bike is relevant when the measured rider fits those starting size ranges and can pass an individual control check.
 Light Pink XJD Girls' Bicycle with Basket & Training Wheels
This Training Wheel Bike offers 12 Inch, 14 Inch, 16 Inch and 20 Inch labels, providing several catalog size points to compare with measured height, inseam, reach and confidence.
 Blue XJD Girls Bike with Training Wheels – 12/14/16 Inch
This Training Wheel Bike has 12 Inch, 14 Inch and 16 Inch labels. Use those options as initial measurement comparisons, then verify the child's individual fit and control.
The Light Pink XJD Girls' Bicycle with Basket & Training Wheels has 12 Inch, 14 Inch, 16 Inch and 20 Inch labels. The Blue XJD Girls Bike with Training Wheels – 12/14/16 Inch offers 12 Inch, 14 Inch and 16 Inch labels. Both are categorized as Training Wheel Bikes, but their available size ranges are not identical.
The Pink XJD Beach Cruiser Bike, 24"/26", U-Brake offers 24 Inch and 26 Inch labels and is categorized as a Beach Cruiser Bike. Compare those labels only with the measured rider and the starting-point table; the product title itself does not establish fit.
Your next decision
Measure height and inseam first, shortlist only the matching wheel-size starting points, and have the child check stand-over, reach, brake operation and confidence. Then obtain the exact manual and confirm that all listed parts and specified tools are present. Assemble strictly to that manual—or choose a qualified bicycle mechanic when anything is missing, unclear or cannot be verified.
Bikes for your next adventure
-

Kids Bike Helmet by XJD for Boys & Girls – Black, Blue, Green, Pink, Purple
The XJD Kids Bike Helmet covers a wide 2-to-8-year age range thanks to two head-…$59.99
-
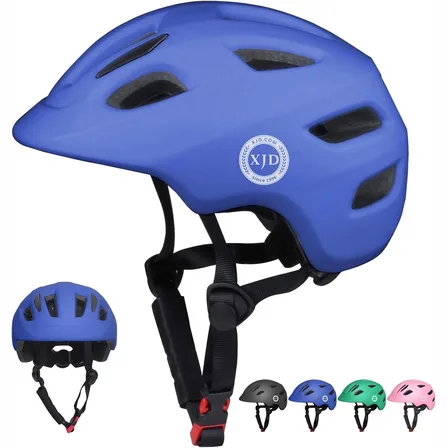
Blue XJD Kids' Bike Helmet, Adjustable Fit – Sizes XS & S
The Blue XJD Kids' Bike Helmet is a lightweight, adjustable helmet for toddlers …$20.39
-

Kids Bike Helmet by XJD for Girls – Pink
The XJD Kids Bike Helmet in Pink is a lightweight multi-sport helmet for girls r…$59.99
$99