

What size bike does my child need
Measure your child’s height and inseam, then compare height with the wheel-size table below. Choose a bike they can stand over, reach and control now—not one they must grow into.
Measure the rider first
Have your child wear the shoes they normally use for riding. Measure total height while they stand straight against a wall. For inseam, have them stand with feet slightly apart; measure from the floor to the top of the inner leg.
Height gives you a practical wheel-size starting point. Inseam helps with the essential stand-over check, but there is no universal inseam-to-wheel formula because frame shapes differ. Record both measurements rather than estimating from clothing size.
Compare the measured height with wheel size
| Wheel size | XBikes starting age | Rider height |
|---|---|---|
| 12 Inch | 3–4 | 34–40 in / 86–102 cm |
| 14 Inch | 3–6 | 37–45 in / 94–114 cm |
| 16 Inch | 4–7 | 40–48 in / 102–122 cm |
| 18 Inch | 5–9 | 43–52 in / 109–132 cm |
| 20 Inch | 7–12 | 48–60 in / 122–152 cm |
| 24 Inch | 10–14 | 54–64 in / 137–163 cm |
| 26 Inch | Youth and adults | Over 60 in / 153 cm |
Use the rider’s measured height before age. The overlapping ranges are intentional starting points, not proof that every bike in either size will fit. Frame geometry, seat adjustment and handlebar position can make two bicycles with the same wheel size feel different.
Check the bike in person
Once the table identifies one or two likely sizes, have your child try the exact bicycle. With the child straddling the frame and both feet on the ground, confirm there is comfortable clearance rather than contact with the frame. Follow the product manual for the correct seat and handlebar adjustment limits.
Next, watch the child sit, start, stop and turn in a controlled area. They should be able to reach the handlebars without stretching or locking their arms, steer without fighting the bike, and operate every fitted brake control comfortably. Their feet must provide the support appropriate to their present skill and confidence.
Reject a size if the rider has to lean awkwardly, cannot reach a brake lever, struggles to turn the bars, or appears intimidated by the bicycle. Do not buy an oversized bike solely to allow room for growth; control today matters more than hoped-for future use.
Choose between overlapping sizes
If your child’s height falls in two ranges, the larger number is not automatically the right answer. Compare both actual bicycles and prioritize stand-over clearance, reach, brake operation and calm, repeatable control. A less-confident or first-time rider may feel more capable on the option they can manage without hesitation.
Age can help narrow the search, but it cannot settle the decision. Growth patterns and riding ability vary, so measured height and a hands-on fit check should overrule an age-based guess. Recheck fit after a growth spurt and before passing a bicycle to another child.
How the supplied XBikes options fit this decision
The two catalog options are relevant when your child’s measurement and trial point toward a 12, 14 or 16 Inch training-wheel bike. They let you compare three adjacent wheel sizes within overlapping height ranges, but the exact bicycle still needs an individual fit check.
 Girls 12/14/16 Inch Kids Bike by XJD with Training Wheels – Peach
A Training Wheel Bike offered with 12 Inch, 14 Inch and 16 Inch SKU labels, relevant when the rider’s measured height and hands-on fit check indicate one of those sizes.
 XJD Light Purple Girls Bike with Basket, Training Wheels, 12/14/16/20 Inch
A Training Wheel Bike with supplied available SKU labels of 12 Inch, 14 Inch and 16 Inch. Its title mentions 20 Inch, but the supplied facts do not list that size as available.
Girls 12/14/16 Inch Kids Bike by XJD with Training Wheels – Peach is listed in the Training Wheel Bikes category with 12 Inch, 14 Inch and 16 Inch SKU labels. Compare only the size supported by your child’s measured height, then verify stand-over, reach and control.
XJD Light Purple Girls Bike with Basket, Training Wheels, 12/14/16/20 Inch is also categorized as a Training Wheel Bike. Although its exact catalog title includes “20 Inch,” the supplied available SKU labels are only 12 Inch, 14 Inch and 16 Inch. Do not assume that a 20 Inch option is available from this information.
Neither supplied product is an appropriate substitute when the fit check points to 18, 20, 24 or 26 Inch wheels. In that case, treat these products only as smaller-size comparison points and look for the exact required wheel size elsewhere in the storefront.
Make the final size decision
- Measure height and inseam in normal riding shoes.
- Use measured height to identify the likely wheel size or two overlapping sizes.
- Have the child straddle and ride the exact bike in a controlled setting.
- Confirm comfortable stand-over clearance, natural reach, steering control and access to every fitted brake control.
- Choose the bicycle the child can control confidently now.
Before riding, provide a properly fitting bicycle helmet that sits level and has straps adjusted according to its manufacturer’s instructions. For assembly, maintenance, compatibility, load limits or torque, follow the exact product manual or use a qualified bicycle mechanic.
Your next step is simple: take the two measurements, shortlist the matching wheel size, and approve a bicycle only after your child demonstrates a comfortable fit and dependable control.
Bikes for your next adventure
-
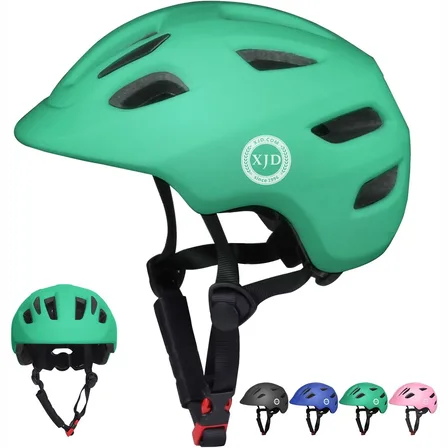
Green XJD Toddler Bike Helmet with Adjustable Fit, XS (46–51 cm)
The XJD toddler bike helmet in Green is built for the youngest riders — the size…$20.39
$23.99 -

Kids Bike Helmet by XJD for Boys & Girls – Black, Blue, Green, Pink, Purple
The XJD Kids Bike Helmet covers a wide 2-to-8-year age range thanks to two head-…$59.99
-

Kids Bike Helmet by XJD for Girls – Pink
The XJD Kids Bike Helmet in Pink is a lightweight multi-sport helmet for girls r…$59.99
$99